11 August 2016

Your Picnic Pal
Your Picnic Pal
Picnics are a favourite pastime and some picnic spots have tables on which you can place your bottles and glasses without fear of them falling over and spilling their contents. Sometimes, however, you pick a spot and the grass is soft and the view spectacular, but there’s no level surface available to safely handle your liquid refreshments. That’s where this case comes in handy!
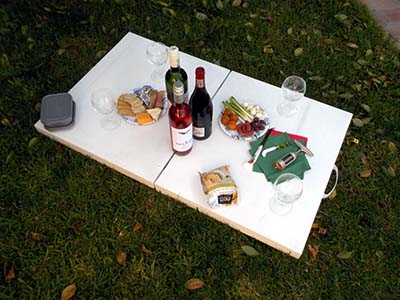
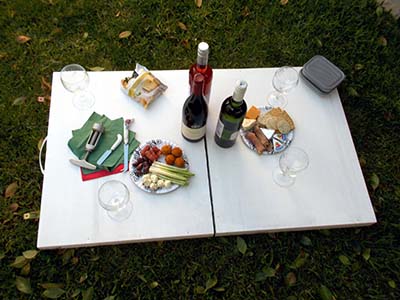
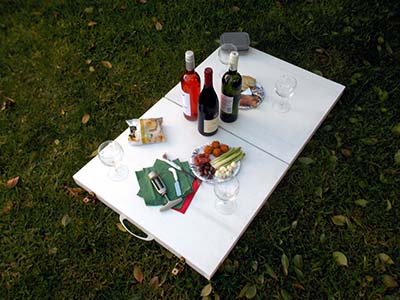
It’s partitioned off so that you can safely transport bottles of wine, glasses and the cheese, cutlery and serviettes you need for a successful picnic. And then it can be used as a table, either closed when there are only two of you, or opened out flat for larger parties.
The dimensions and materials are given here for this case, which measures 600x500mm, but you can adapt the case to whatever size you require, in which case, adapt the materials accordingly.
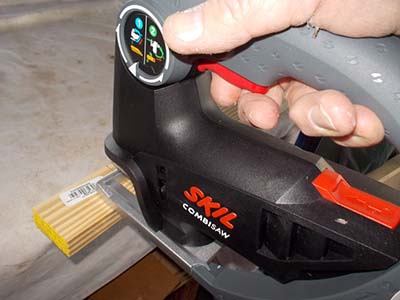
Tools required:
- Jigsaw
- Sander
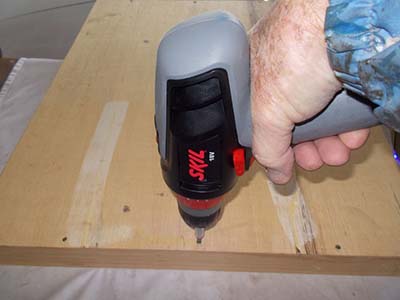
- Drill
Materials:
- One-quarter sheet of 3mm ply – 1220x610mm
- SA Pine: 22x44mm – two lengths of 1.8m
- Cover strip – 9x44mm – two lengths of 1.8m
- One pair 32mm hinges
- Two catches
- One handle
- Two 4x20mm fender washers
- Two 5x30mm fenders washers
- Wood glue
- 80 20mm wood screws
- Finish of your choice
Method:
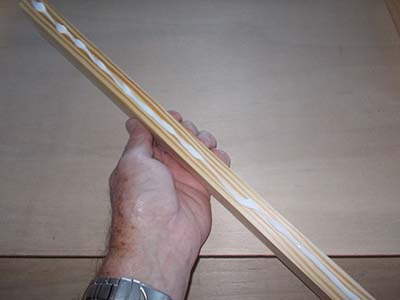
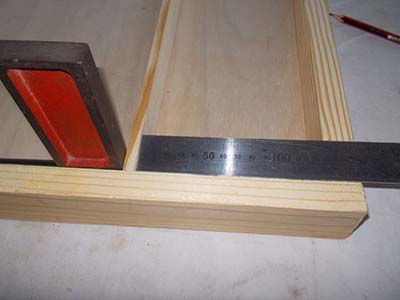
- Cut the ply in half and trim it down to 600mm. Mark off and cut the lengths of 22x44mm SA Pine.
- Coat the edges of the SA Pine lengths with glue.
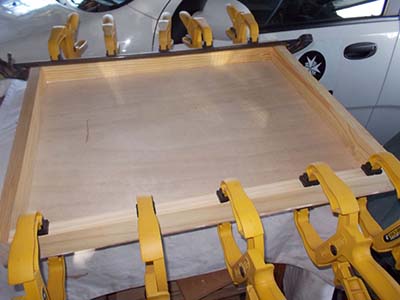
- Attach the lengths around each sheet so that you create two shallow trays, and clamp the lengths in place while the glue cures.
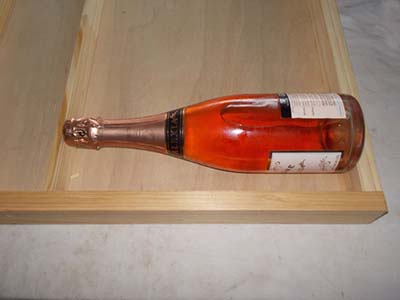
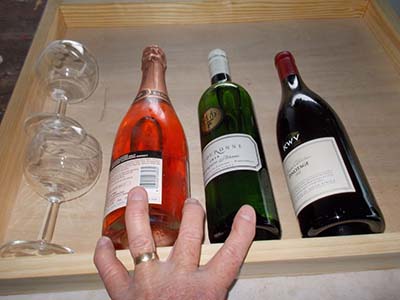
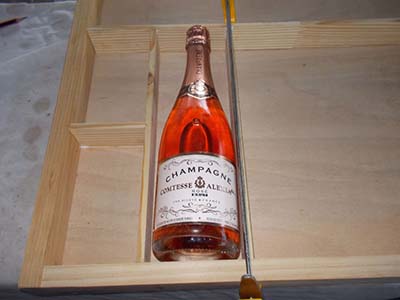
- Once the trays are complete, select one to be the base and cut a length of 9x44mm SA Pine cover strip to fit across the case. Then position it using the largest bottle of wine or sparkling wine you have. Allow a few millimeters of clearance.
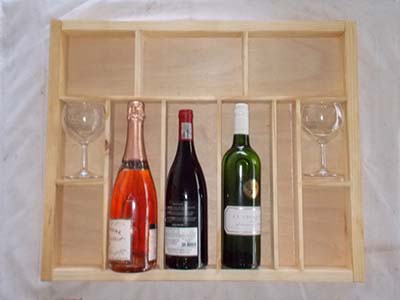
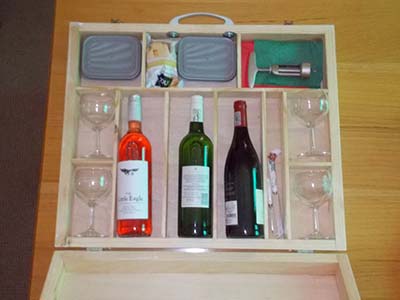
- Confirm that the amount of bottles you want to carry will fit – In this case, we’re allowing for three bottles of wine/sparkling wine.
- Ensuring that the cover strip separator is properly positioned, apply glue and glue it into position.
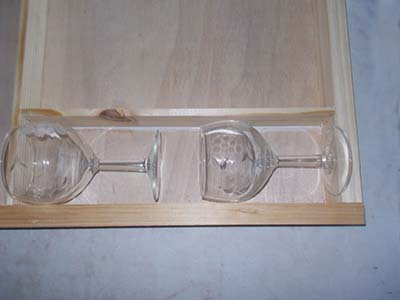
- Once the first horizontal separator is fixed in position, add the first vertical one for your glasses. We are using standard wine glasses, but if you have special ones that you prefer, use them to set the spacer at the right place.
- Things are starting to take shape now! Add a second horizontal spacer so that two glasses could be stacked on the left, and another separator to create a compartment for the first wine bottle.
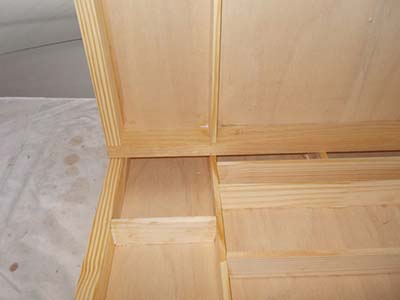
- From there on, it is simply a matter of following the same procedure, checking and rechecking every time to ensure that you position each separator correctly. Here we show you the three bottles in their compartments, the compartments for four glasses and a narrow compartment for cutlery added between the right-hand bottle compartment and the right-hand glasses compartment. Above the main horizontal separator, we added two more verticals to create three compartments at the top of the case. These are for cheese, dips, serviettes and other extras.
- To ensure the latter will not fall into the lower bottles and glasses compartments, align the case base with the lid and add a single horizontal separator as shown.
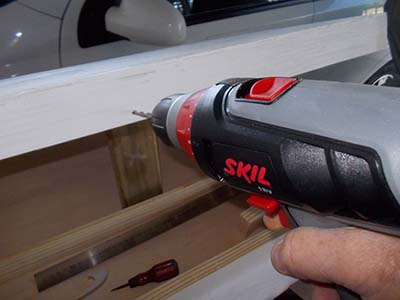
- To reinforce the case, drive in screws around the perimeter.
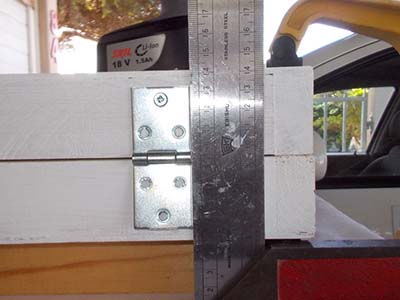
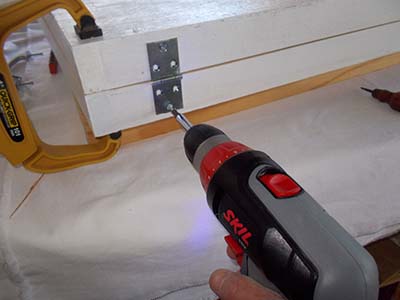
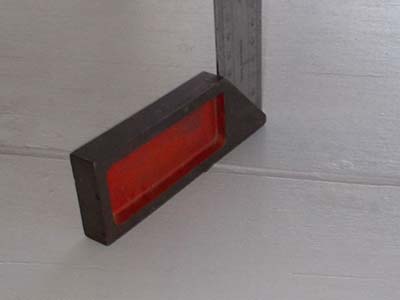
- Now for the hinges – It is important that they are centred exactly on the junction between the base and the lid, so that the upper surfaces are level when the case is opened out and that they are at a right angle. Position them 75mm in from the edge.
- Drive in two screws per hinge to lock them in position.
- Carefully open the case out fully to ensure that the upper surfaces meet at exactly the same level before completing the hinge attachment.
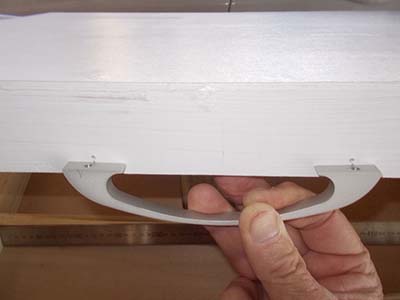
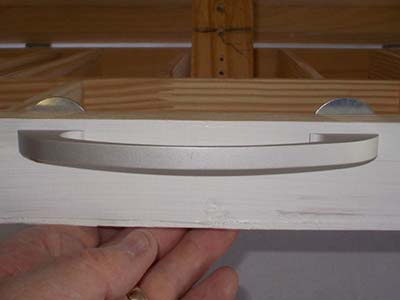
- Centre the handle and mark off the attachment screw positions.
- Position the handle as close to the edge of the case side as you can, so that the case will hang as closely to directly downwards as possible when carried.
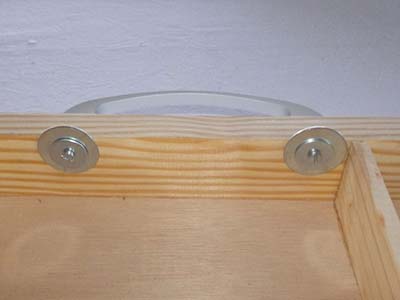
- Now for the crafty bit… to ensure that both the case base and lid share the burden, I added a fender washer to each side, as shown here.
- A view from the base interior. As the fender washers protrude a centimetre or so, they ensure that the lid takes some of the weight.
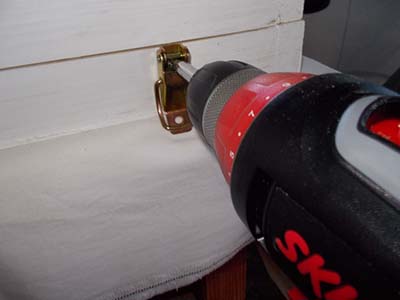
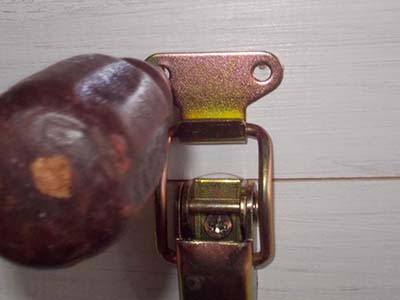
- Attach catches to each side as shown here.
- When attaching the hook of the catch, pull it tight against the wire loop on the toggle section and use an awl to position the attachment screws at the top of the screw holes in the hook, as shown here. This means that, when the hook is attached, the countersunk screw heads shift it just a millimetre or two higher. This results in some tension on the catch, which will help it stay closed.
- The case loaded and ready to go.
- And here’s the finished product. Enjoy!
Project guide
- Skill level: 2
- Estimated time: a weekend
- Cost: R200-R250
- Assistant: No