17 September 2020
A riveting tale… how to use pop rivets
Rivets of many different types and materials have been used – and continue to be used – in a vast range of applications.
For instance, they have been used in ships, steel bridges, buildings, armoured fighting vehicles, machinery and more. Welding has now largely taken over in ship, bridge building, buildings and other fields. Rivets are still widely used in aircraft and in household appliances – particularly in items such as refrigerators, stoves and ovens, microwaves and so on.
So, here we are going to cover pop rivets (named for the sound they make when their mandrel snaps). These rivets are also called blind rivets – this name being derived from the fact that they can be used when the operator cannot see the far side of whatever materials he or she is joining. For the purposes of this feature we’re going to use the term ‘pop’.
As you know, screws, bolts or nails are used in a very wide range of applications, but often riveting is the best option.
Parts of a pop rivet
A pop rivet comprises of the rivet itself (most usually aluminium) through which passes a tightly fitting steel mandrel – rather like a nail. The mandrel has a head slightly larger than the mandrel’s diameter and the channel in which the mandrel is very snugly seated in the rivet body; there is also a slightly narrower section of the mandrel just below the head so that it will break at that point. As the mandrel is pulled through the rivet, its head increases the diameter of the rivet shaft, bulging it outwards. This locks the rivet body very firmly against the surface of the material. As the riveter is operated, the mandrel is placed under a great deal of strain and finally the head snaps off and the join is secure. The mandrel is pulled out the rivet and dropped out of the rivet gun, ready for the next rivet to be inserted. (If the mandrel shaft does not fall out of its own accord, opening the riveter will push the end of the mandrel out of the socket, and a light tap with a hammer will free it.)
Pop rivets produce strong fastenings, they are resistant to vibration and tampering and when installed, neither the rivets nor the riveting tool mar the surfaces of the materials being joined. However, it is important that the hole drilled for any rivet is the correct diameter – that is, just large enough to accommodate the rivet. If it is too large, the rivet might simply pull right through the hole.
Types of blind rivets
There are several common types of blind rivets each with its own features that suit it best to a particular task or range of tasks.
- Standard rivets are the most common and used for such applications as securing security gate locks in their housing in the gate, but they are not watertight and not as strong as some other types of blind rivets.
- Sealed blind rivets have a closed end and when used provide a waterproof attachment; they are used in applications such as bakkie canopies – to attach hinges and other attachments to the fibreglass or aluminium canopy, and marine or boating applications, where it is important that assemblies be watertight.
- Peeled blind rivets have a rivet shaft that splits into four segments, rather like a peeled banana. These four segments curl back on themselves, spreading the load over a wider area on the far side of the join.
- Less widely used by Mica customers are probably multigrip blind rivets. These are specifically designed for applications where the required length of the rivet is unknown. When used, the multigrip blind rivet compacts down on the far side of the join, leaving less of the shaft sticking out. They are a good choice if clearance is an issue because there are moving parts near the far side of the join.
Types of rivet heads
Blind rivets come in several head styles, but the three most common are the standard head, otherwise referred to as dome head, the countersunk head (usually abbreviated to the letters CSK), and the large flange head.
- The dome head is considered standard, and is the most common head style and suitable for a very wide range of applications.
- The countersunk or CSK head is designed to give a flush fit when used in a bevelled hole such as those often found on some hinges and lock fixing plates. CSK rivets are a good choice where clearance might be small – for instance when used to secure a security gate lock to a security gate. At the best of times there should be very little clearance between the gate and its frame (to make forcing the gate open that much harder), and this clearance will usually decrease quite a bit in hot weather as the gate expands (as you know, metals such as steel contract in cold weather and expand in hot weather).
- The large flange head is often used with softer materials to increase the load-bearing area – for example when attaching a material such as canvas to a frame.
Sizing blind rivets
When sizing blind rivets, remember that the larger the rivet’s size the stronger the fastened joint is in both shear (force acting at 90° across the join) and tensile (pulling force acting on the rivet along its length – i.e. a force acting to pull the materials apart).
Rivet sizes are provided as two figures, the first being the diameter of the rivet shaft, the second being its length from the bottom of the flange to the end of the rivet shaft. So, for example, a 3.2x6mm rivet has a diameter of 3.2mm and a shaft length of 6mm. This excludes the head. A 3.2x12mm rivet has the same diameter shaft, but it is twice as long. A 4.8 x12mm rivet is as long as the 3.2×12, but its shaft diameter is 4.8mm – 1.6mm larger than the 3.2mm rivet’s shaft. The exception to the length measurement is the CSK rivet. In its case, length is measured from the topside of the flange as the rivet will sit flush with the surface of material being riveted and is therefore the total length of the rivet – shaft plus head.
Rivet strength
- Aluminium rivets with aluminium mandrels are the least strong
- Aluminium rivets with steel mandrels are stronger than the above
- Steel rivets with steel mandrels are stronger still than both the above
- Stainless steel rivets with either steel or stainless steel mandrels are the strongest.
Using blind rivets
- Size of the hole:Ensure that the hole size is correct for the rivet size and that when the hole is drilled, the drill is held steady. Any wobbling will result in a hole larger than ideal, and possible failure of the join.
- Blind revets are not like screws or bolts that pull the materials tightly together as they are tightened. Therefore, do not use a blind rivet to pull the two materials together. It is important that the materials being joined are first clamped tightly together with clamps, a vice or vice grips to hold the surfaces together tightly. Only then is the rivet inserted and secured in position with the riveter.
- Seating the rivet: The rivet head must be hard up against the upper surface and also not angled (one side of the flange being higher than the other). The entire lower surface of the flange must meet the material’s surface.
Grip range
If a rivet is too short for the materials being joined, it will not work; the join will be loose and will probably come apart, so it is important that the right length of rivet be selected to accommodate the materials being joined, plus any washer/s being used to spread the load-bearing surface.
This is called the grip range and is less than the length of the rivet – because there has to be enough of the rivet shaft to bulge out and secure the join when the mandrel is pulled through it.
Hence there is a minimum and a maximum grip range. Here are some examples:
| Size – diameter x length in mm | Grip range minimum/maximum in mm |
| 3.2×6 | 1.0 / 3.0 |
| 3.2×8 | 3.0 / 5.0 |
| 3.2×10 | 5.0 / 7.0 |
| 3.2×12 | 7.0 / 9.0 |
| 4.0×6 | 1.0 / 1.5 |
| 4.0×8 | 2.5 / 4.5 |
| 4.0×10 | 4.5 / 6.5 |
| 4.0×12 | 6.5 / 8.5 |
| 4.0×14 | 8.5 / 10.5 |
| 4.0×16 | 9.5 / 12 |
| 4.8×8 | 1.5 / 4 |
| 4.8×10 | 4.0 / 6.0 |
| 4.8×12 | 6.0 / 8.0 |
| 4.8×14 | 8.0 / 9.5 |
| 4.8×16 | 9.5 / 11 |
| 4.8×18 | 11 / 13 |
| 4.8×20 | 11 / 15 |
| 6.4×18 | 7.6 / 12.7 |
Blind rivet sizes (all dimensions in millimetres)
| Aluminium Open | Aluminium CSK | Aluminium Sealed | Large Flange | Aluminium Peeled | Stainless steel Open |
| 3.2x 6 | 4.0×10 | 4.0×12 | 4.0×10 | 4.0×12 | 4.0×15 |
| 3.2x 8 | 4.0×12 | 4.0×15 | 4.0×12 | 4.0×15 | 4.8×10 |
| 3.2×10 | 4.0×15 | 4.8×12 | 4.0×15 | 4.8×12 | 4.8×18 |
| 3.2×12 | 4.8×12 | 4.8×15 | 4.8×10 | 4.8×15 | |
| 3.2×15 | 4.8×18 | 4.8×18 | 4.8×12 | 4.8×18 | |
| 3.2×18 | 4.8×21 | 4.8×15 | |||
| 3.2×21 | 4.8×18 | ||||
| 4.0×6 | 4.8×21 | ||||
| 4.0×8 | 4.8×8 | ||||
| 4.0×10 | |||||
| 4.0×12 | |||||
| 4.0×15 | |||||
| 4.0×18 | |||||
| 4.0×21 | |||||
| 4.8×6 | |||||
| 4.8×8 | |||||
| 4.8×10 | |||||
| 4.8×12 | |||||
| 4.8×15 | |||||
| 4.8×18 | |||||
| 4.8×21 |
The rivet gun or hand riveter
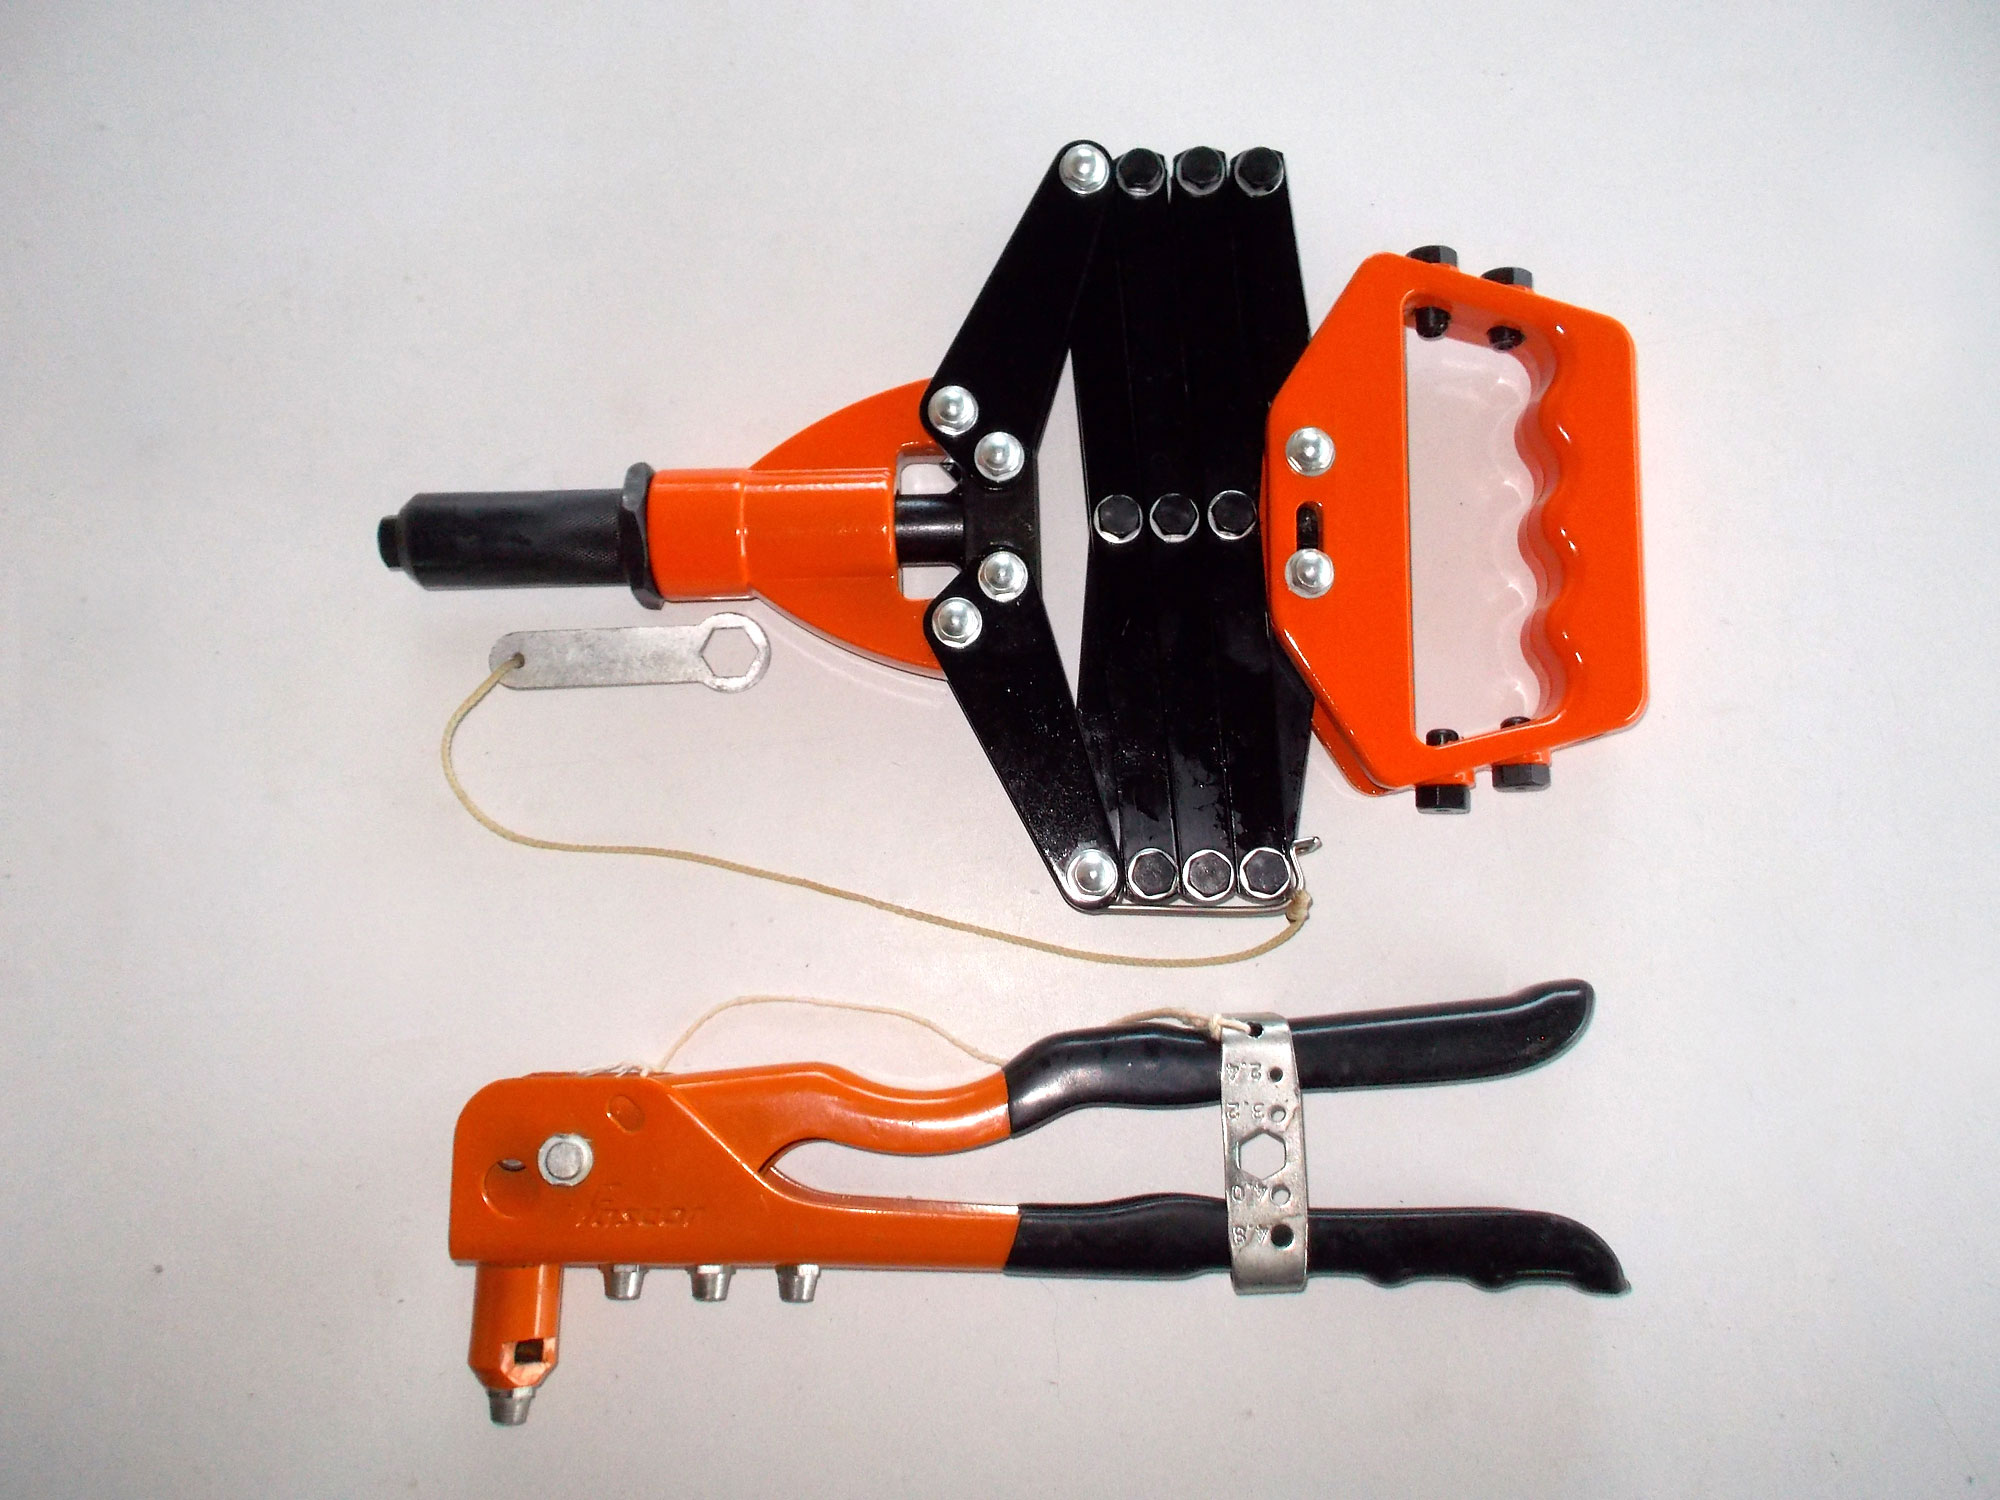
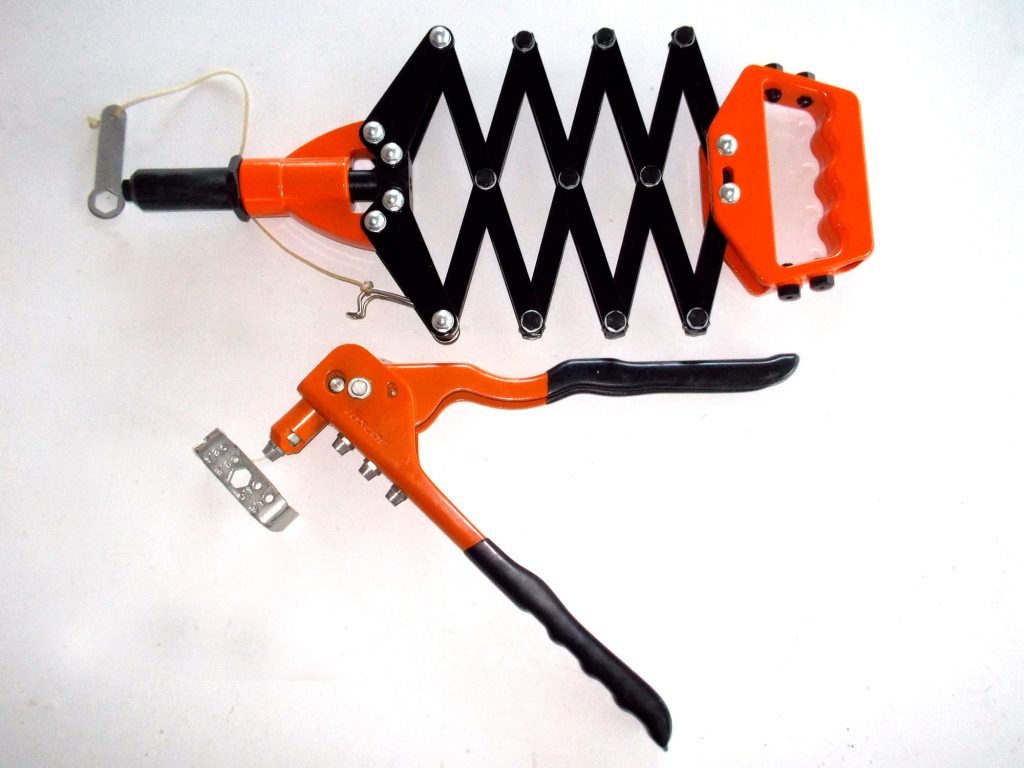
Essentially there are two types of hand riveters you might consider:
- The concertina version of rivet gun operates simply by extending it, inserting a rivet into the nozzle, and then pushing the tool handle to close the concertina. This action pulls the mandrel into the rivet, snaps the head and the join is complete. A couple of advantages this version has over the pliers type is that the action of closing the concertina while operating the tool automatically pushes the rivet head on to the surface. It also allows the operator to use their full weight to close the tool, so it can be used with larger rivets than the pliers type.
- The squeeze type, with the same action as a pair of pliers. It is very effective, but seating larger rivets with thicker mandrels can be a challenge as strong hands are needed to close the rivet gun’s handles, which in any event are also spring loaded. However, it is more compact than the concertina type, so it is handier and a better choice when the operating space is restricted.
Captions:
- The two versions of riveters you are most likely to require – the concertina version (top) and the pliers type – in their storage condition. They are not expensive and it could be an idea to have both types. Note that each one is supplied with a spanner that is used to change the nozzles (the pliers type spanner is also used to keep the handles closed for storage). In both cases we have attached the spanner to the tool with a length of nylon cord so that they are not misplaced.

- The same two tools with the concertina type partially open and the pliers type fully open. Note that both have different mandrels for different rivets sizes stored in the handle. Also note that the pliers type spanner has rivet mandrel sizing holes to speed rivet size selection.
- The parts of a rivet gun; in this case the concertina type is a different one, with just two alternative nozzles. This example also does not have an adjustable nose…

- … Whereas this one does. The nose length can be adjusted to suit different mandrel lengths. Here it is fully screwed in.

- Here it is at its maximum extension.

- Another view of the pliers type with the four rivet sizes it can handle. The four nozzles accept mandrels for 2.4mm, 3.2mm, 4.0mm and 4.8mm diameter rivets.

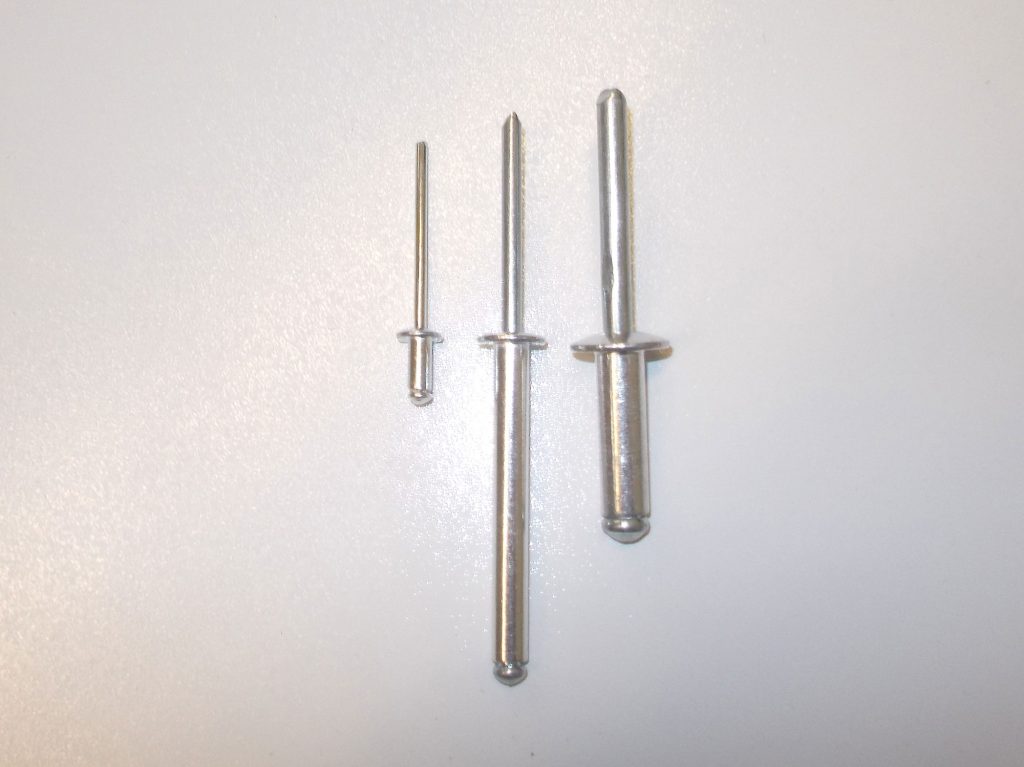
- Three rivet sizes for comparison. From the left we have a 3.2x6mm, a 4.8x40mm and a 6.4x20mm.
- This shows five rivets, all 3.2mm in diameter, but 6mm, 8mm, 12mm, 17mm and 18mm long, for different applications.

- As mentioned above, large flange rivets are available and a sensible choice when attaching softer materials such as fabric to a frame. Here one is compared with a standard or dome head on the left – but both these rivets have the same body diameter.
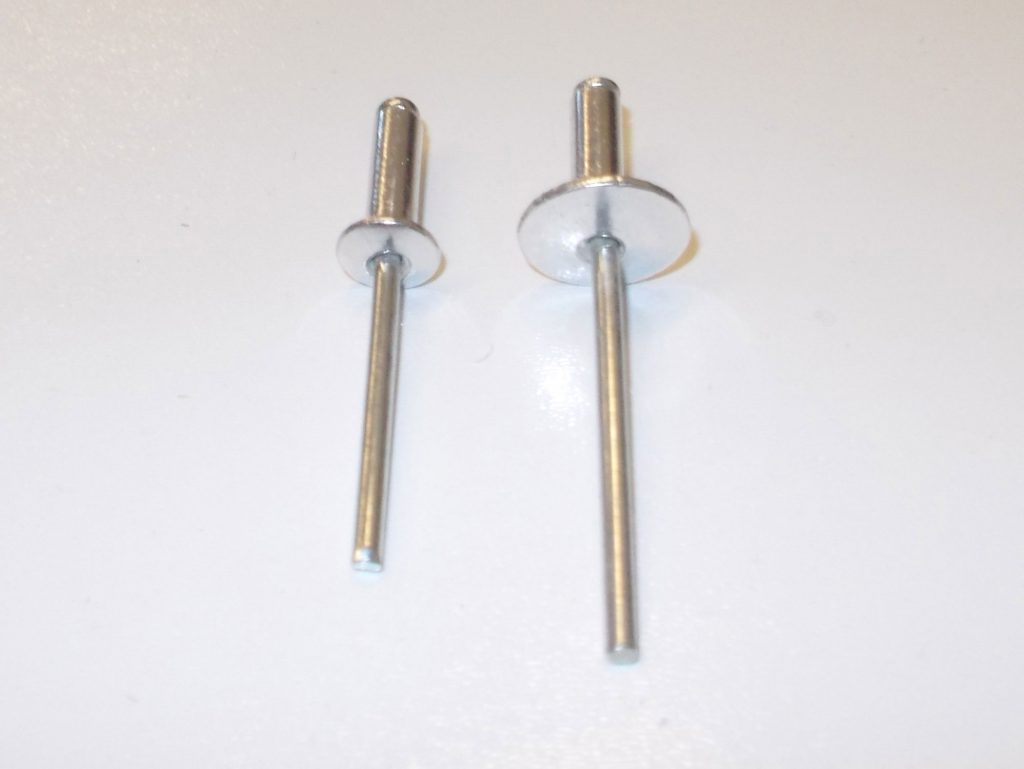
- Another image showing the same two rivets and how the larger surface area of the large flange version provides a larger bearing surface.

- An illustration of how a CSK rivet will seat itself in a bevelled hole.

- A CSK rivet in action… its top is flush with the tope of the metal; note that the dome head rivet on the right stands proud of the material’s surface.

- Here are two examples of sealed head rivets – used when a watertight seal is required.

- The difference between an open, standard rivet and a sealed version on the reverse surface.

- When an even larger bearing surface is required, there is a wide range of washers available to suit the various rivet sizes, but note that washers are not suitable for use with CSK rivets and will also increase the effective height of the top of the rivet head in relation to the surrounding surface… naturally by the thickness of the washer itself.

- This clearly shows the difference between the way the rivets react when the mandrel is pulled through. On the left is a standard rivet and a large flange version and you can see how the mandrel has caused the rivet shaft to bulge, making good the join. On the right is a peeled rivet and you can see how the shaft has peeled back in four segments, expanding the holding area on the surface.

- Mica stores stock stub drill bits. They are double-ended, so you get double the use, and they are suitable for wood, metal and other materials but not ceramic tiles or masonry. The sizes shown here are 3.2mm, 4mm, 4.8mm and 5mmØ.

- The sizing information is etched into the drill shaft at its midpoint and provides a good guide when seating the bit in a drill’s chuck.
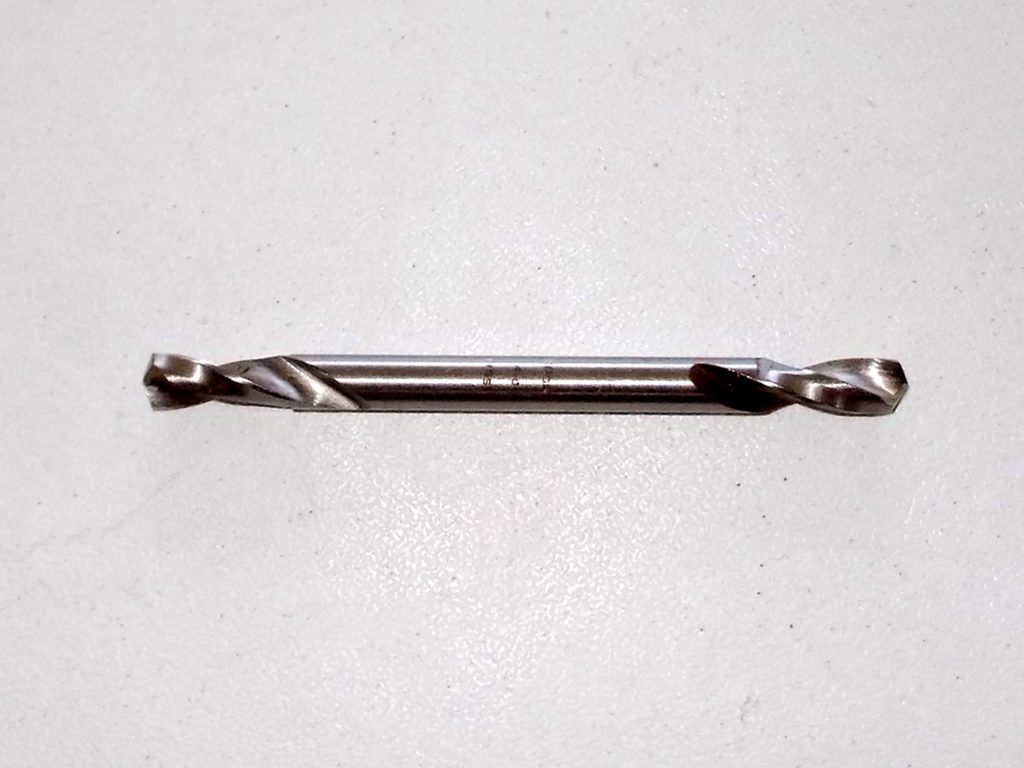
- The drill’s chuck must grip the smooth part of the bit and not the actual cutting edges. If this happens not only will the drill bit not rotate true, but you could also damage the cutting edges themselves. Hint: When seating a drill bit in the drill’s chuck, first tighten the chuck by hand so that if the bit is off-centre you can ease off a bit, realign it and then complete the tightening by hand before using the key or hand action (depending on the chuck’s tightening mechanism) to full secure the bit. Tightening it with the bit off-centre can damage the chuck jaws.

- Some applications… using pop rivets to secure a new lock body in a security gate.

- You can use rivets to secure Perspex or plastic to harder materials – such as aluminium as in this case – but when doing so always use a washer on the Perspex or plastic side so that expanding rivet body does not split the latter material as the mandrel is pull through the rivet body.

- You can even use rivets to attach items such as a hinge to very thin material such as plywood when the plywood is too thin to accept screws and a nut-and-bolt attachment is not desirable. Here a CSK rivet has been used.

- The reverse of the same attachment – neat and very effective.

- Here rivets have been used in conjunction with large 25mmØ fender washers to secure a shopping bag’s handles. The use of the fender washers ensures the largest possible bearing area on the fabric. Use a smooth-sided awl or nail to make the holes in the fabric for the rivet (the idea is to shift the fabrics’ warp and weft threads aside rather than cutting through them), slip a washer on the rivet and then the rivet shaft through the fabric, and on the far side slip another washer on to the rivet and clamp the two securely together. Then use the rivet gun to seat the rivet.
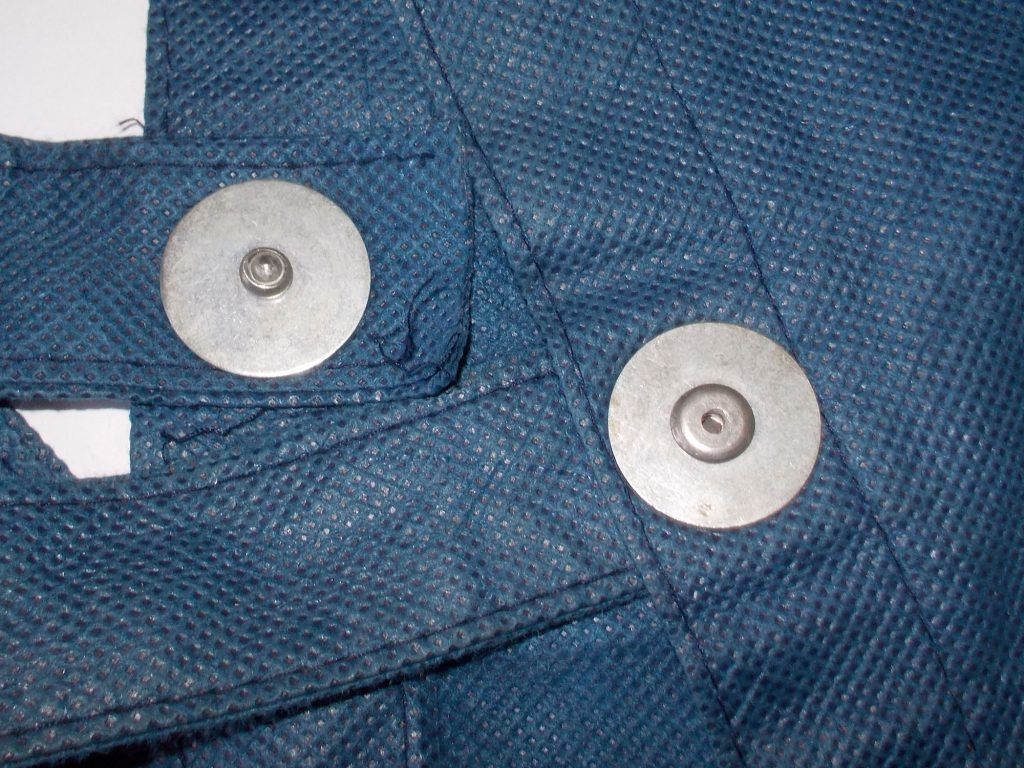
- The same method was used with nylon strap to make up a strap to secure luggage. Two chain links (your local Mica store can cut a very short length of three or four links to release the two you require) are loosely secured in a loop at the end of the strap, and again a rivet and two washers are used to secure the loop (a smooth awl or nail is used in this case as well to shirt the trap’s threads aside and not cut them – which would weaken the strap). The strap is passed around the case and the end passed through both chain links, then back over the rear and under the front one – the one closest to the loose end of the strap. This results in a self-locking end, which is then secured with a padlock, the shackle of which is pushed through both lengths of the strap to secure the strap and make it theft-proof – unless of course the strap is cut… and there’s no antidote for that!

- This shows how the strap is secured… obviously it is shown here before being pulled tight.

Panel:
These materials are available at Selected Mica Stores. To find out which is your closest Mica and whether or not they stock the items required, please go to www.mica.co.za, find your store and call them. If your local Mica does not stock exactly what you need they will be able to order it for you or suggest an alternative product or a reputable source.