07 August 2017

DIY Bathroom Shelf and Towel Rack
A simple towel rail and shelf for your bathroom
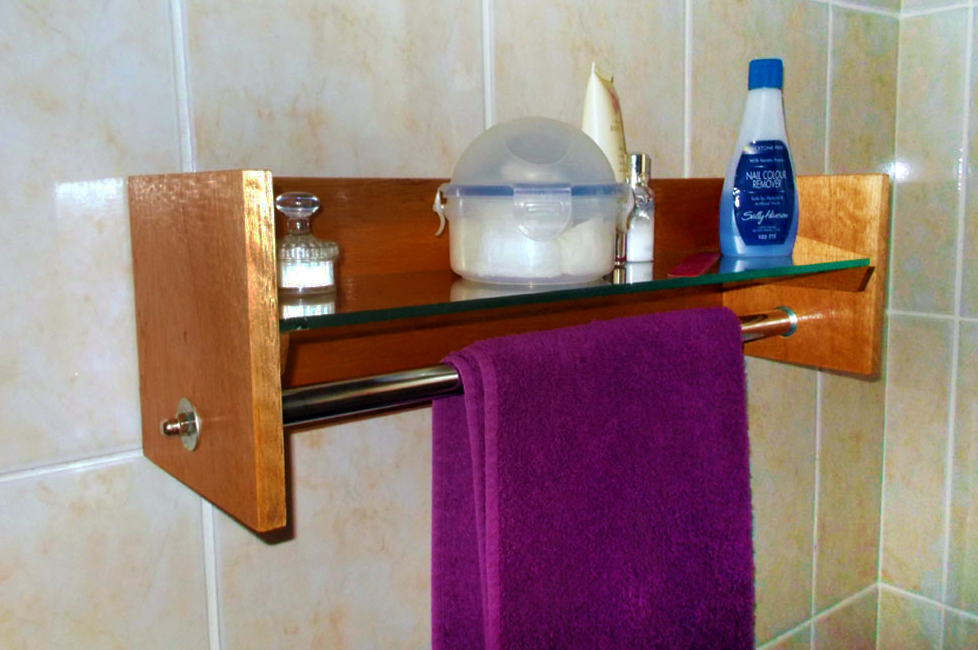
We often run out of storage space in the bathroom. This towel rack-shelf can help solve that problem!
Materials:
- Meranti – one length of about a metre of 12x144mm to make up the back (456mm), and two ends (140+140=280mm)
- Length of batten – 6x19mm – shelf supports, each 130mm long
- Two or three 900x6mm dowels (for the towel rail centring inserts)
- Ten 32mm panel pins; six 15mm panel pins; 500mm of 6mm threaded rod, two dome nuts, four 6x25mm fender washers
- Length of 17mmØ chromed towel rack
- Wood glue
- Meranti wood filler
- Glass Shelf – 6mm thick – in this case 6x127x457mm
- Finish of your choice – I selected a gloss varnish
*Note: Everything hinges on the dimensions of the glass shelf, so you may need to adapt the dimensions and amount of materials accordingly
Tools:
- Jigsaw (or circular cut-off saw or mitre saw)
- Sander
- Drill/driver
Method:
- First, measure the shelf length.
- Allow about 2mm extra on the back so that you can remove the shelf for cleaning.
- Cut the shelf as accurately as you can. Ideally use a mitre or radial arm saw.
- Cut the ends and the two shelf supports from the 6x19mm and secure it to the inner surfaces of the sides. In this case, the underside of the shelf is 78mm from the bottom of the unit, and 40mm from the towel rail – note that I predrilled the holes for the towel rail – 30mm up from the bottom of the sides and centred. Use glue and 15mm panel pins – three per support to attach the supports. Countersink the pins’ heads and fill them with meranti filler. Sand down later on.
- Trim 12mm off the end of each support.
- Glue the ends into position on the back.
- Use three 32mm to each end to attach them to the back, and add two more panel pins to each end to secure them firmly.
- Countersink the panel pin heads a millimetre or two and fill the holes with filler.
- While the filler dries, cut the towel rail to length. It needs to be 2mm less than the distance between the ends – to prevent the end of the rail being forced into the ends.
- Centre the threaded rod on the rail (otherwise it will eventually rest directly on the rod, totally off-centre) and cut five lengths of the 6mm dowel to just less than the length of the rail. The rod will be centred automatically by the dowels.
- Use a small screwdriver to centre the inner fender washer and the rail on the predrilled holes in each end.
- A screw will keep everything centred while you push the threaded rod into the rail at the far end.
- Add the washer to the outer end of the threaded rod and tighten the dome nuts to really help hold the whole unit together.
- The Finished Product


Project Guide:
Skill level: 2
Estimated time: a weekend
Cost: R100
Assistant: No
These materials (with the possible exception of the glass) are available at Selected Mica Stores. To find out where your closest Mica is and whether or not they stock the items required, please go to www.mica.co.za, find your store and call them. If your local Mica does not stock exactly what you need they will be able to order it for you or suggest an alternative product or a reputable source.


