07 January 2025

Ban blocked gutters!
The house on which this remedy was done has a thatched roof, which had also just had some rethatching work done to it. But it appears that the contractor, instead of sealing off the downpipes before starting work, simply banged on regardless.
The result was that with the first rains, bits of trimmed thatching and other detritus off the roof was washed into the gutters, and then into the downpipes, where they jammed, accumulated – and blocked one of the pipes, fortunately not more than that, but they could have.
Unblocking the pipe was accomplished with great difficulty using a garden hose at full blast plus a vigorous application of a plumber’s pipe snake, using for unblocking drains and other pipes.
With the downpipes clear and water free flowing, the next step was to check the gutters (all of them) for any more debris, and remove it.
Once they were clean, the final step was to fashion up a grill/sieve system to stop larger pieces of any thatching etc getting into the downpipes and blocking them again.
True, debris could build up ahead of the sieves like dams, but at least it is easier to handle an overflowing gutter by removing the dam and cleaning the grill and then replacing it. At least nothing has gone down the pipe and blocked it in a difficult-to-reach spot.
Materials:
- Fine chicken mesh – the smaller the mesh the better it stops large pieces of debris going down the pipe, but still allows the free flow of smaller bits, and of course, rainwater. The chicken mesh used here was 13x13mm*
*Chicken mesh is available is a range of sizes, but I suggest you use the smallest for greatest effect. Chicken mesh sizes (in mm) are as follows: 13×13; 25×25; 31×31; 50×50 – though this might vary slightly according to the manufacturer.
Before we start, one of the most common items involved in accidents in and around the home is the good old stepladder, or extension ladder for that matter. (I actually got quite emotional the other day when I went into my workshop and saw my stepladder. I never knew my real ladder! So sad.)
Anyway, back to business… So…
Some stepladder safety tips for you…
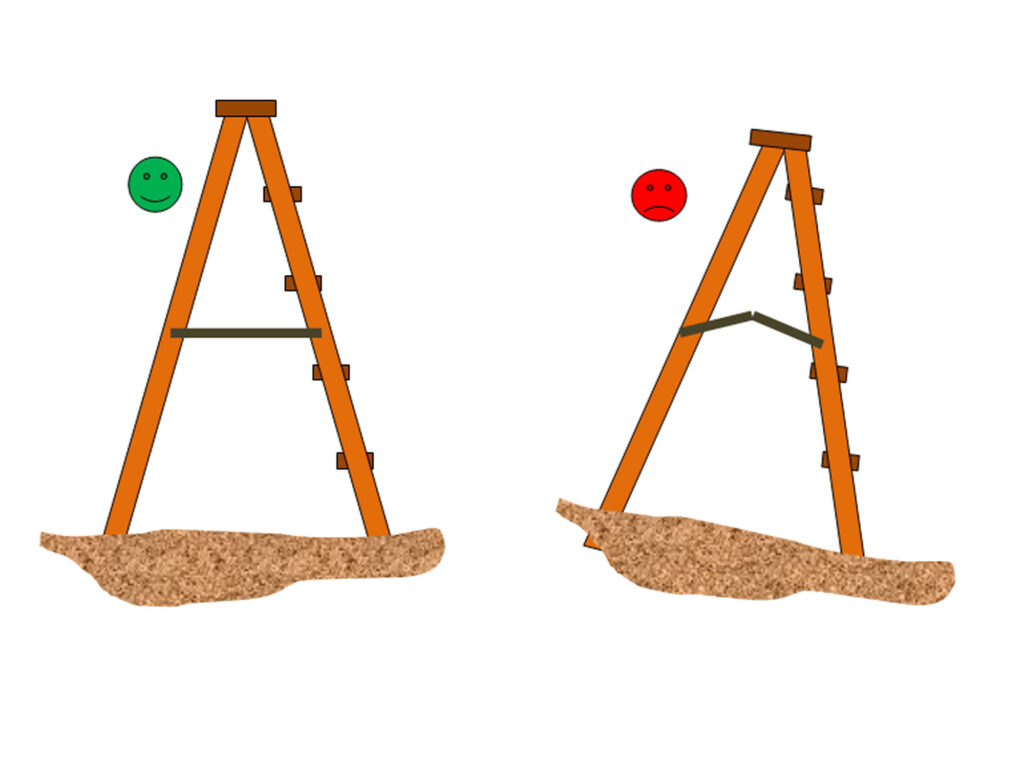
- Ensure your stepladder is upright, on as level a surface as possible and on a firm footing. If it is set up on a slope or uneven surface, use pieces of wood – large enough for the foot of the ladder leg – to not only ensure the ladder’s four feet are all on a level and not wobbly, but also that the ladder itself is as close to vertical as possible when viewed from the step side or prop side. You could also use bricks, but with the widest surface to the ground. Do not use stones as the feet could slip off them.
- Any rocking or unsteadiness is dangerous. So…
- If necessary, tie off the ladder at the top on either side at a very shallow angle, rather in the same manner as you would keep a pole upright, or as those very high radio towers are stayed… with stays between them and the ground some distance away so your securing points are, say, 1.5-2m or so on either side from the ladder’s top. This should prevent any toppling if tied off correctly and securely.
- If it is on soft ground, place it on planks or sheets of wood to prevent it sinking in, and thereby becoming unsteady – and leaving large holes in your lawn. DO NOT use this method if using an extension ladder, the feet will just slide away and you will fall.
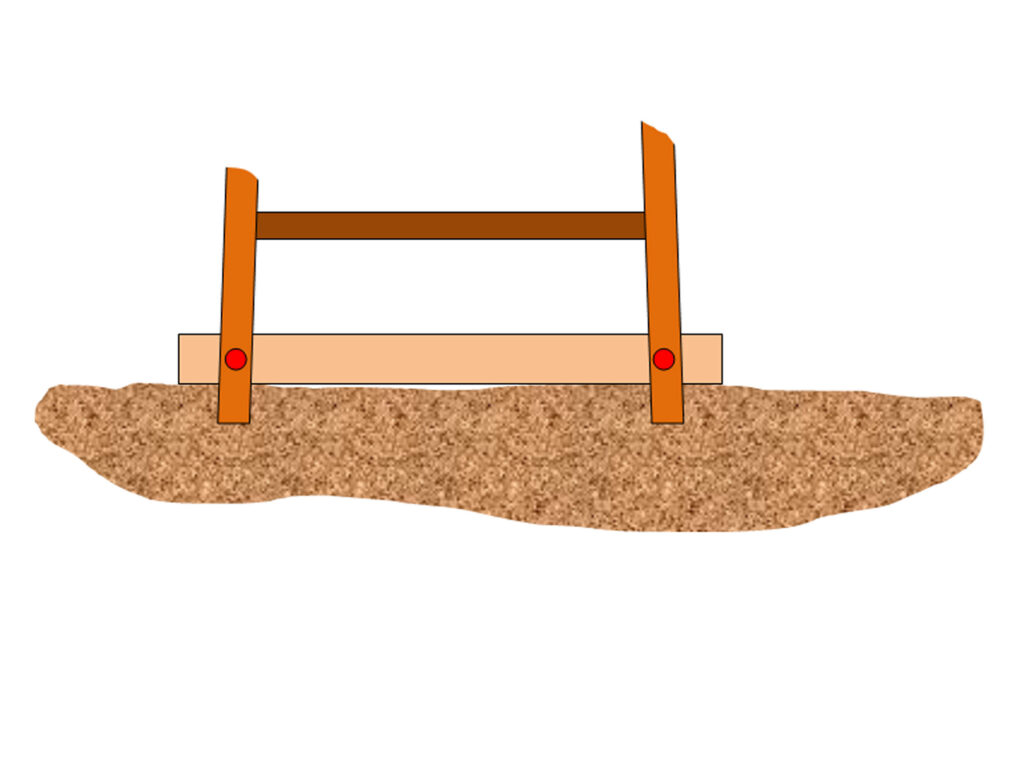
- A simple to trick to make your ladder far steadier and stop its feet sinking into soft ground is to firmly bolt or screw a length of wood – even a 22x44mm length is sufficient, across the feet about 30-40mm up from the bottom of the feet and extending about 40mm on either side. This spreads the load of the ladder and you on it over a far larger area and stops the feet sinking in and causing the ladder to tilt to one side, and in the process making deep holes in your lawn.
- Wear non-slip footwear secured with laces or Velcro straps. Flip-flops could see you flail and fall.
- Ensure the steps are dry and/or free of any liquids that might make them slippery.
- When going up a ladder of whatever type, always have three points of contact at all times… both hands and one foot or both feet and one hand.
- Do not carry tools etc up with you unless they are in an apron or pocket. Never in your hands. If necessary, have someone pass tools, buckets etc up to you, or if up high, have a length of rope with you so you can haul them up.
- Never try to over-reach… if an area you need to get to is not quite within reach, dismount from the ladder and move it to where you can reach the area without any overextension… trying to reach too far can cause the stepladder to topple.
- Never stand on the very top of a stepladder… there is very little to stop you falling off it. Stand no higher than on the top step.
Extension ladder safety
The points mentioned with regard to stepladders apply here – as does the point regarding the scrap piece of wood mounted across the feet. Other safety points include…
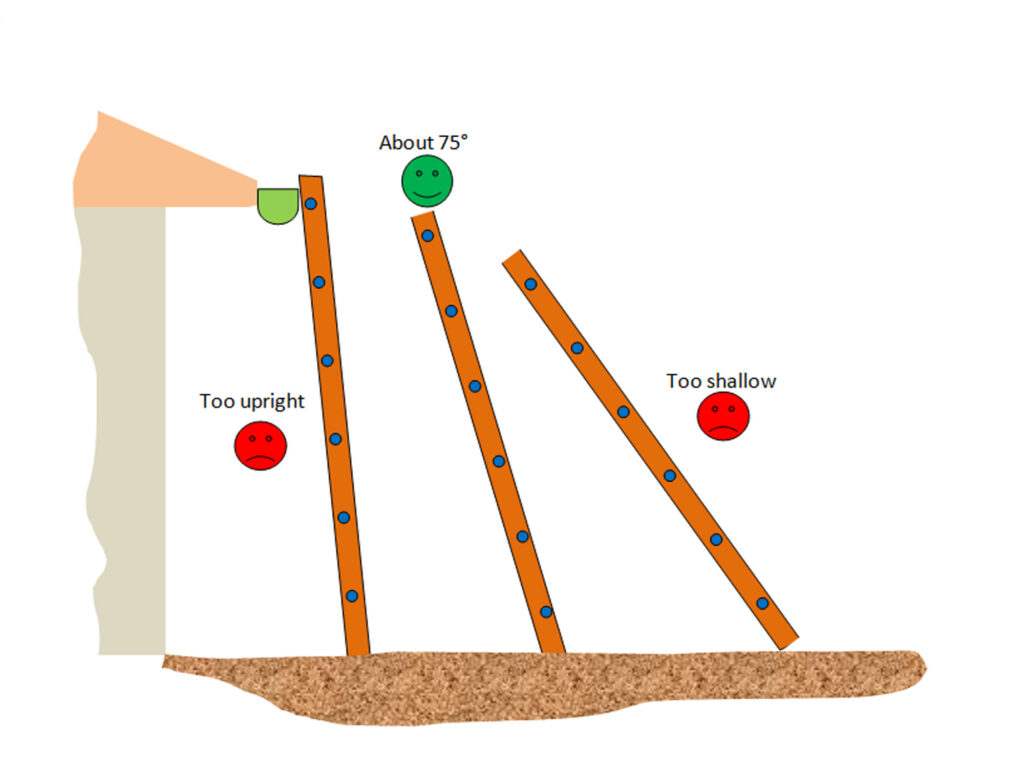
- When using an extension ladder, the angle between the wall and the ladder should always be around 75°… you can achieve this by simply following the four-to-one rule: for every 4m of height you have to climb, move the base 1m away from the wall.
- Place ladders on a firm, level surface and ensure the footing is secure.
- Erect extension ladders so that the upper section is in front of the bottom section.
- Ensure that locking mechanisms are secure before climbing.
- If using one of those multi-ladders that fold into a ‘W’ for storage, or a telescopic extension ladder, ensure that all of the locks are properly locked before mounting it.
- Use care when getting on and or off the ladder at the top or bottom in order to avoid tipping the ladder over sideways or causing the ladder base to slide.
- Brace or tie off the ladder near the base. If there is no structure to tie off to, use a stake in the ground.
- Tie the top of the extension ladder to a firm footing – even tying the end of a long length of rope to it and passing that over the roof to a secure anchor on the far side is better than nothing. This will stop the ladder tipping over backwards and limit or stop any lateral movement.
Some ladder ‘don’ts!’
- Do not use ladders near power lines and it is as well not to use an aluminium extension ladder or stepladder or any ladder for that matter when lightning is likely… as a high point you could find this to be the highlight and final light of your life.
- Do not set up or take an extension ladder down when it is extended. Rather position it, and then extend it, and when finished with it, collapse it and only then move it. Ask for help when necessary.
- Do not overextend it. Always maintain maximum overlap of sections that you can.
- Do not climb higher than the fourth rung from the top of a ladder.
- Do not use ladders on ice, snow (there are parts of the country that get snow and ice during winter) or other slippery surfaces without securing the ladder’s feet.
- Never toss a rope over the roof to and secure the top of the extension latter to anything movable, such as a car tow hitch, for example. Tie it ONLY on to something that is stationary, such as tree. After all, you don’t want your life partner to decide to go shopping while you are up the latter tied to the car, right?
Method:
- Couple of very simple stepladder rules – always place it on level ground and always ensure that the scissors brace – that keeps its legs spread – is fully down and locking it open.
- A very simple extension ladder rule… too vertical and you risk toppling over backwards; too shallow an angle and you risk the feet sliding out and away and the latter falling flat – along with you. The idea is to set it at an angle of about 75º from the vertical – but ensure you still tie off the top and bottom rungs to ensure it is secured in place.
- A length of wood fixed across the bottom of the feet – in the case of a stepladder, both pairs, will stop them sinking into soft ground and possibly cause a loss in stability. Nowadays many manufactures incorporate this feature on their extension ladders.
- The best option is of course to stay off the ladder as much as possible, so a good idea is to use a hand mirror or similar on a pole to check the gutters from the ground and see where there are any build-ups and then work on them individually.
- A strip of that plastic mesh used on trellises for climbing plants is a good barrier to most large pieces of debris off the roof.

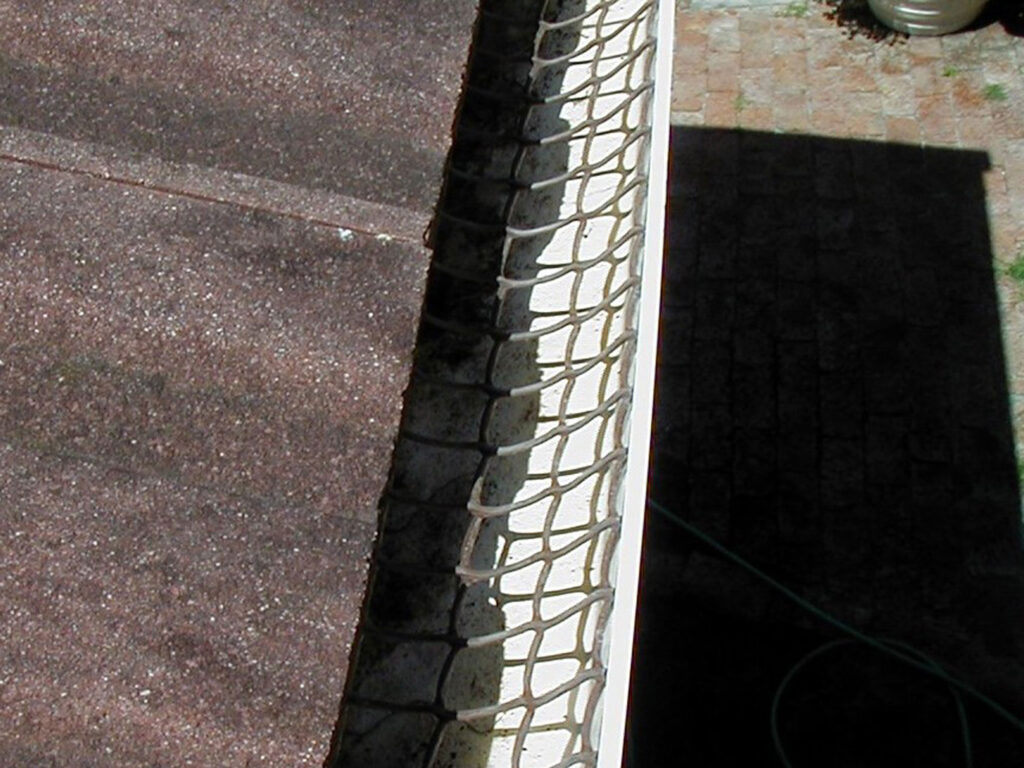
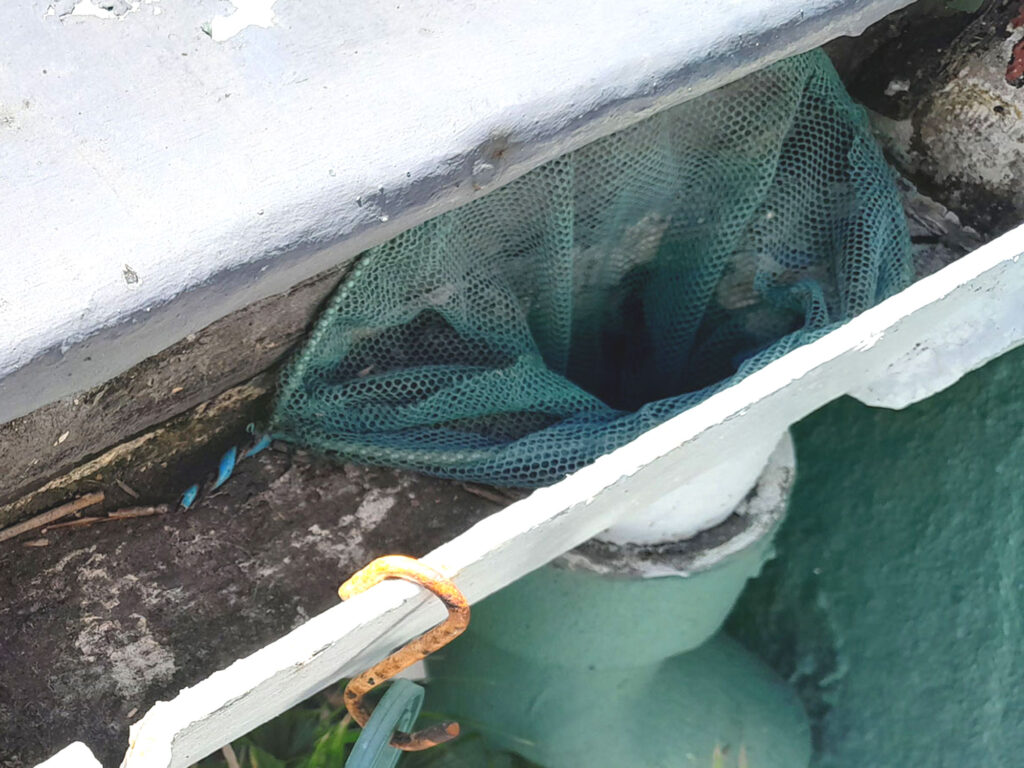
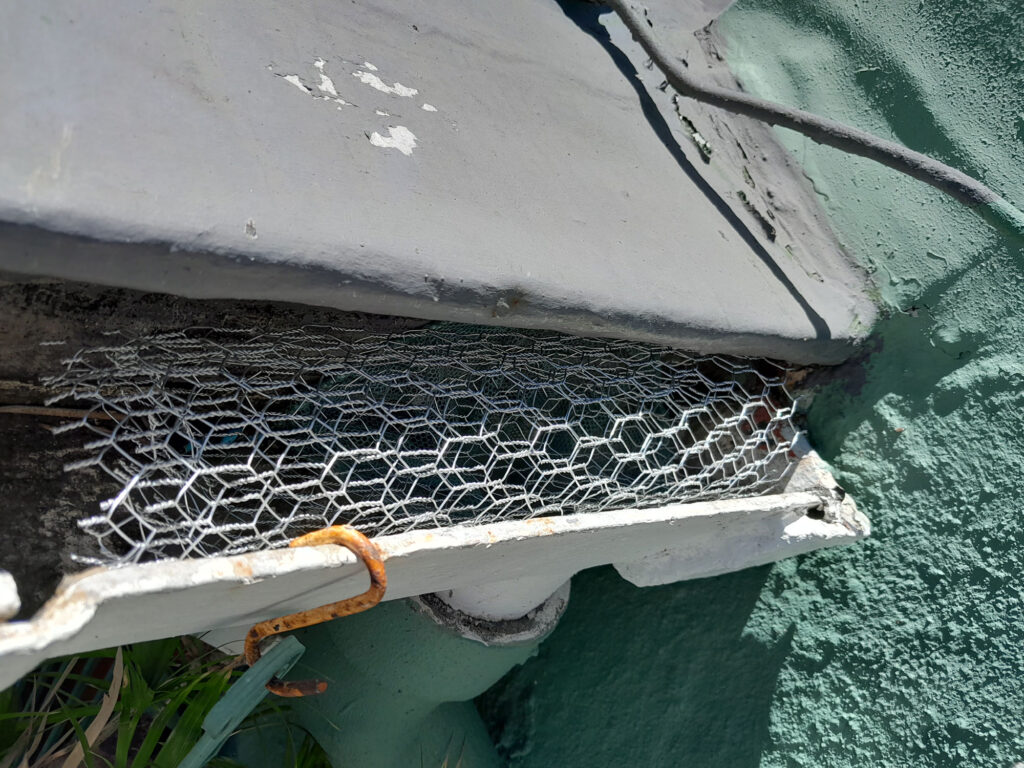
- In this case an old aquarium fishing net was used to stop large bits of debris blocking the downpipe. It is a good choice, but might also trap far smaller pieces, leading to a blockage right at the top, which would lead to the gutter overflowing. Of course this is very easily removed by simply emptying the net. And then putting it back in place.
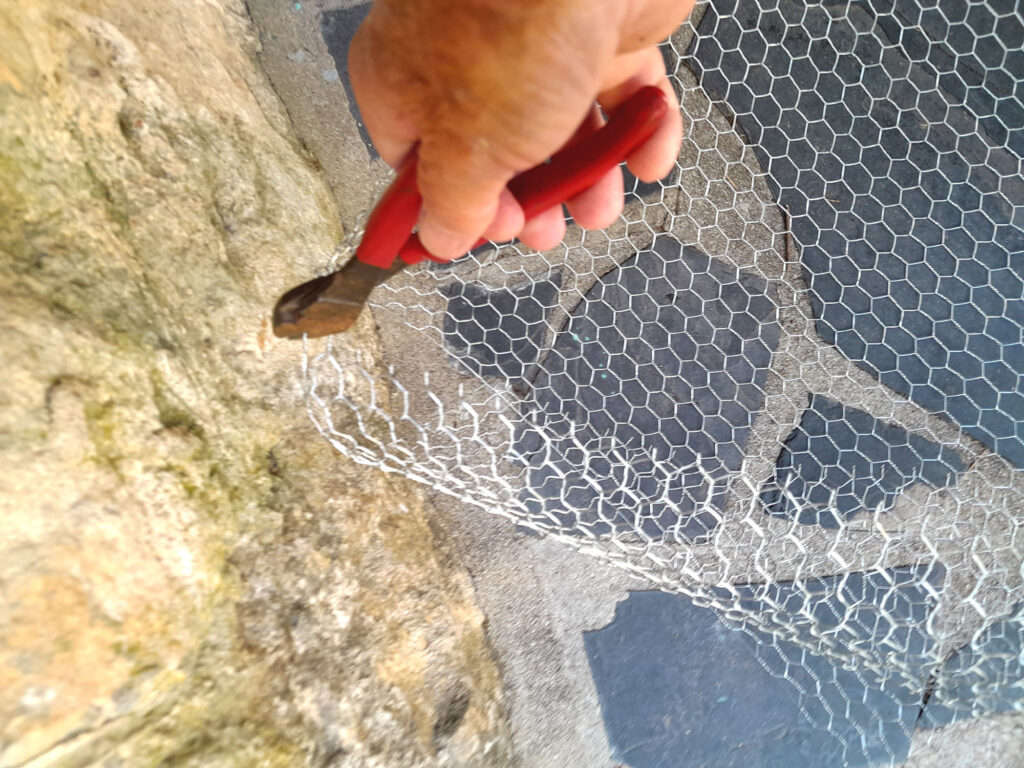
- So here’s the solution… cut a section of fine chicken mesh about 300-400mm wide.
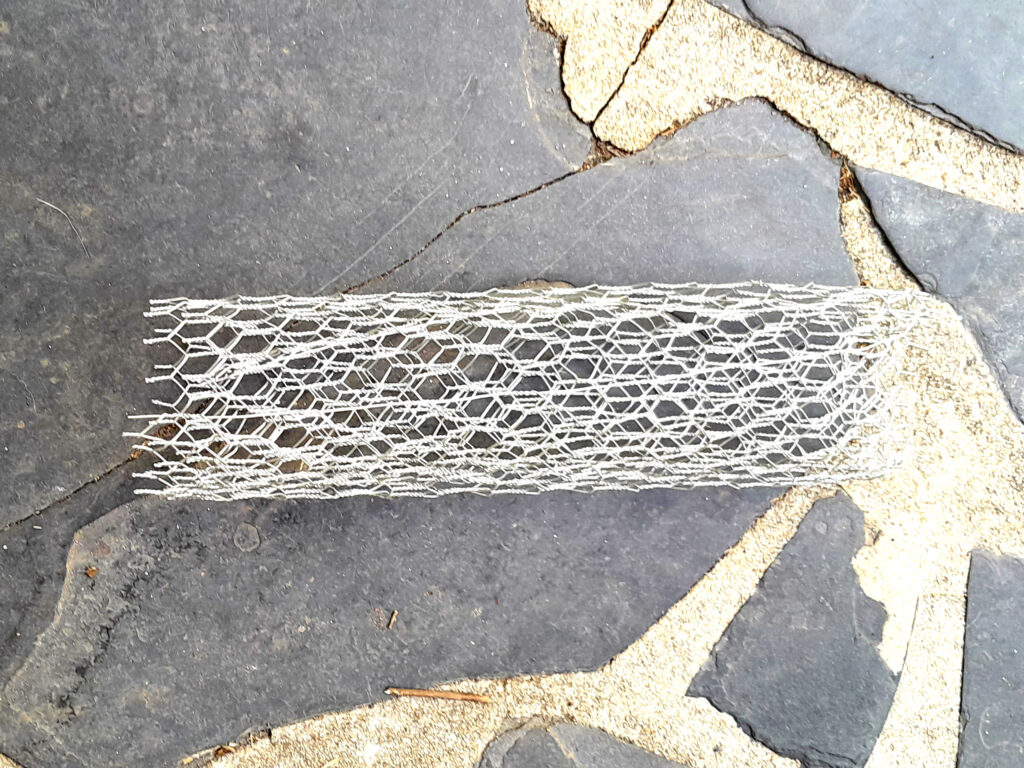
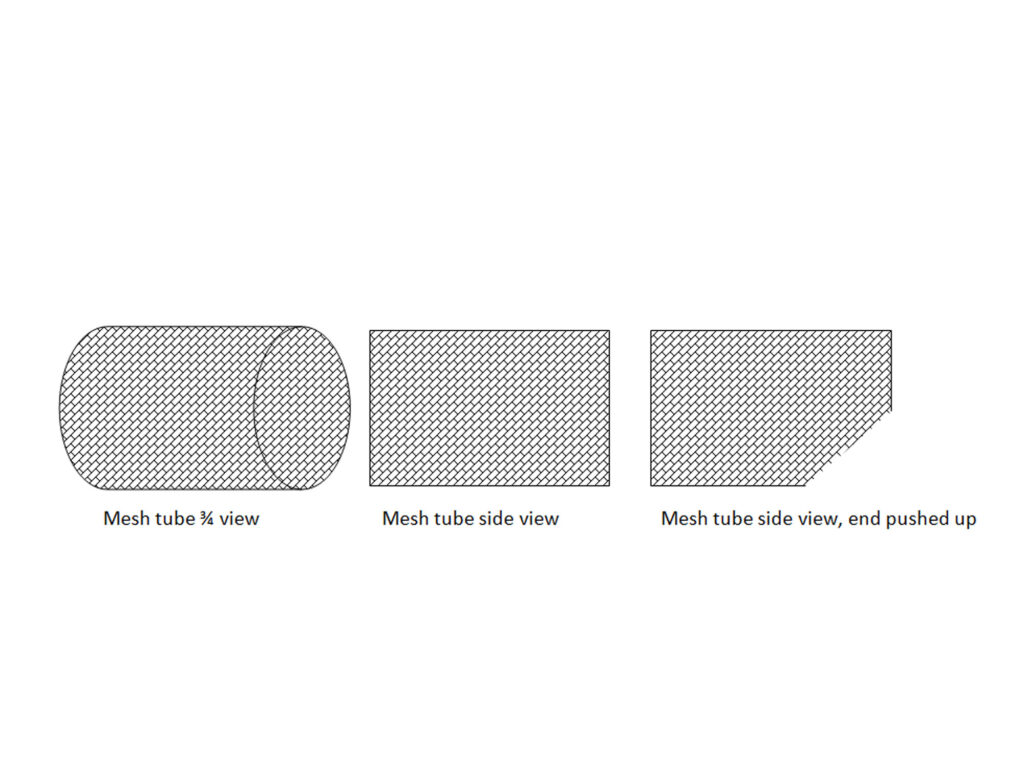
- Roll it into a tube and push in one end to partially close it off… this is designed (I hope!) to stop larger pieces of debris from passing into the tube itself and possibly then down the downpipe.
- This illustration shows what I mean about pushing one end up and inwards; if you wish, both ends can be pushed up and inwards.
- And here’s the completed job – and hopefully no more blocked downpipes. Over time the mesh will probably rust but that should take a while as it is galvanised, but in any event, it is very easy to replace and the cost is minimal.
Panel:
These materials are available at Selected Mica Stores. To find your closest Mica and whether or not they stock the items required, please go to www.mica.co.za, find your store and call them. If your local Mica does not stock exactly what you need they will be able to order it for you or suggest an alternative product or a reputable source.
Project guide
TIME: little more than an hour, depending on how much mesh you will be putting in place
COST: less than R100, depending on how much mesh you will be putting in place
Skill: 1
Assistant: No
Tools required:
- Pair of tin snips or electrician’s side cutters or a pair of pliers and a drainpipe snake if there is already a blockage; if not, then no snake required