02 August 2023

Simple Shelves & Bracket Chat
Where possible it is a good idea to go for shelving that can be adjusted for height and shelf separation, which will add versatility. But having said that, there are plenty of occasions when fixed brackets are just what you need and all that you need, and we will take a look at some after showing you how to install these simple shelves.
In this case, they are intended for books, but of course whatever you need to store ready to reach is up to you.
This sounds obvious, but…
When you buy lengths of wood from any hardware store you will find that one or both ends have been painted yellow at the sawmill as an identifying mark and are usually quite roughly cut. For a better final result, even if painting the shelves, trim a millimetre or so off these ends. Not only will it remove the paint but also give a smooth, more aesthetically pleasing result to your shelves.
A note of caution
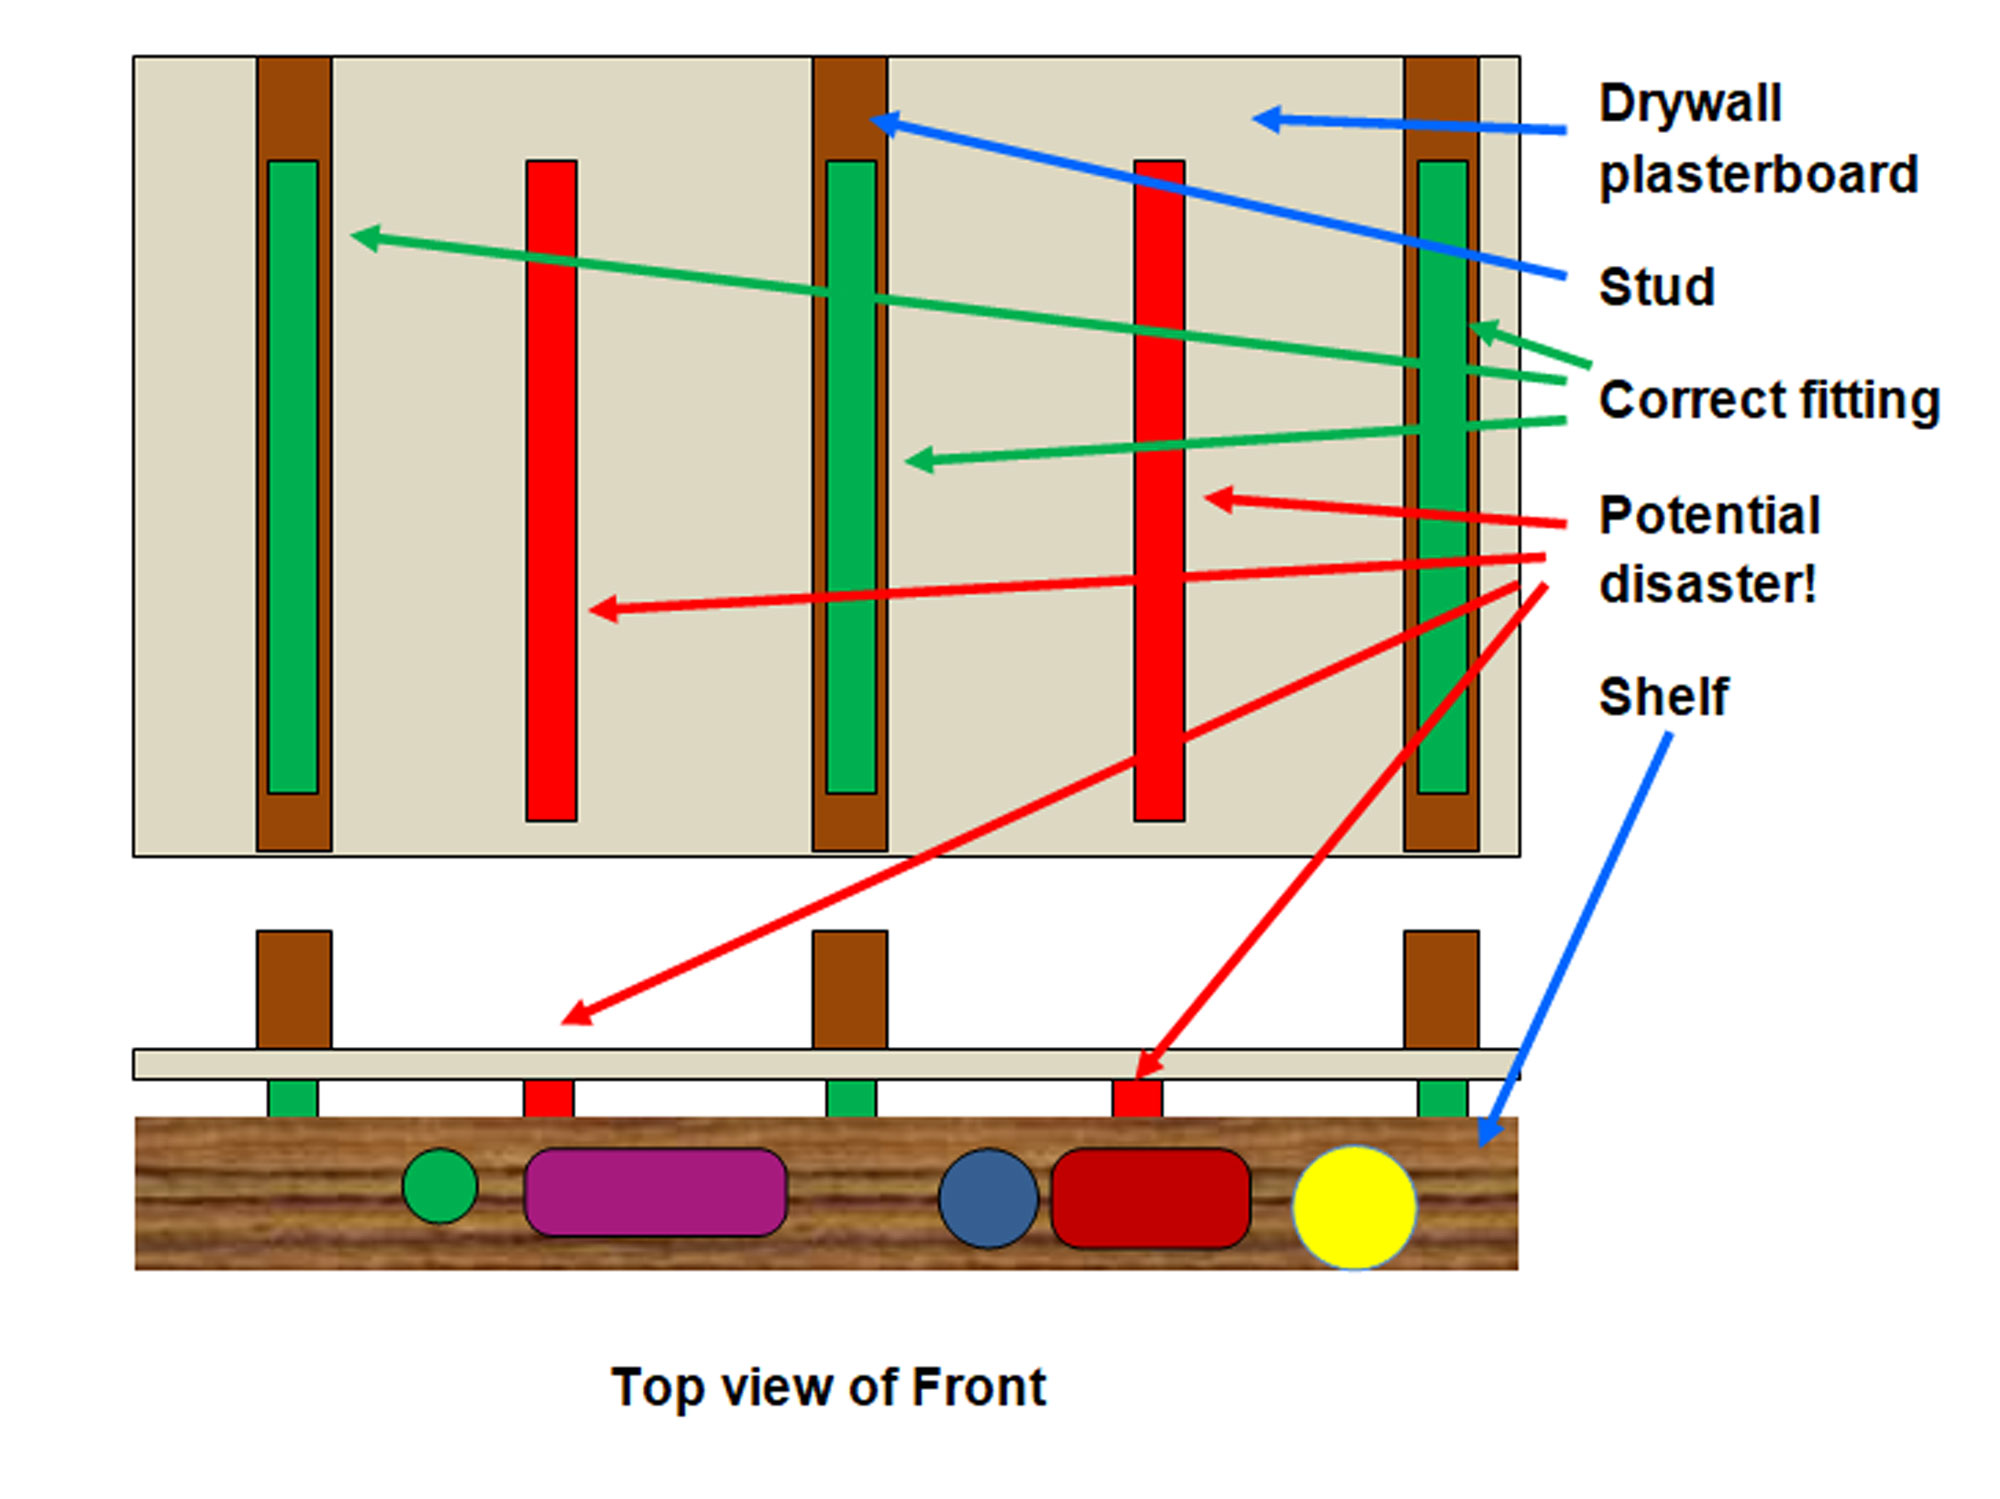
The double slot wall bands in this feature are secured to a masonry wall and will bear a very heavy load – in excess of 100kg or more in total. If they were installed on a drywall, however, it is important that they be attached using suitable fasteners to the upright wall studs if they are to be able to bear the full weight placed upon them. If they are simply fixed to the wall willy-nilly and end up being secured only to the plasterboard covering – either both bands or on one side or the other side, it is very likely they will pull free from the wall. (See illustration for correct attachment.) If that happens whatever is on them will end up on the floor and you are also likely to have some rather damaged drywall to fix.
Materials:
- Shelves: Two 1.8m lengths of 22x222mm SA pine cut to four lengths of a fraction under 900mm each
- One pair of double slotted wall bands, 915mm long (they are also available in lengths of 495mm, 610mm, 1220mm, 1524mm, 1830mm, 2134mm, 2438mm and 3000mm, any and all of which you can cut to your particular requirements
- Ten 8x50mm wood screws
- Ten wall plugs
- Eight 250mm single slotted brackets. These are available in a range of lengths (250mm, 300mm, 350mm, 400mm) and designs – from single-slotted, as used here, to left- and right-handed lipped versions and also in a double-slotted version as well. Check out what is available at your local Mica and decide from there what suits your requirements best
- In this case the only wall bands and brackets were available in grey (they are also available in white and cream) so I decided to spray paint them white before installing them. Hence, I needed a couple of cans of gloss white aerosol spray enamel
Method:
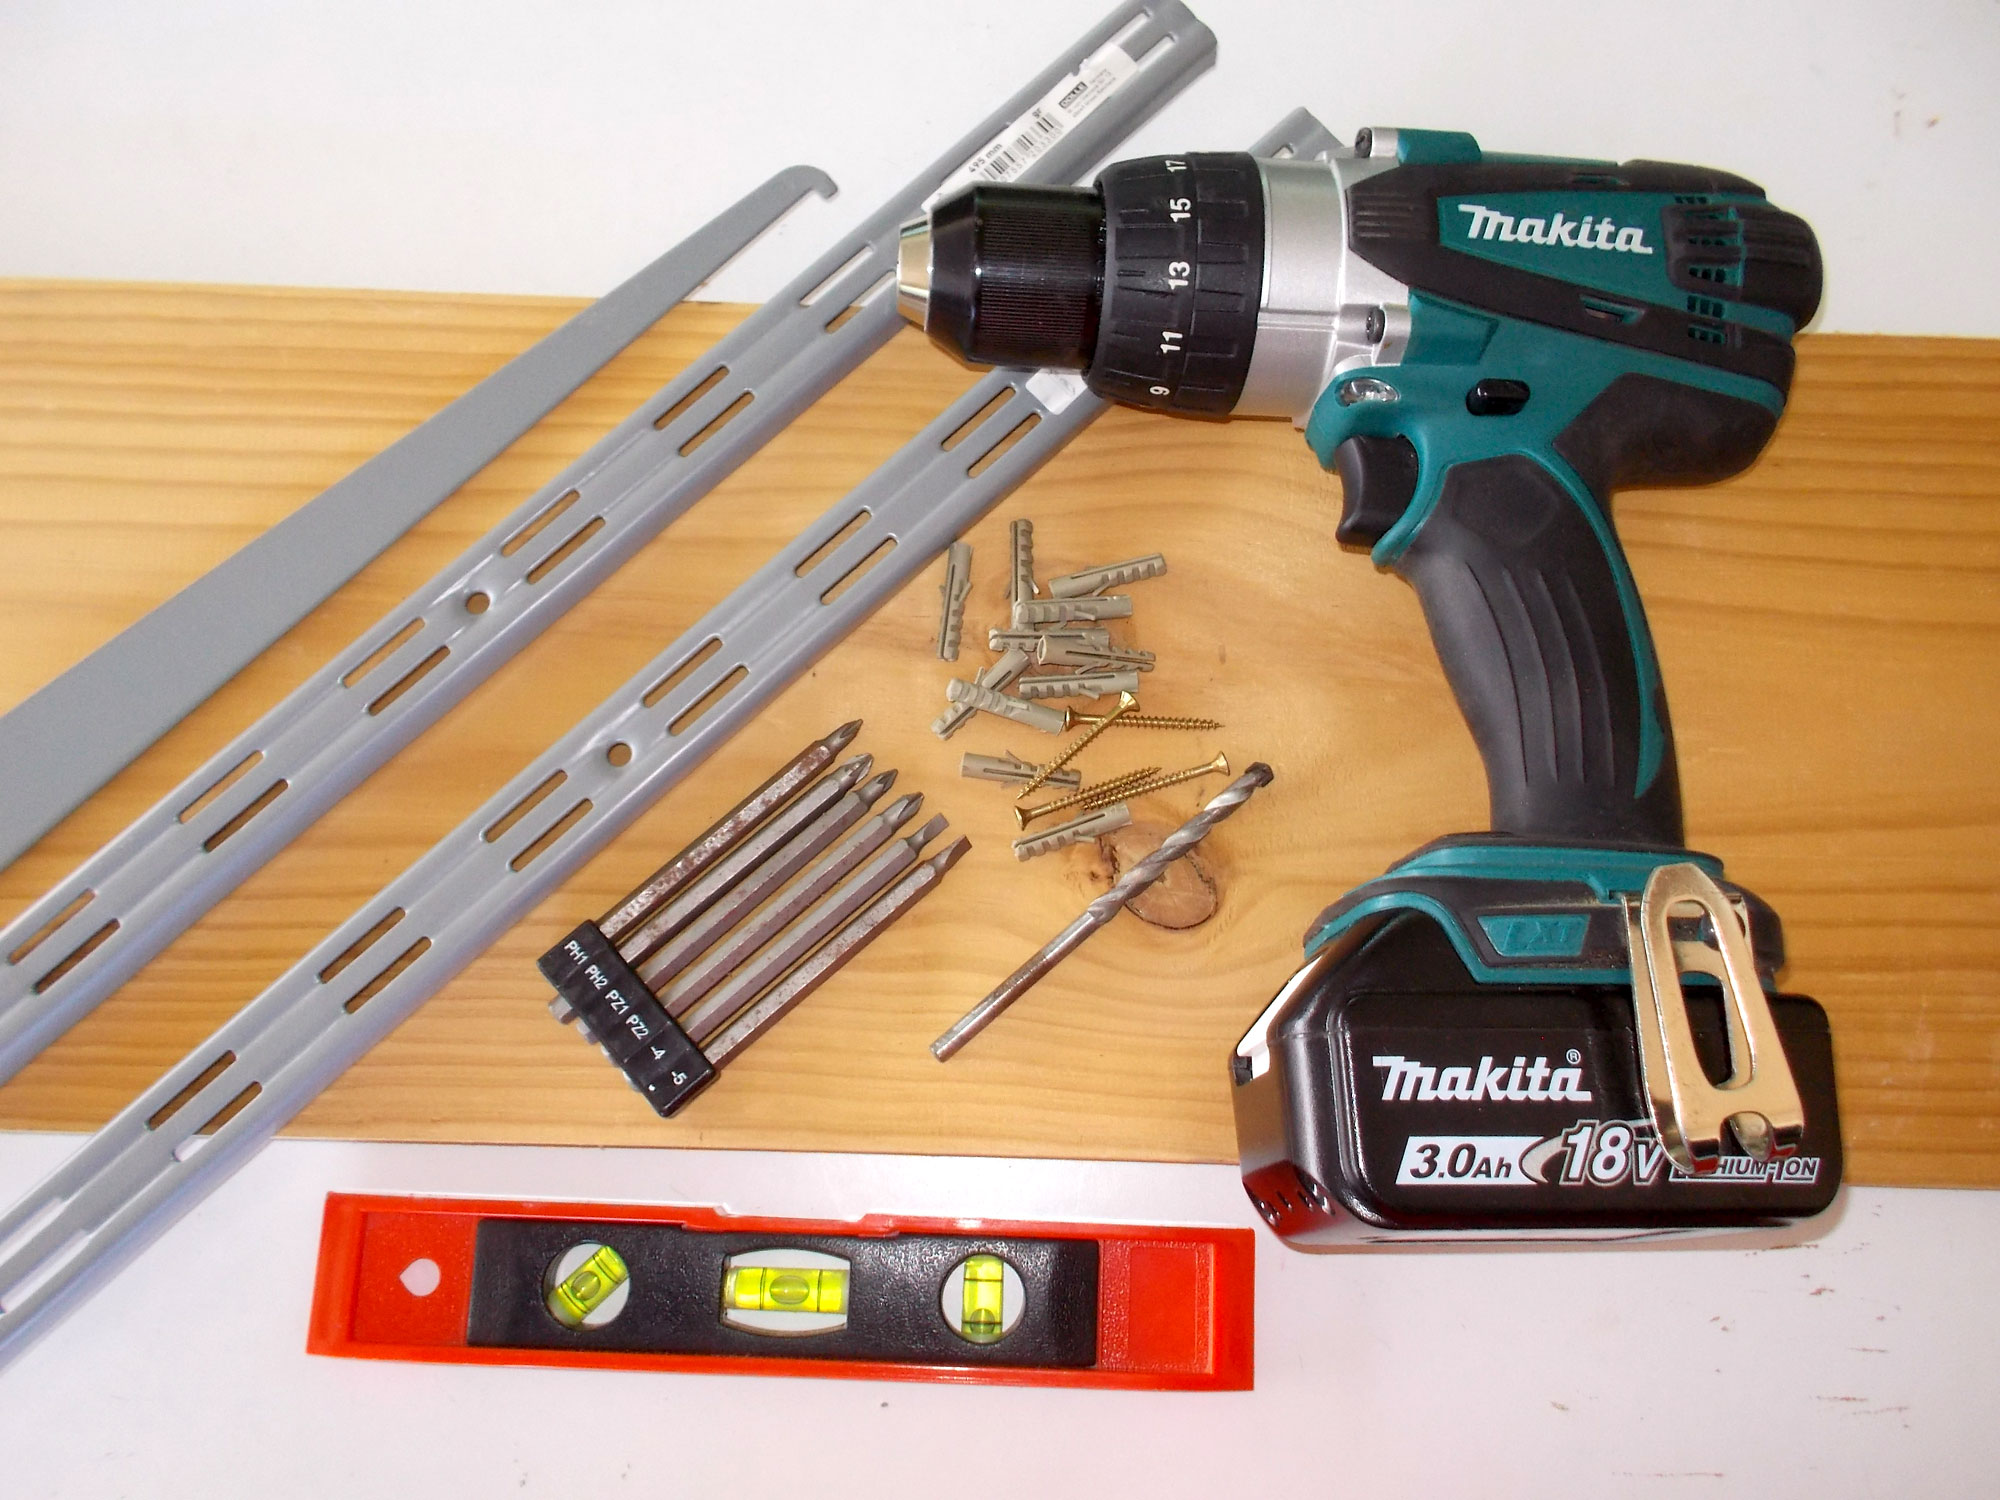
- Here’s what you need: two bands, eight brackets (just the one shown), plus screws, plugs, a level and the drill-driver.
- When marking the positions of the attachment screws, it is more accurate if you flip the band around and mark the positions as the screw hole in the band is then close up against the wall surface. So… position the band at the required height…
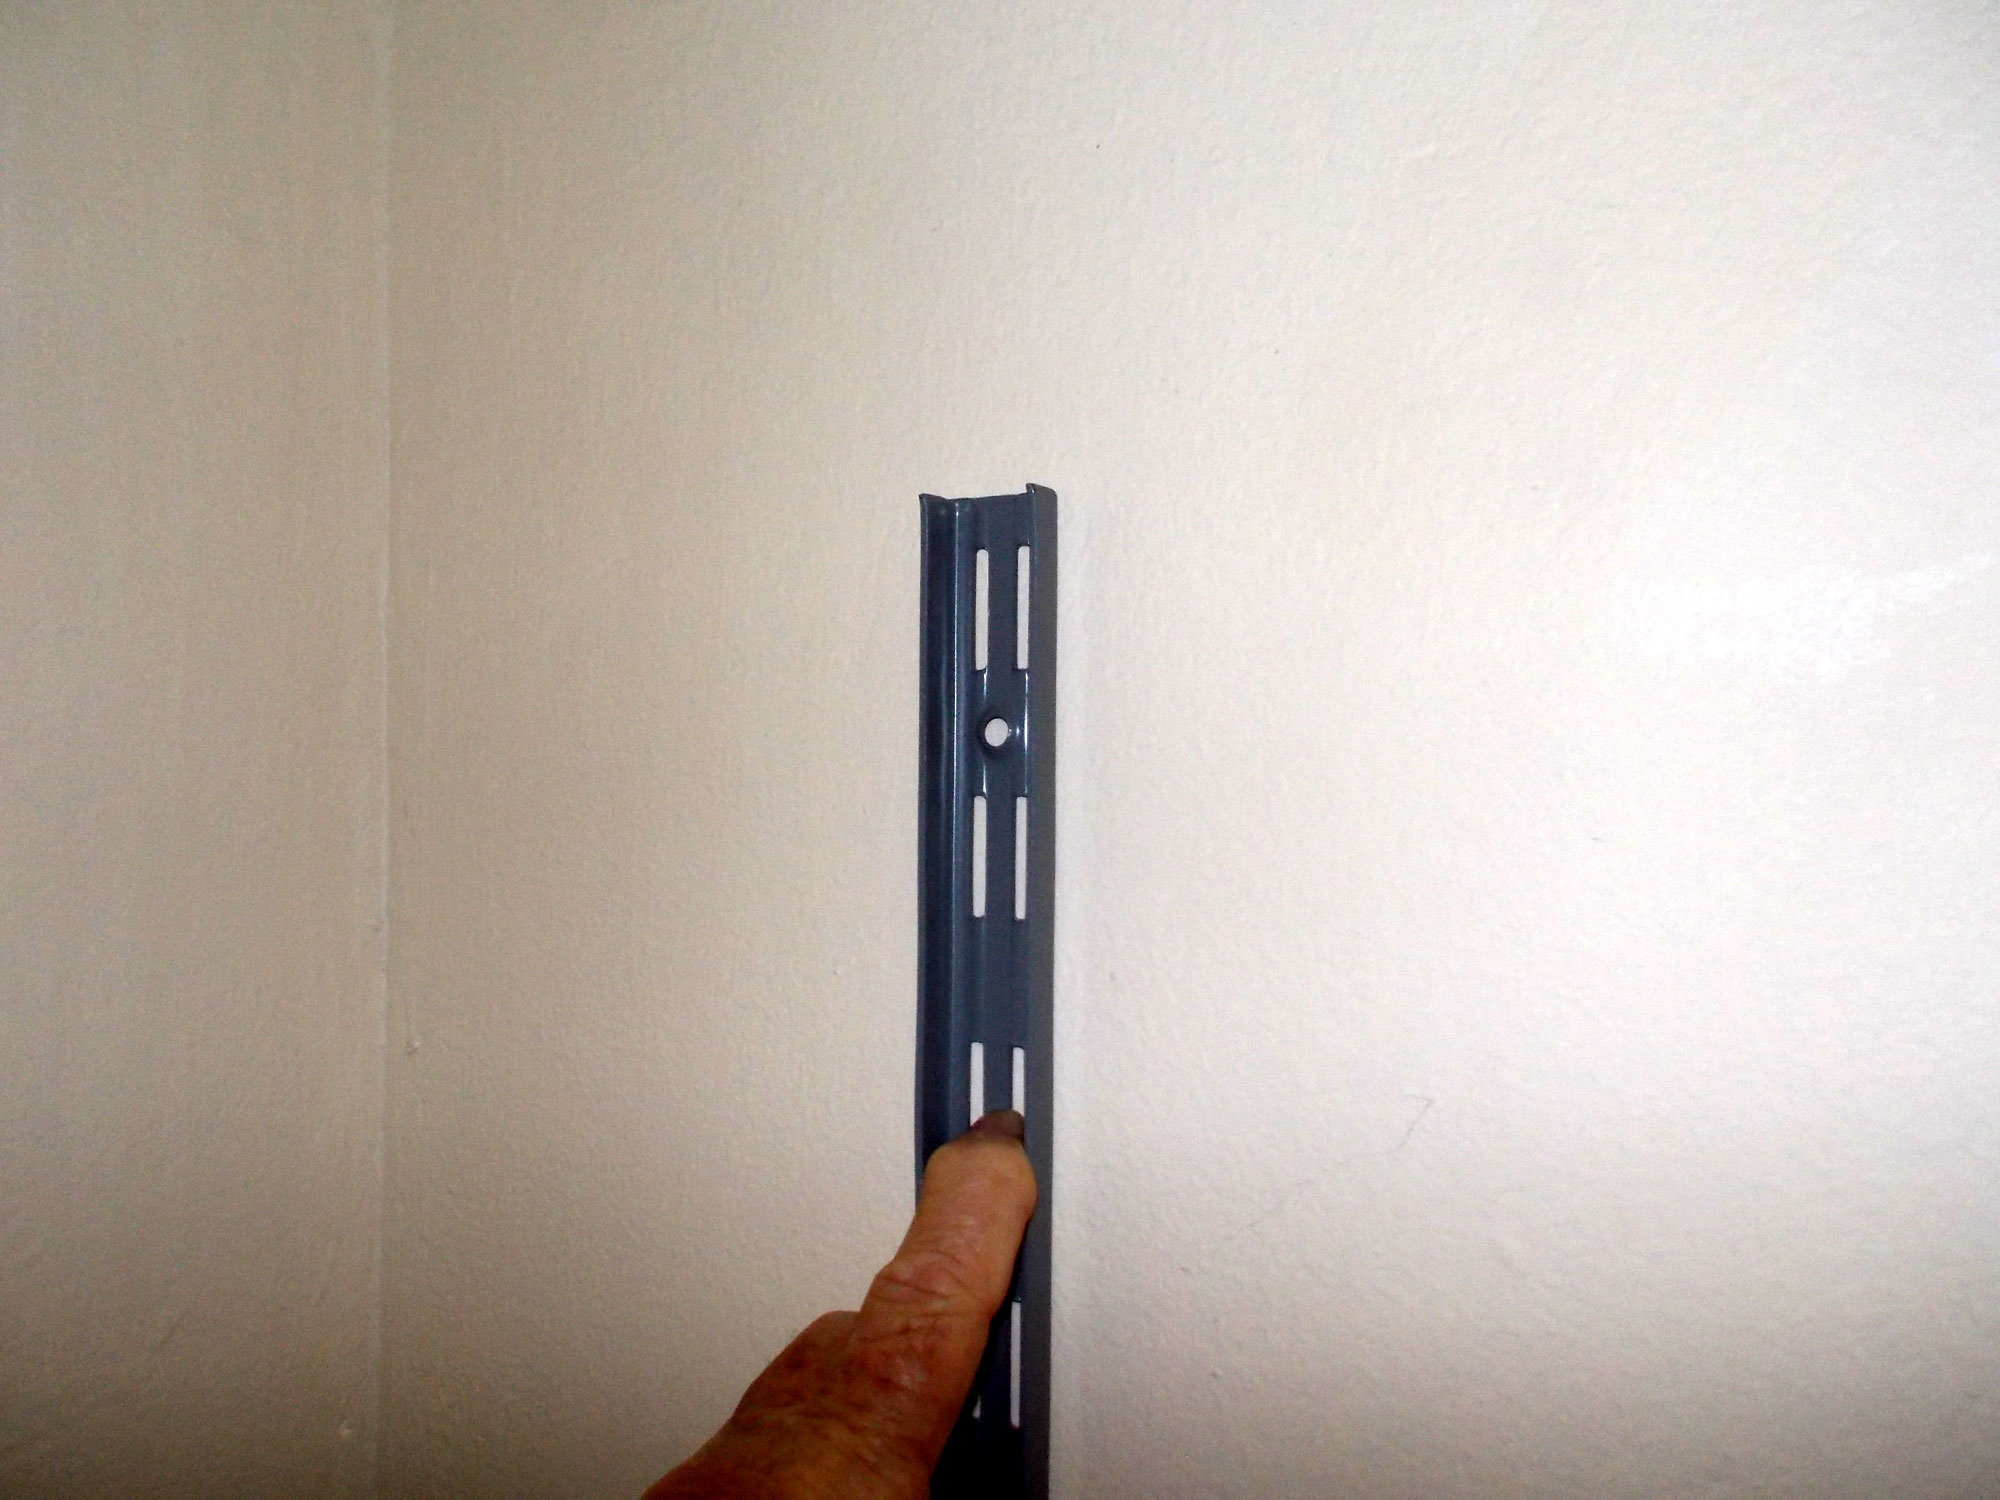
- … and mark the position for the topmost attachment screw.

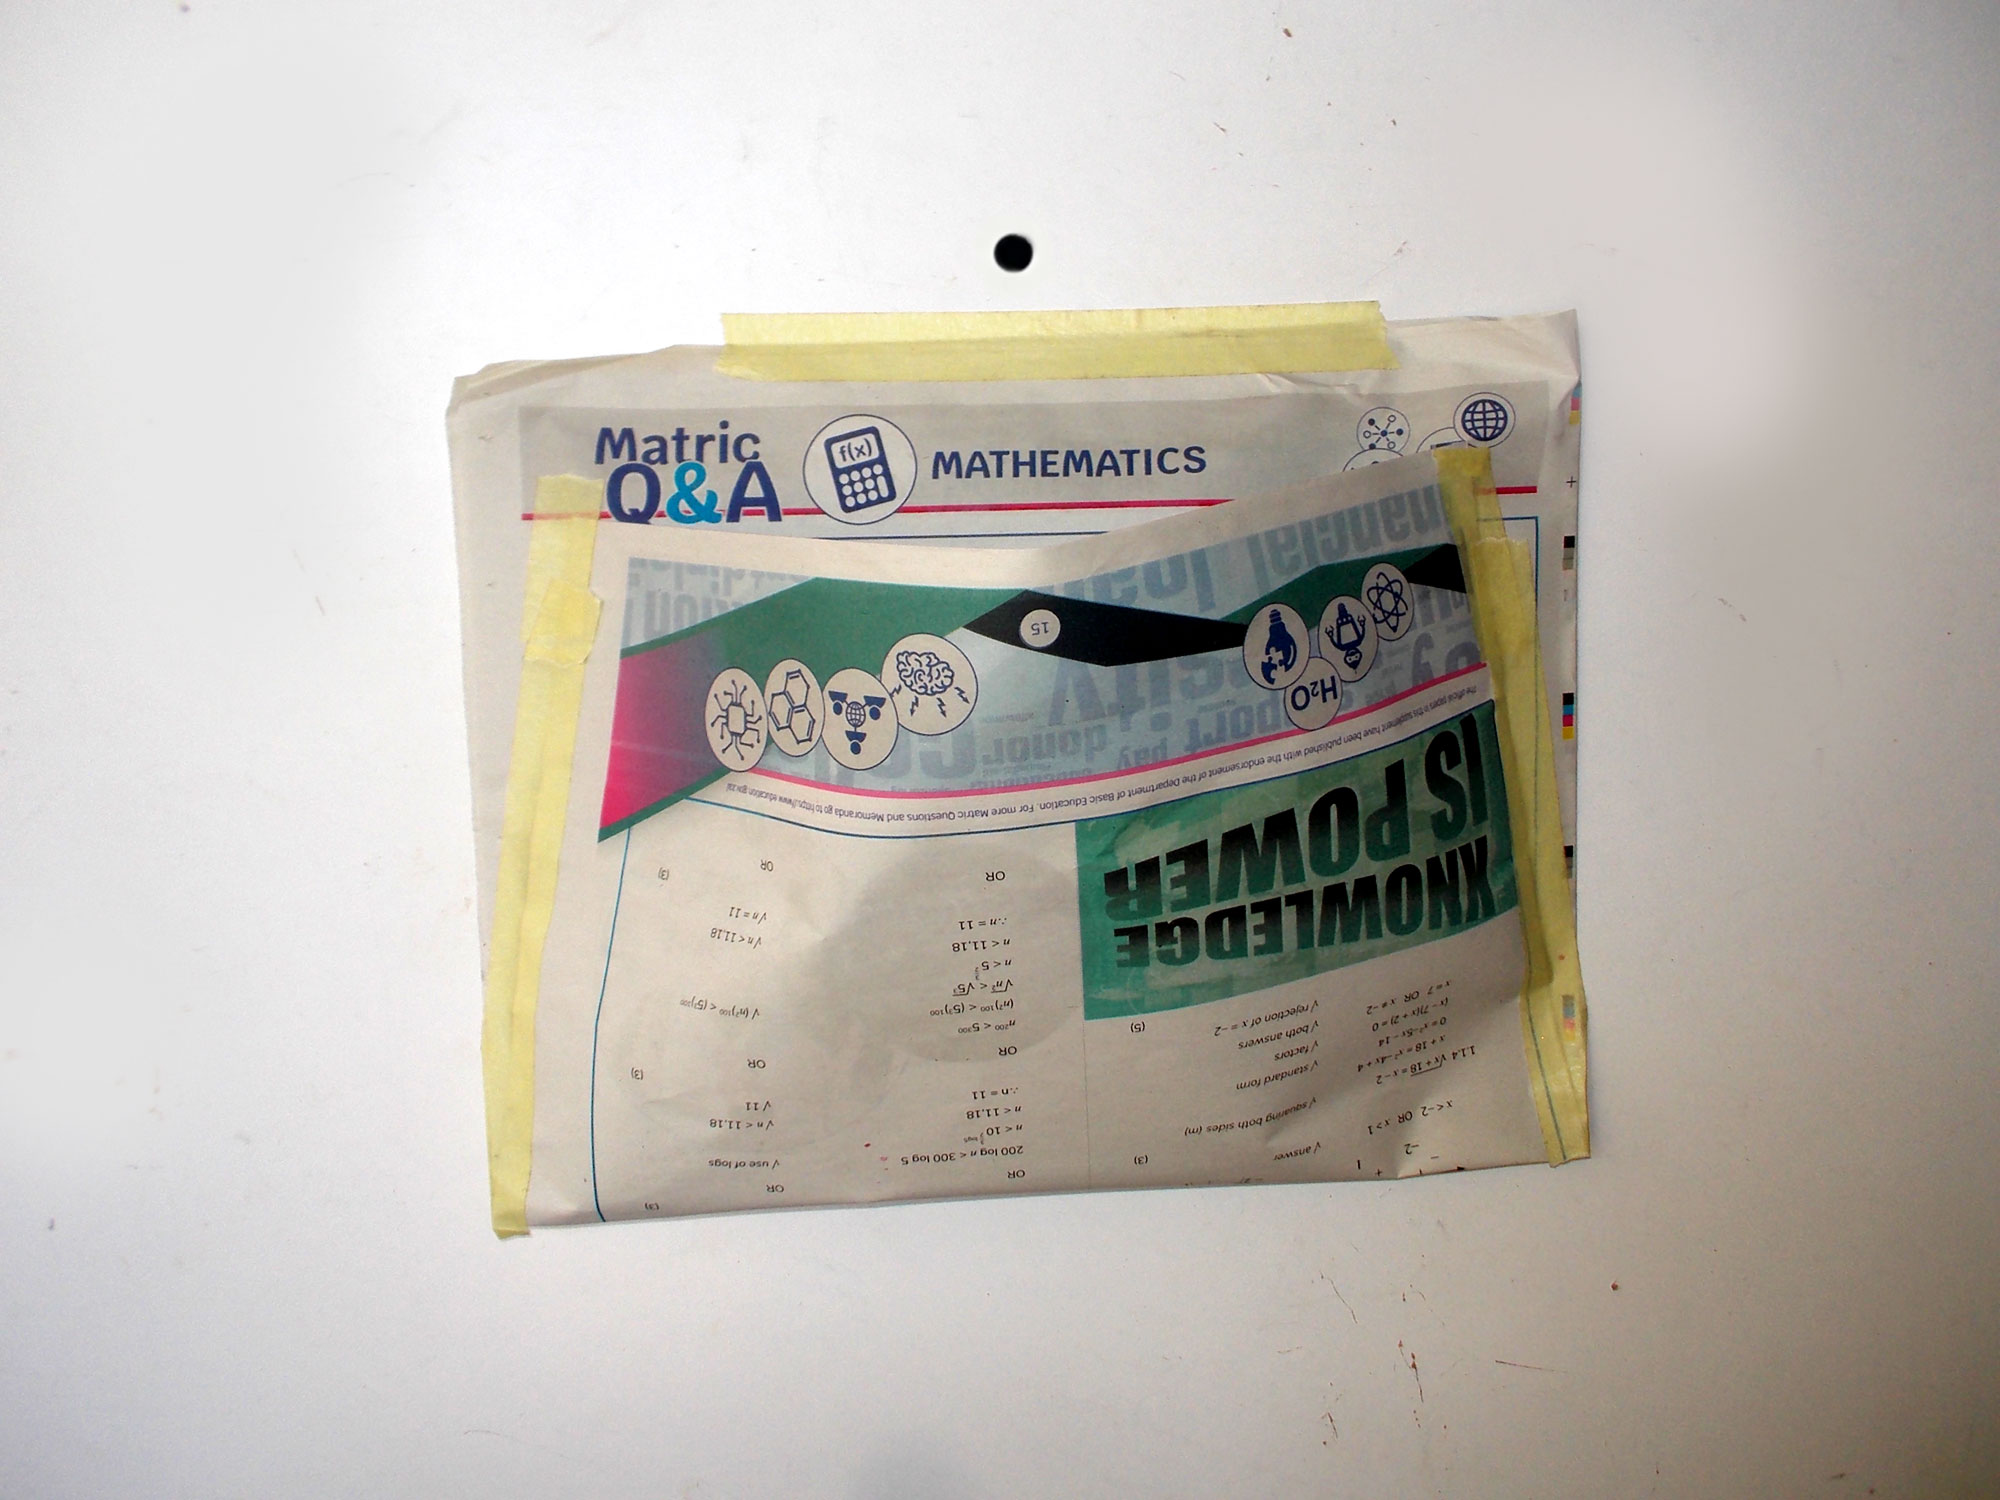
- To keep masonry dust clean-up to a minimum – or zero – make up a simple pouch as shown and attach it just below the drilling point and then drill away – no mess. No clean-up. Drill the hole to a depth of about the screw length plus 5mm or so.
- Insert a rawl plug into the hole top screw and lightly attach the first band to the wall and use a level to get it absolutely vertical. Then mark off the remaining four screw positions on the wall. The bands allow for attachment screw holes at intervals of 200mm. It is best to secure the band with at least four or five screws – more if the band in much longer. Securing it with a screw at the top and just one other at the bottom could find the band ‘bowing’ outwards in the middle due to the turning force of the weight of the shelves and their contents.
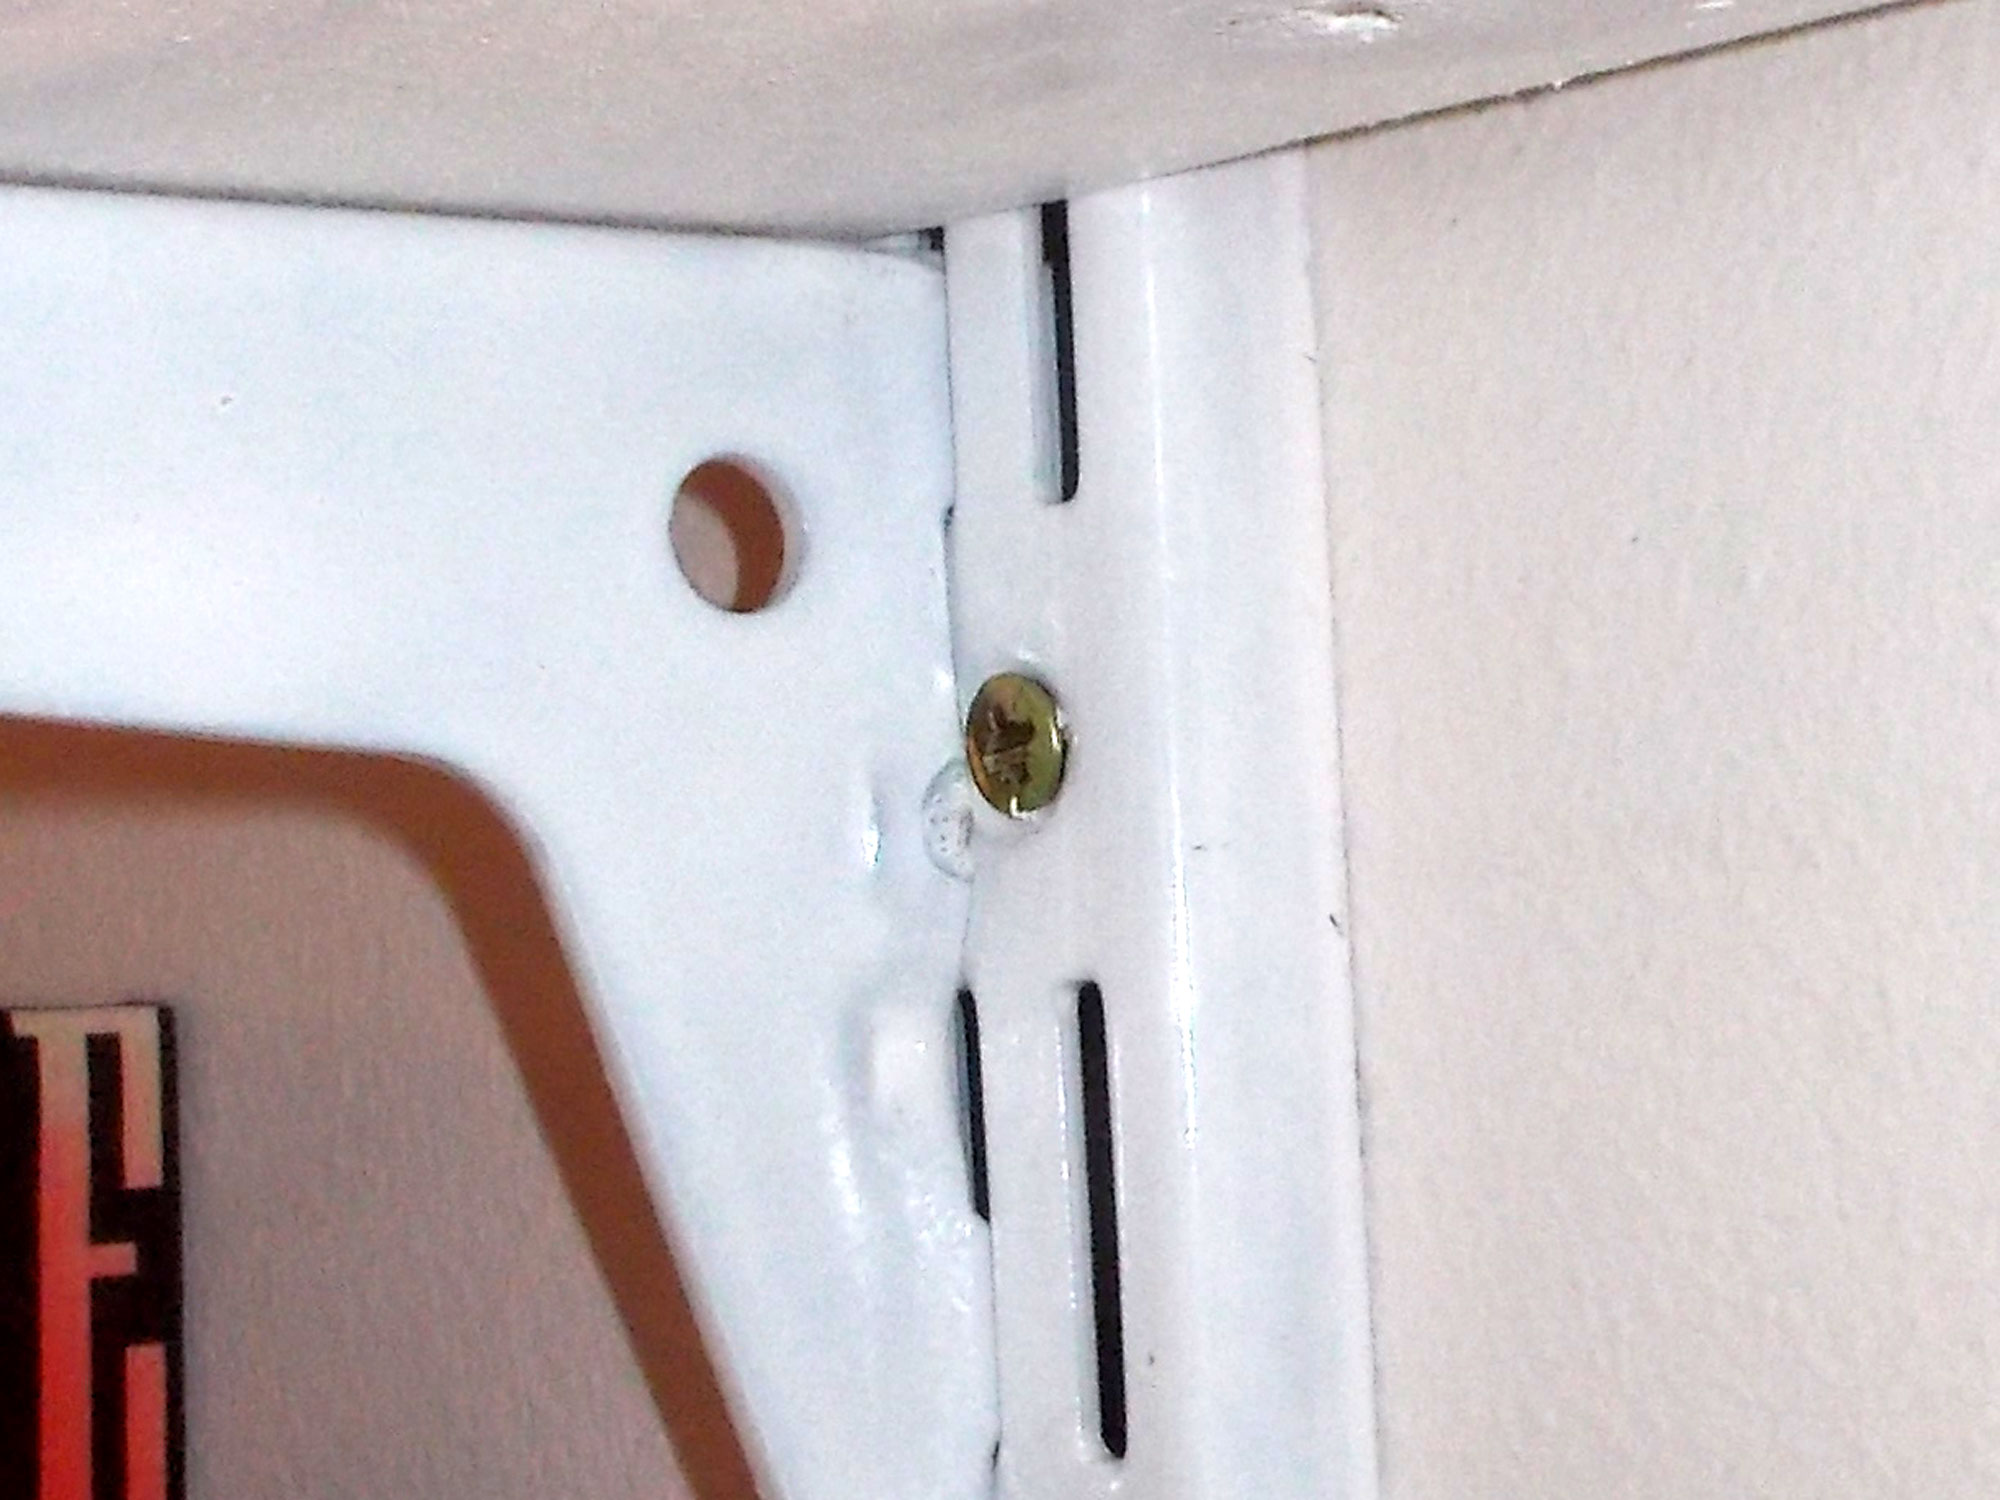
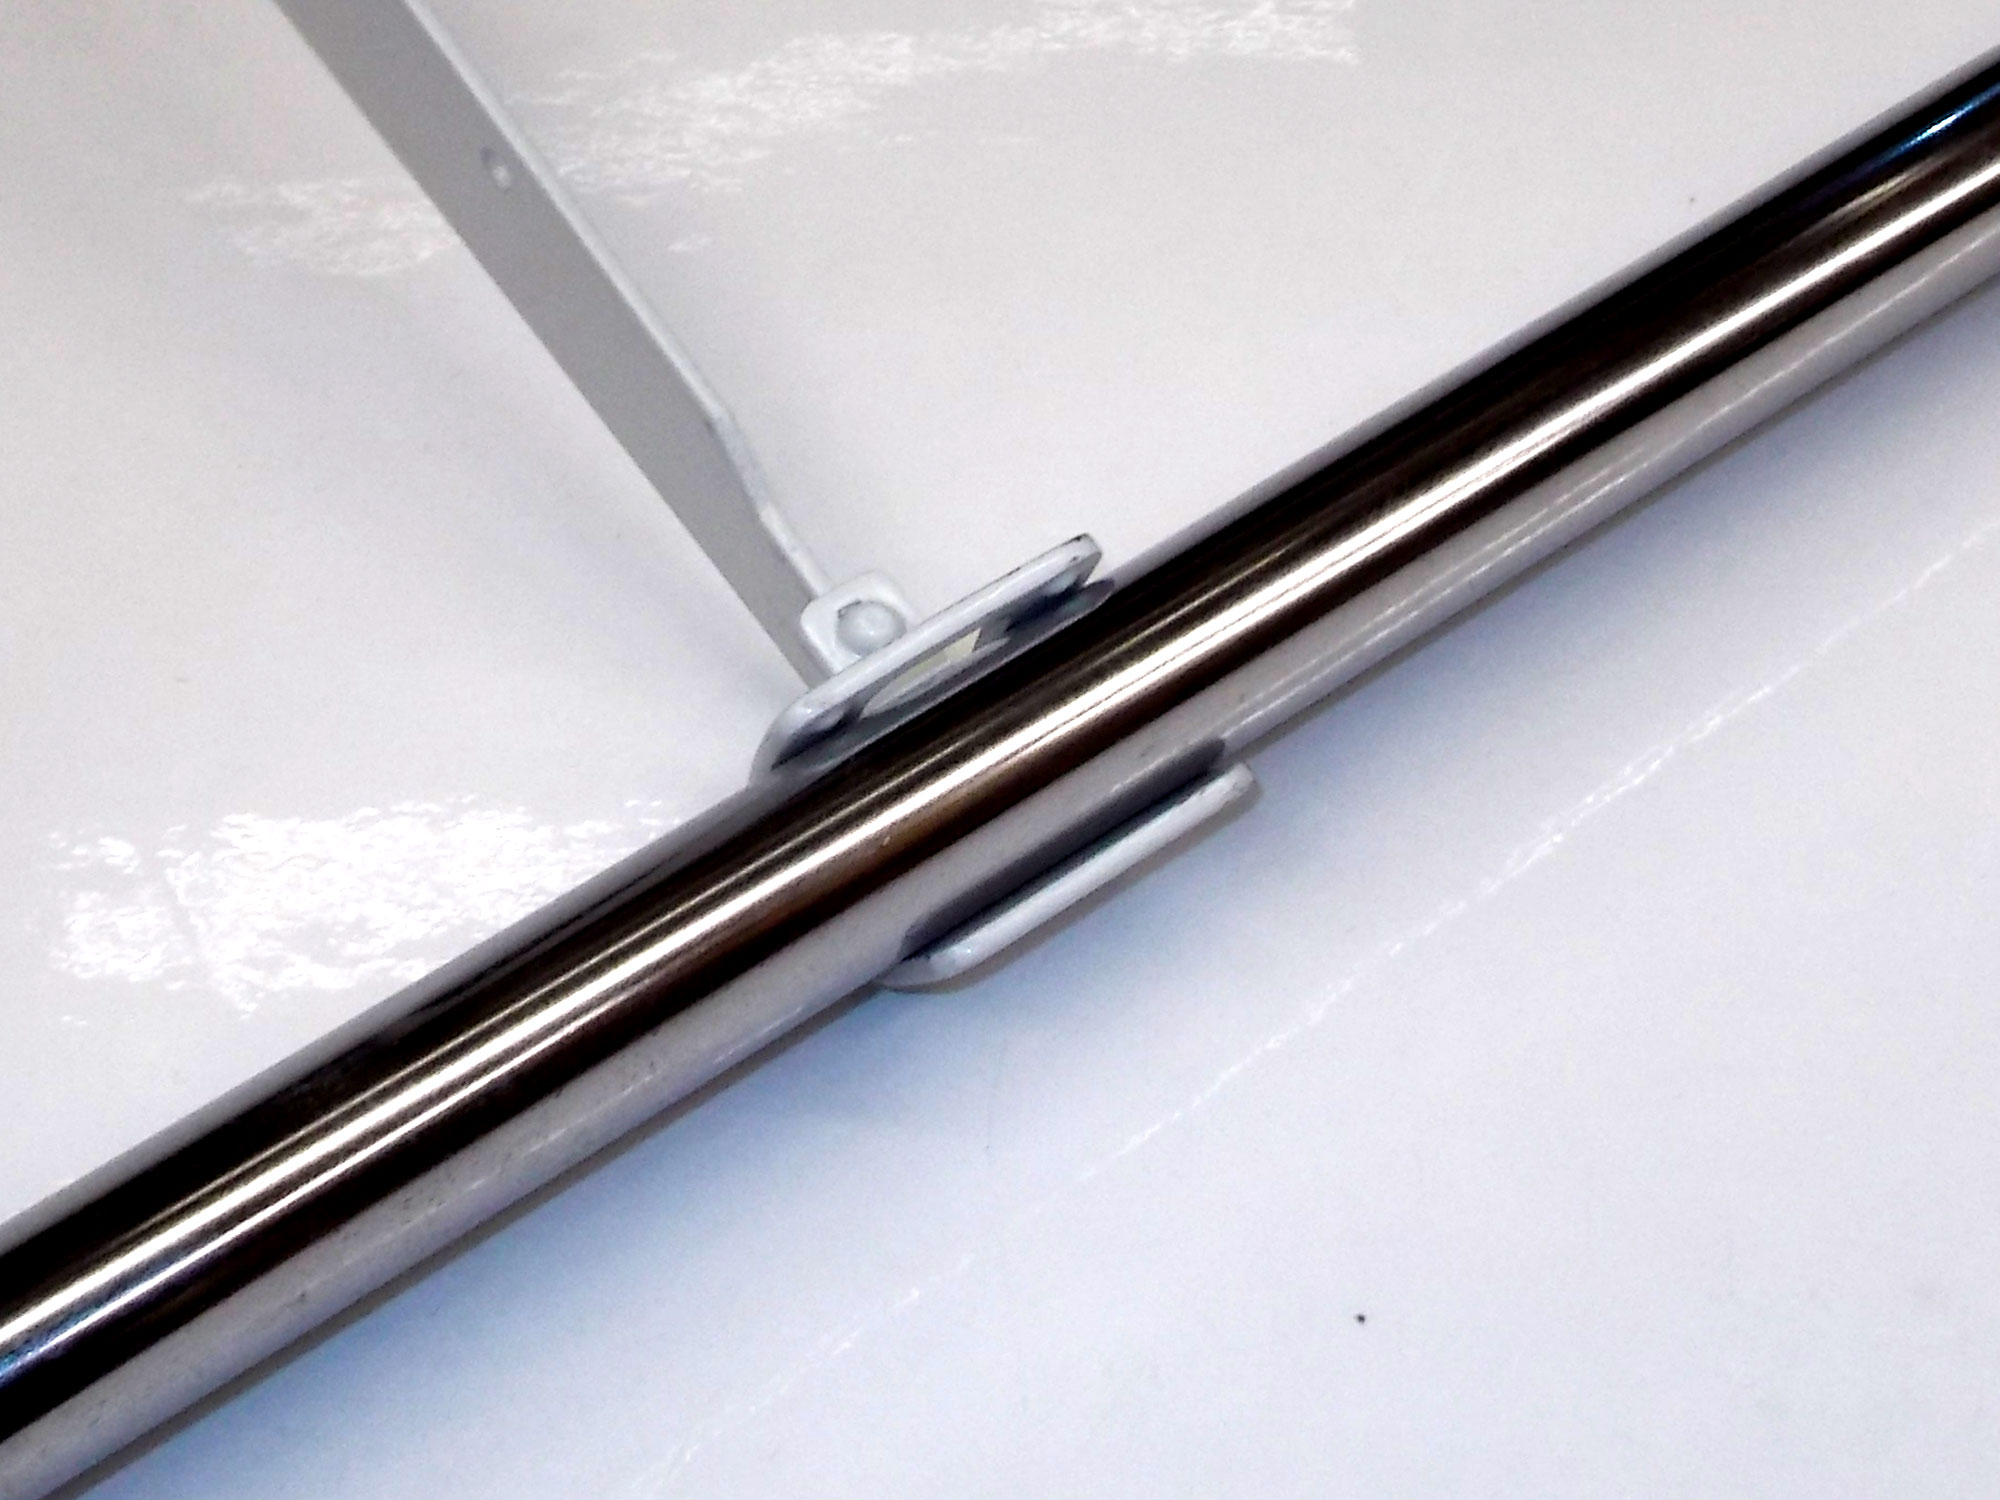
- Remove the band and drill the rest of the holes, then flip the band front side forward and secure it firmly to the wall. Then repeat the same procedure with the other band. In this case it is 600mm from the first so that there is adequate overlap of the shelves on each side and the shelves will not sag under the weight of their contents. If they do, simply flip them over, and restack them. This shows one of the securing screws – of which there are five per band in this case.
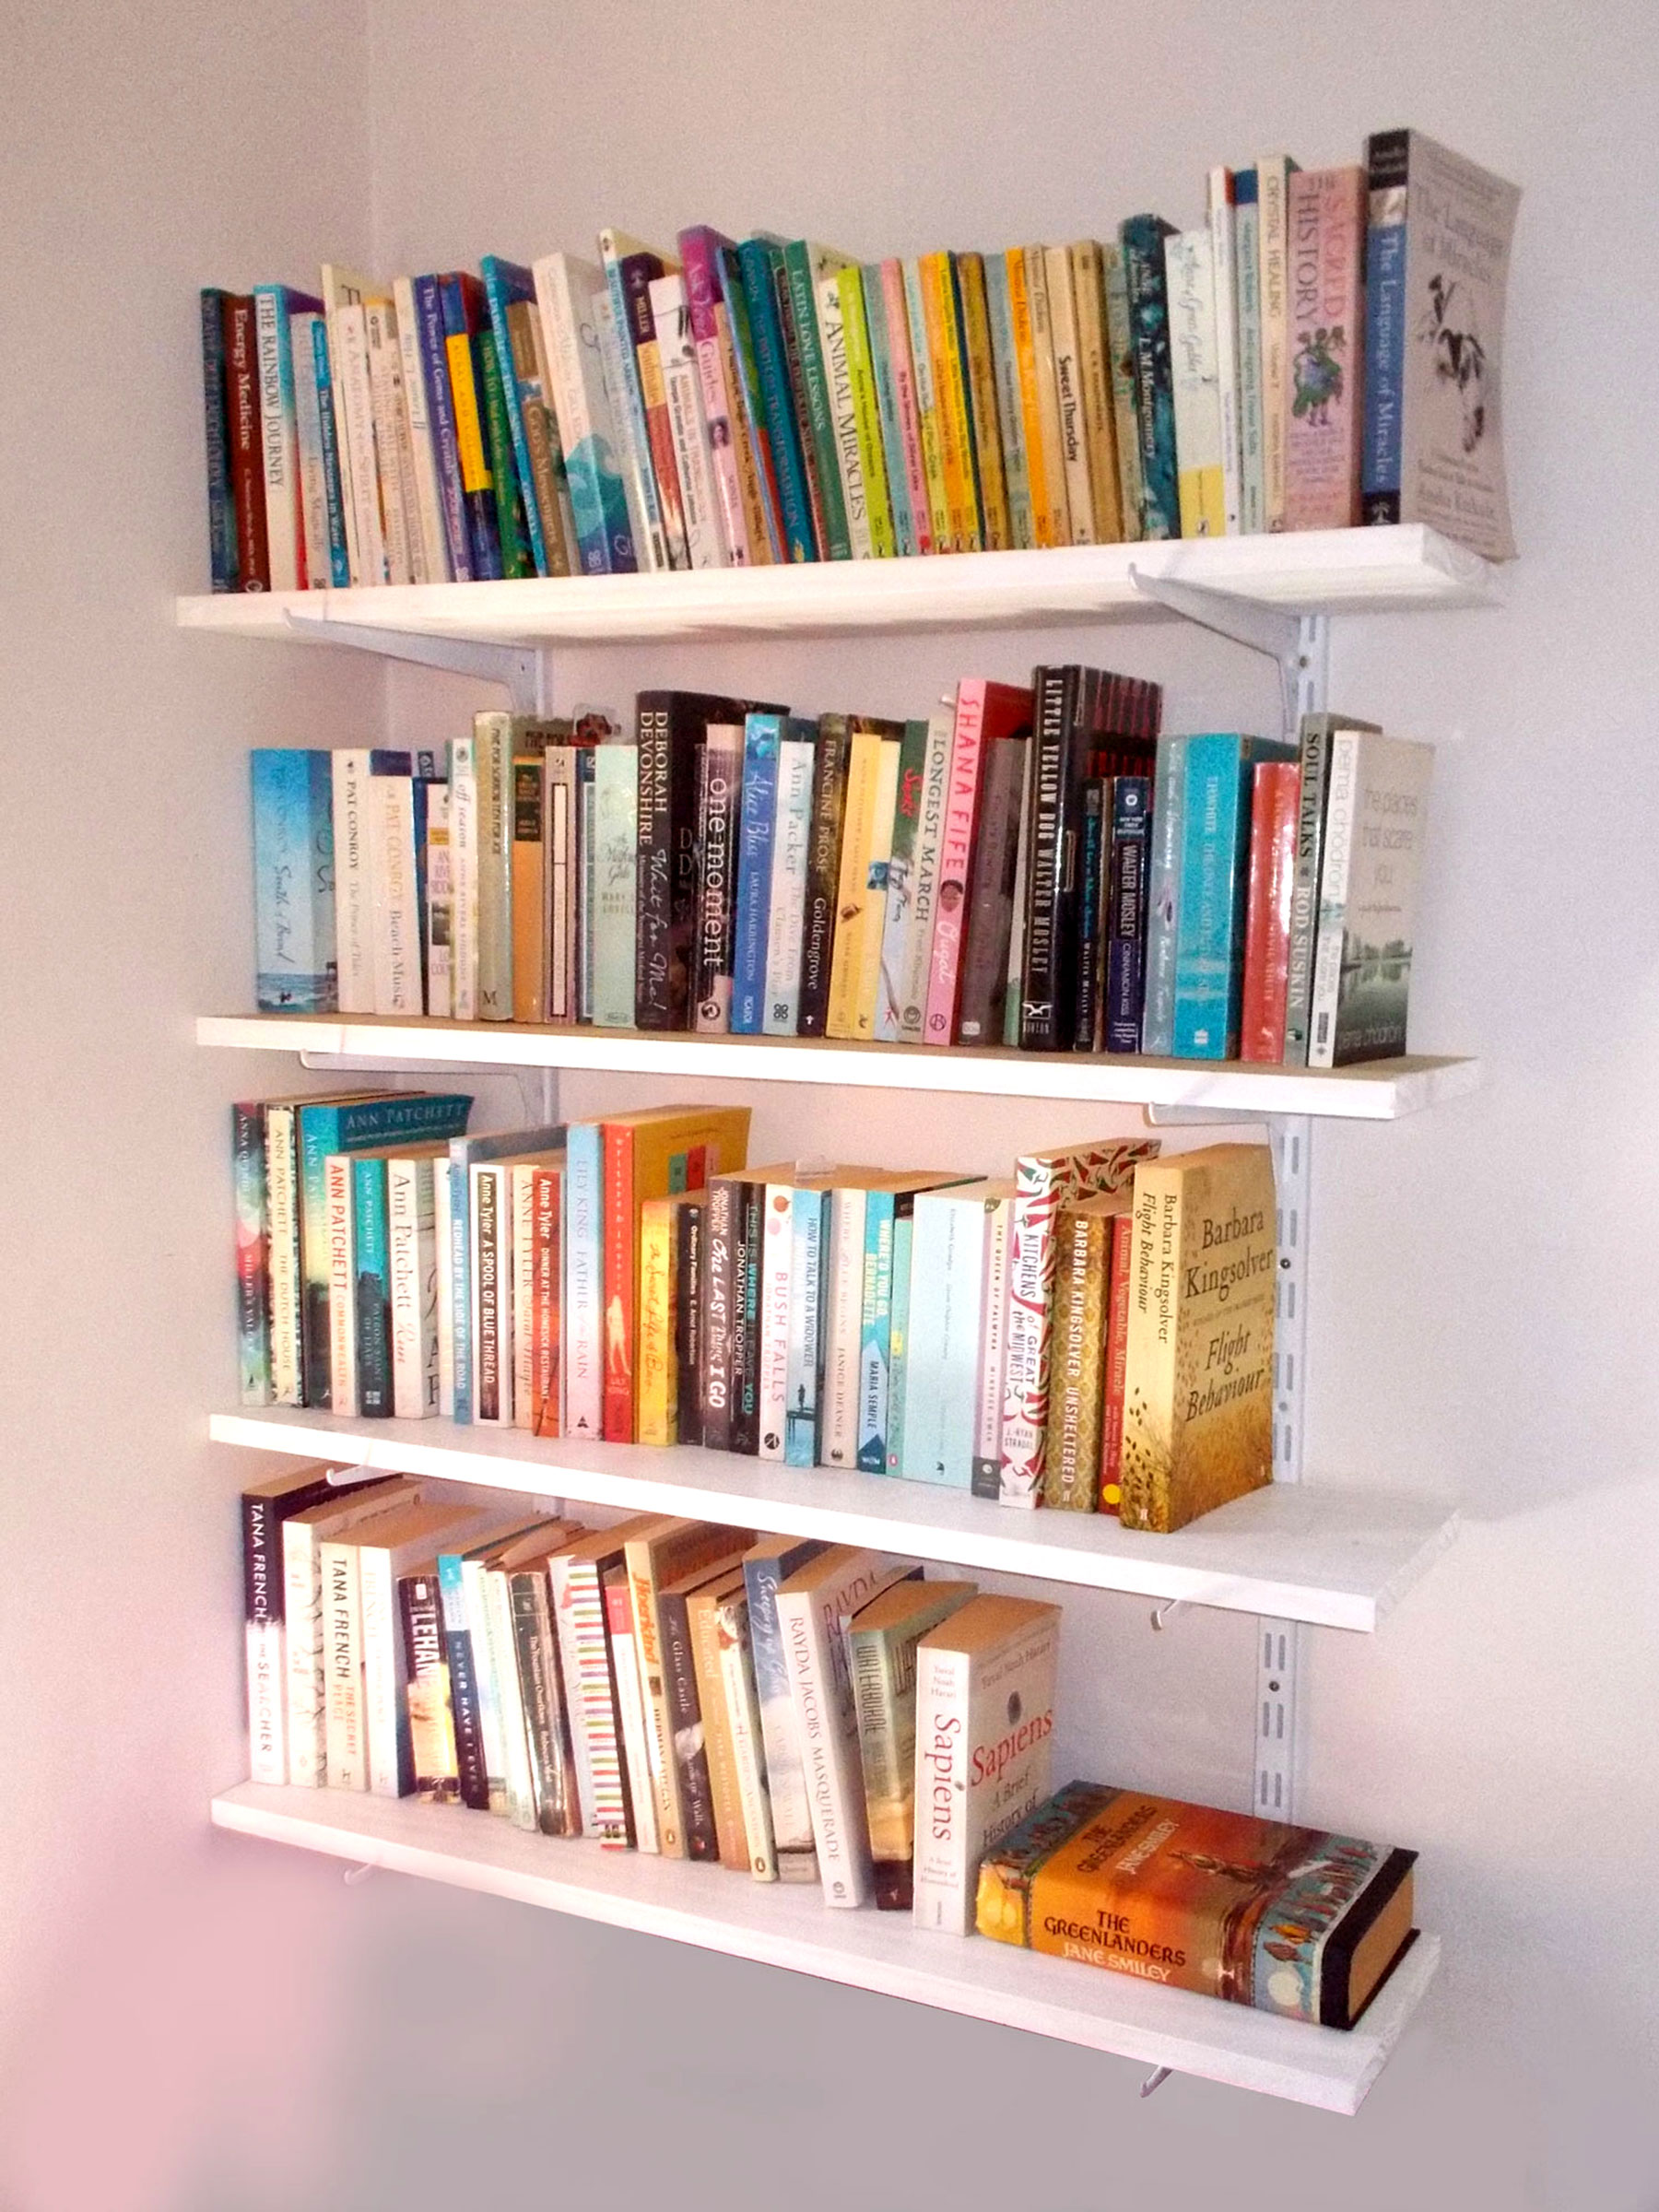
And here is final result… secure and fully adjustable for books of differing dimensions and weights – including even the heaviest tome.
Now let’s take a look at some brackets…
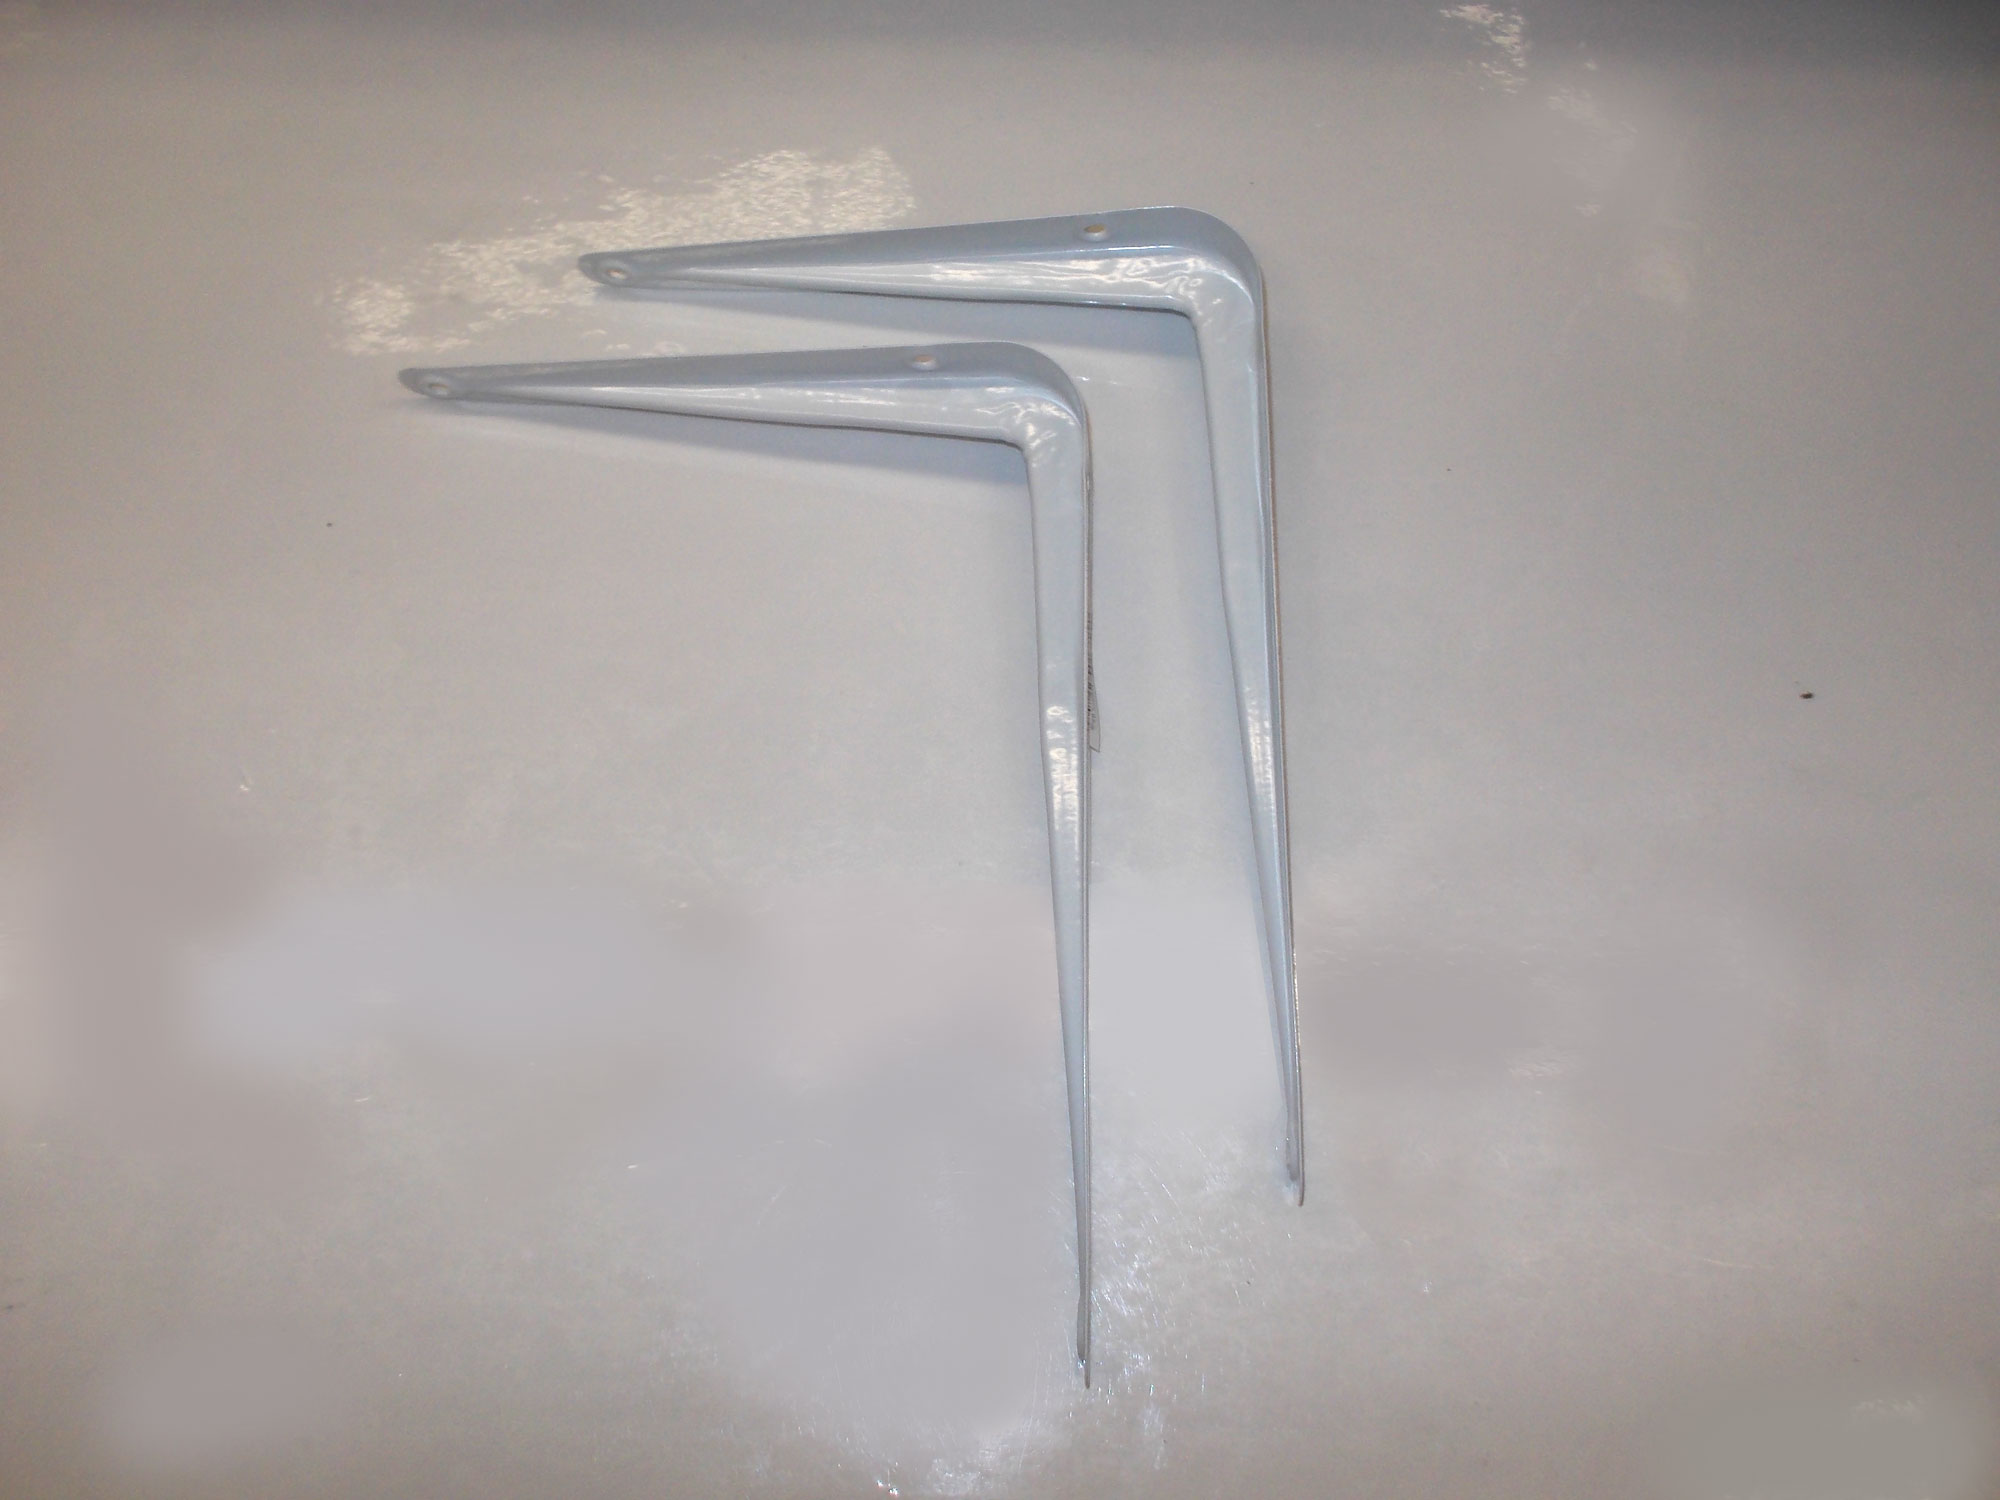
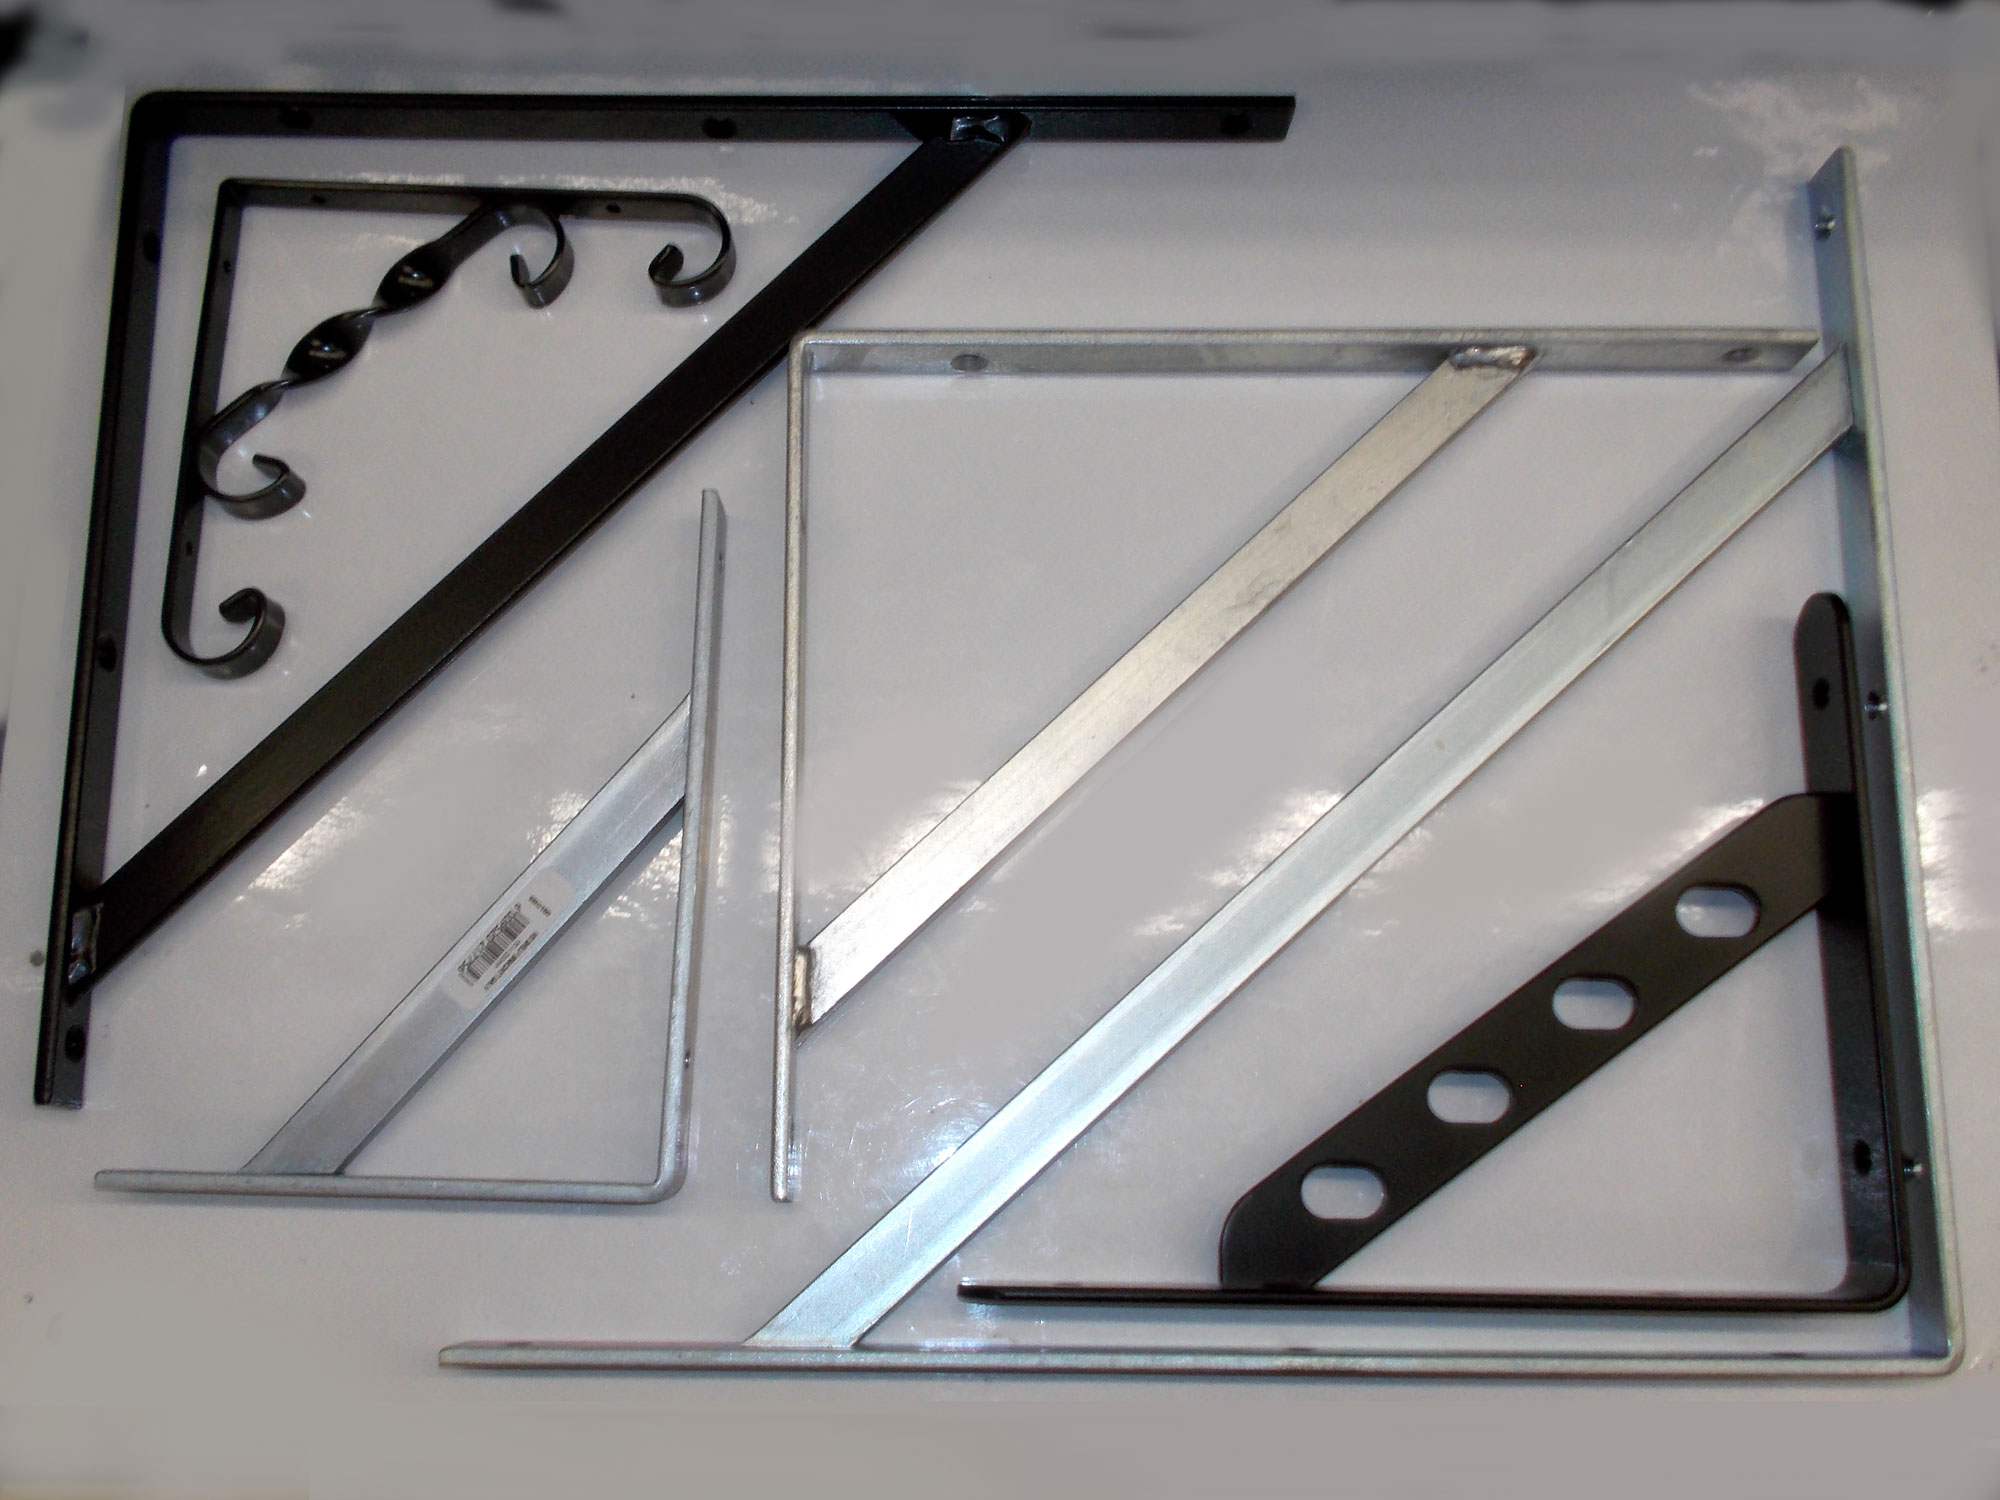
- These are the very common simple brackets ideal for workshops. Their load-carrying capacity is not perhaps a large as other types, but they are adequate for a wide range of purposes. They range in sizes from 125x150mm, 150x150mm, 150x200mm, 250x 300mm and so on.
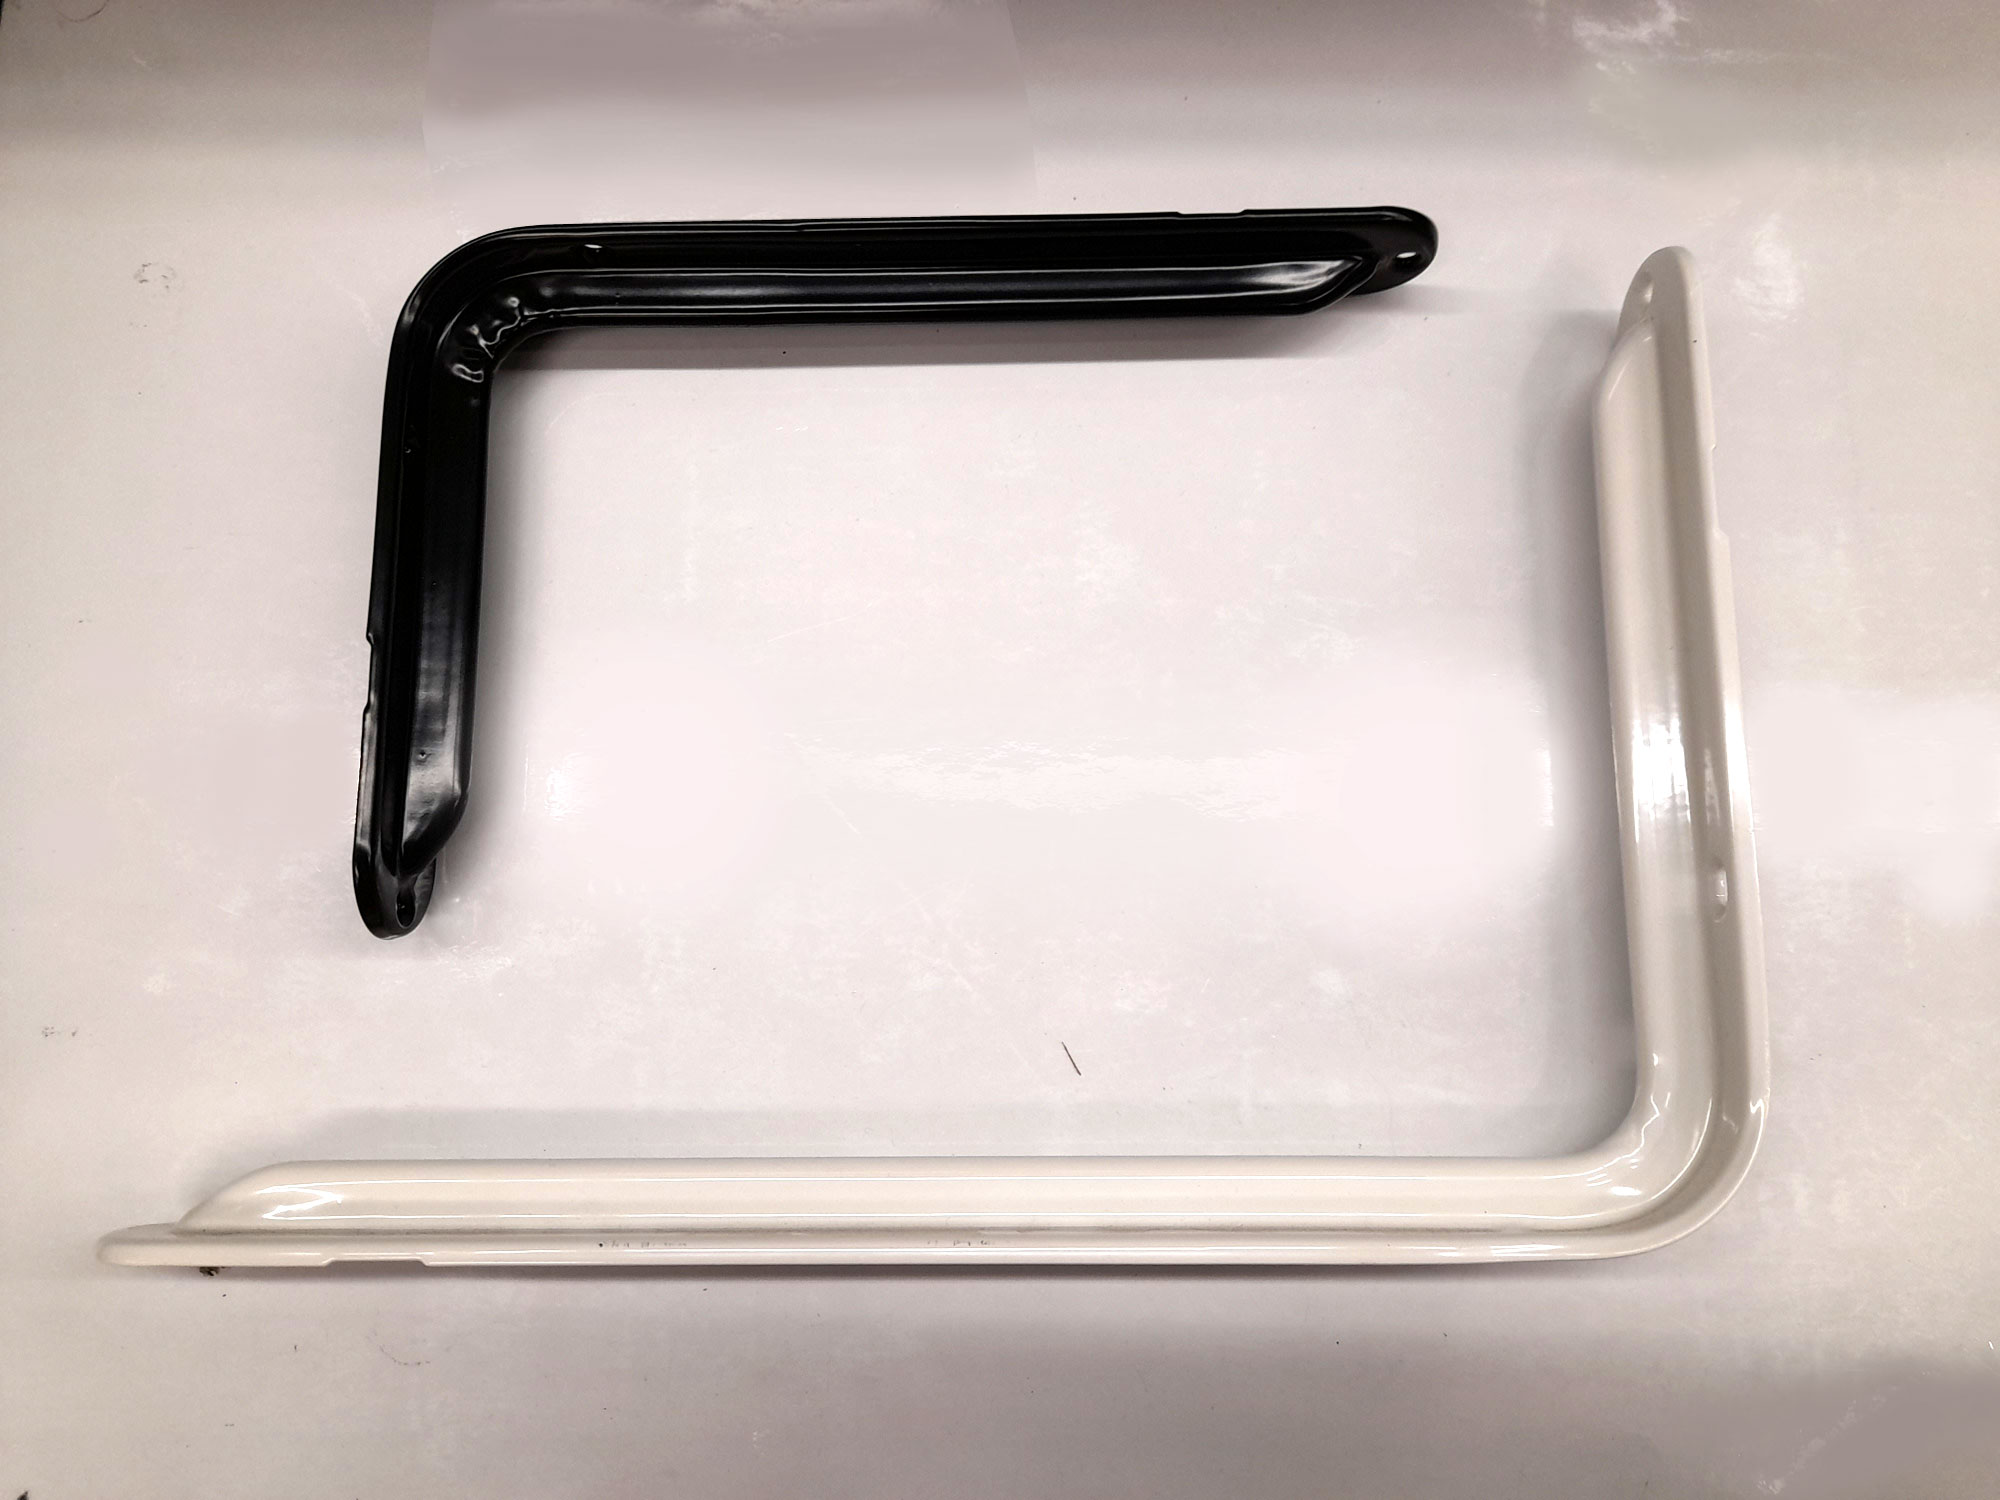
- Two brackets along similar lines, but made from thicker metal and with a constant chord ribbed profile for enhanced strength. The black bracket is 155x250mm and white bracket is 155x350mm
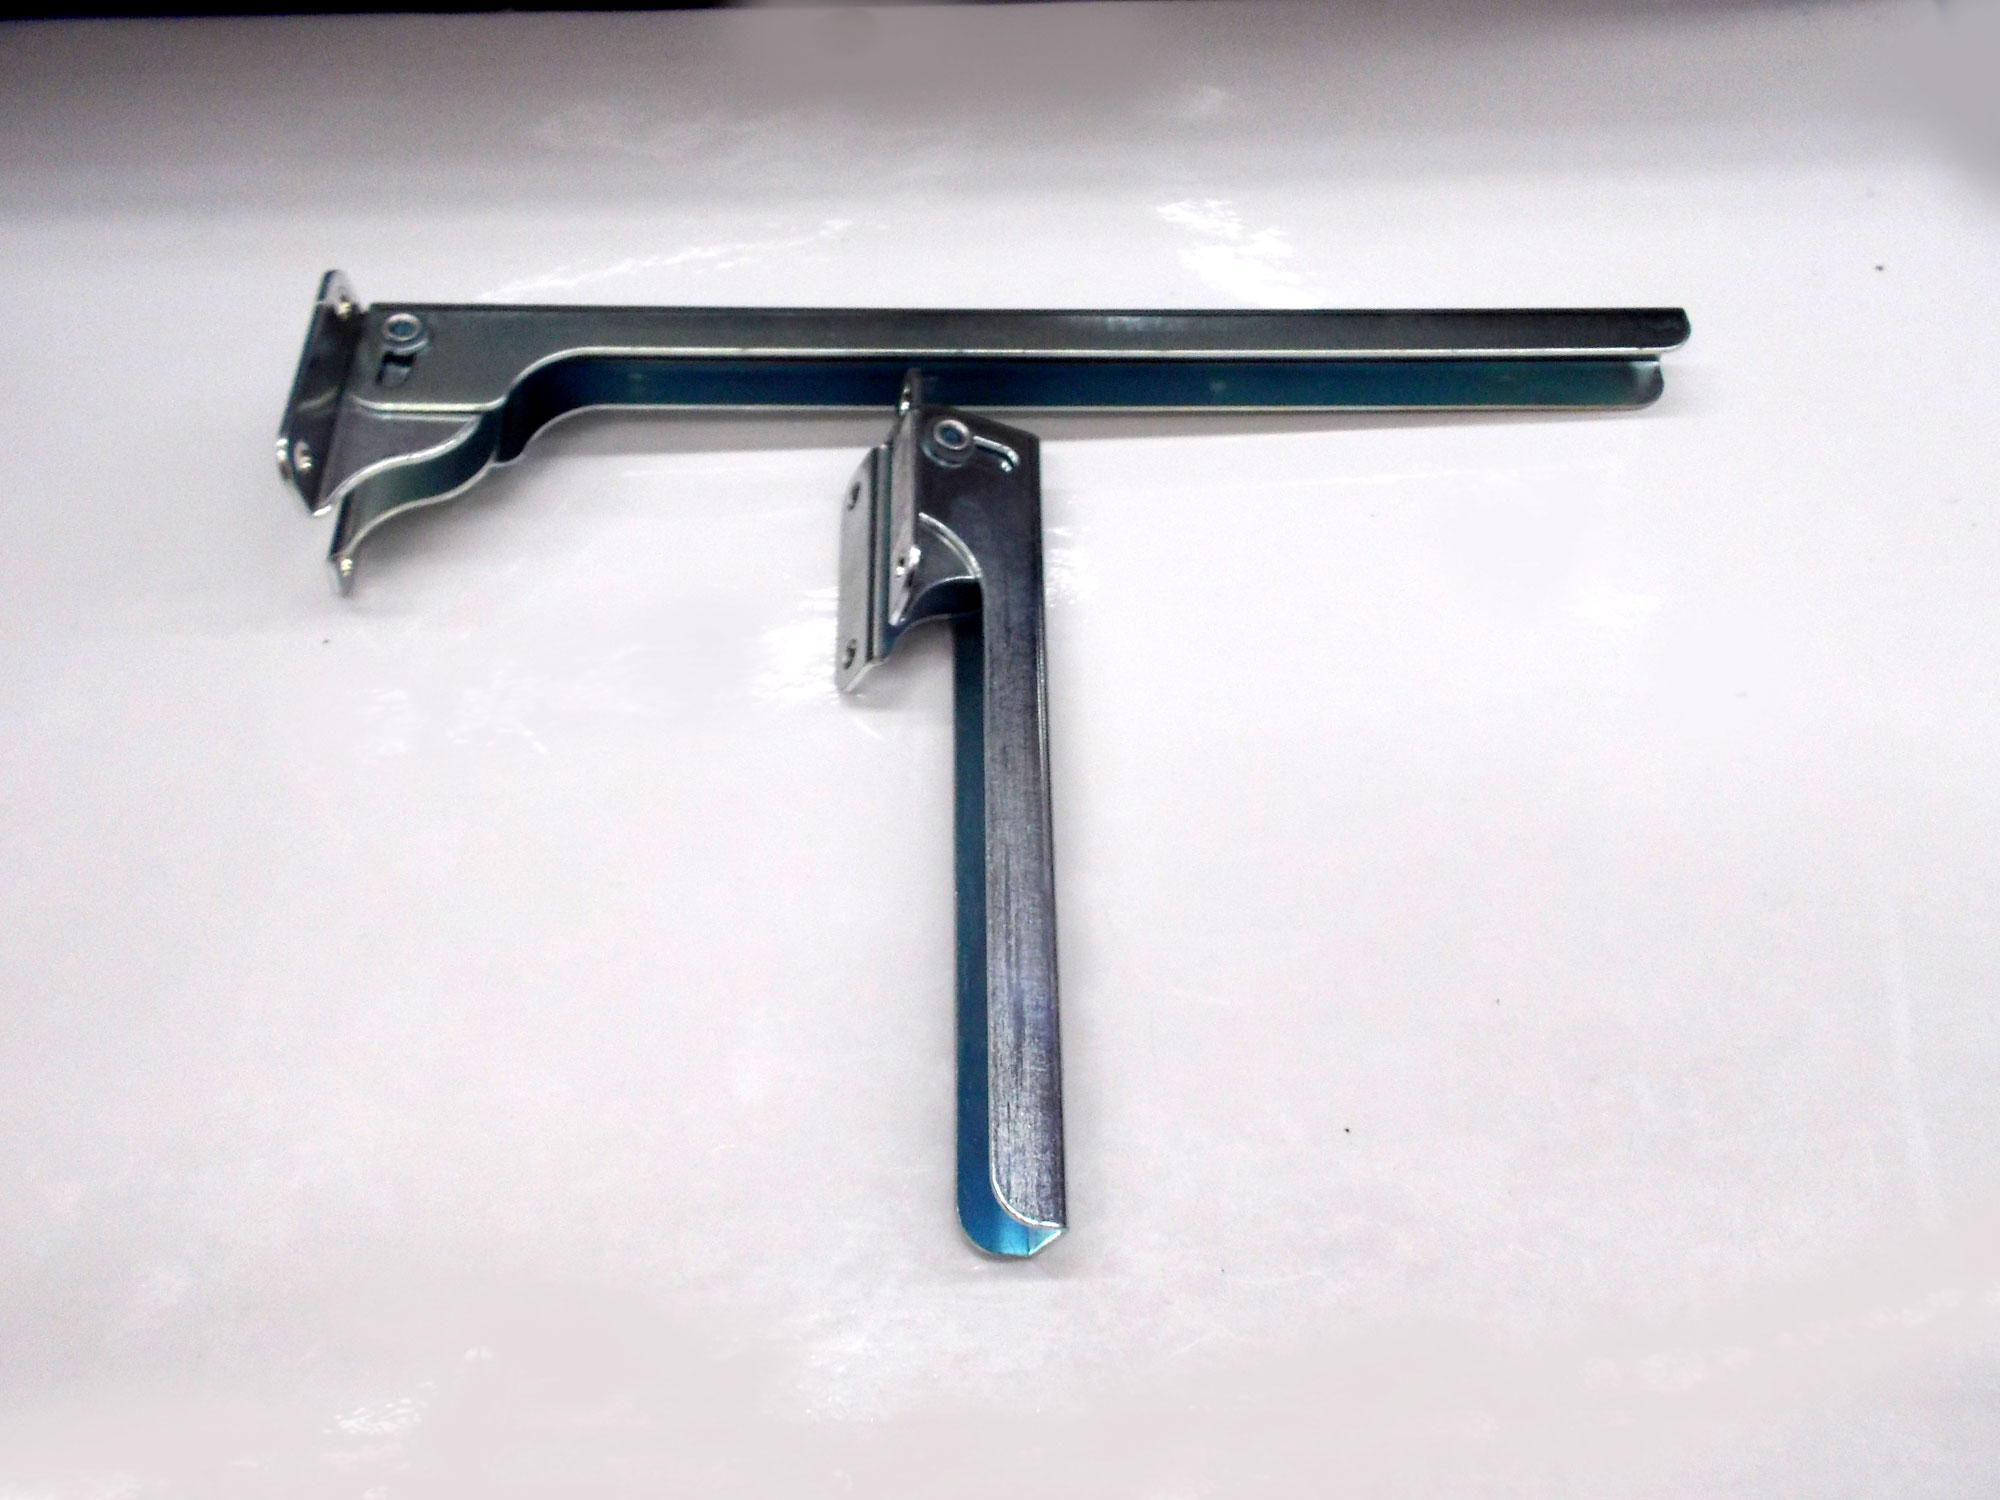
- Two sizes of 2-position folding brackets. The upper one is in the extended position, and the lower one is in the folded position. The base is firmly attached to the wall with four securing screws or bolts and the shelf is secured to the load arm. To raise the shelf it is lifted and lowered when horizontal. This engages pinions on each side of the load arm in slots in the bracket, locking the shelf in position. These brackets have two positions: extended at 0° horizontal or folded at 90°. This makes them ideal for situations in which a work surface or shelf is required at times, but needs to be folded away when not required.
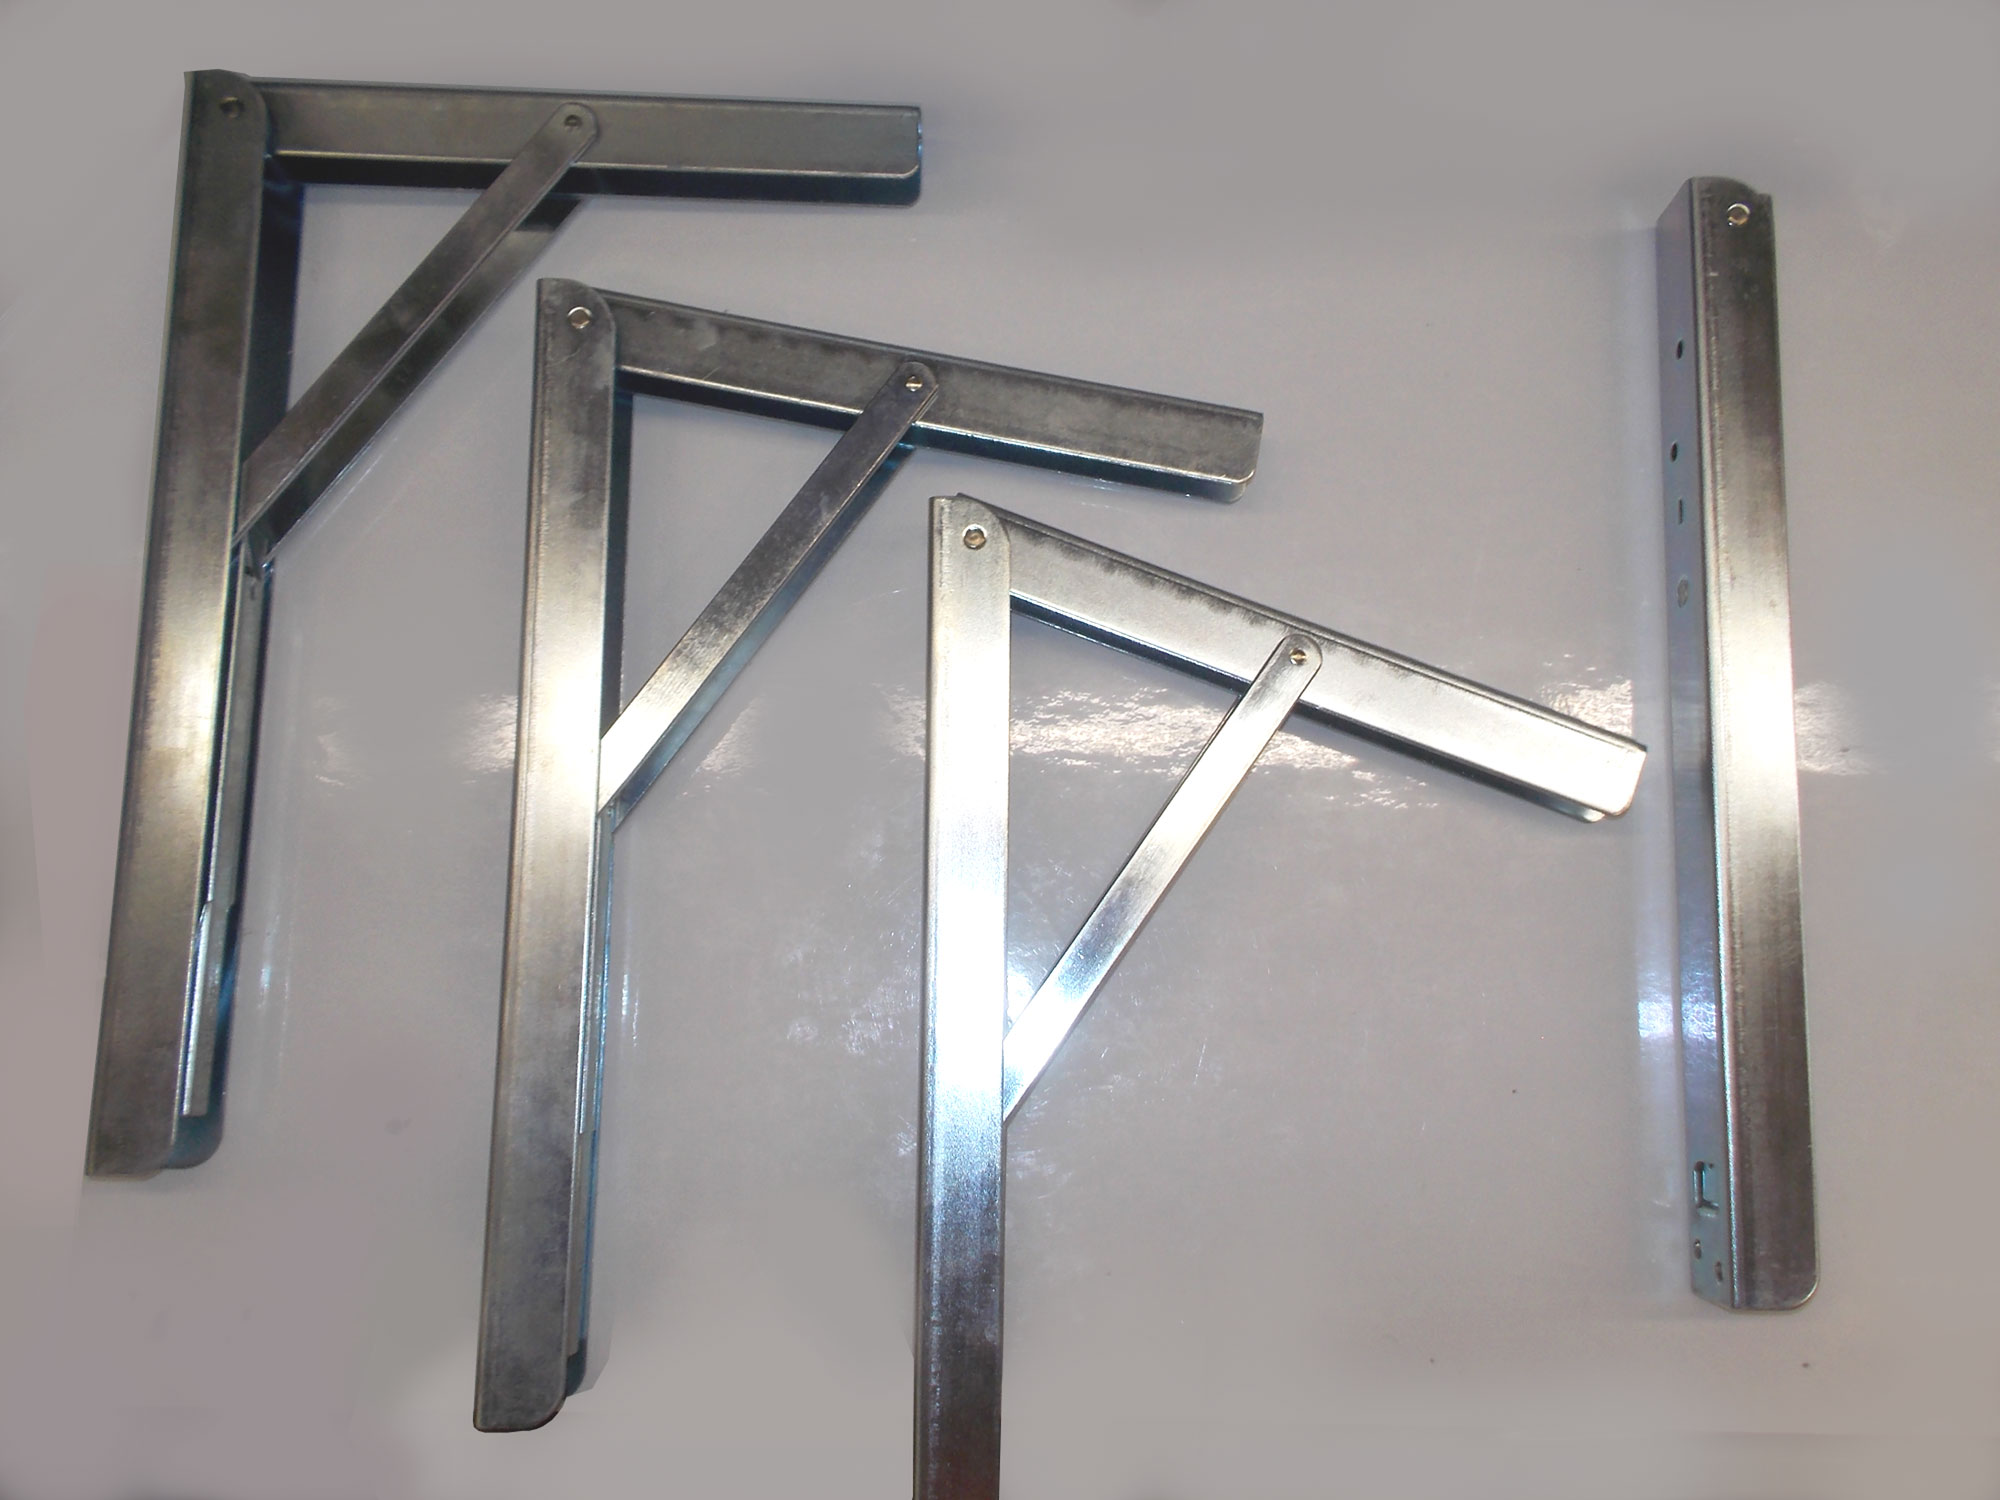
- These folding brackets have four positions for greater versatility… from 0° to 90°, with two intermediate positions making so the shelf can be used as level shelf, or at a slight angle for when reading a book, a deeper angle for use as a draughting work surface for use in a draughtsman’s office, for instance, and finally folded down flat and out of the way. The angle is adjusted by a release lever. As these brackets are braced, they can bear a significant load.
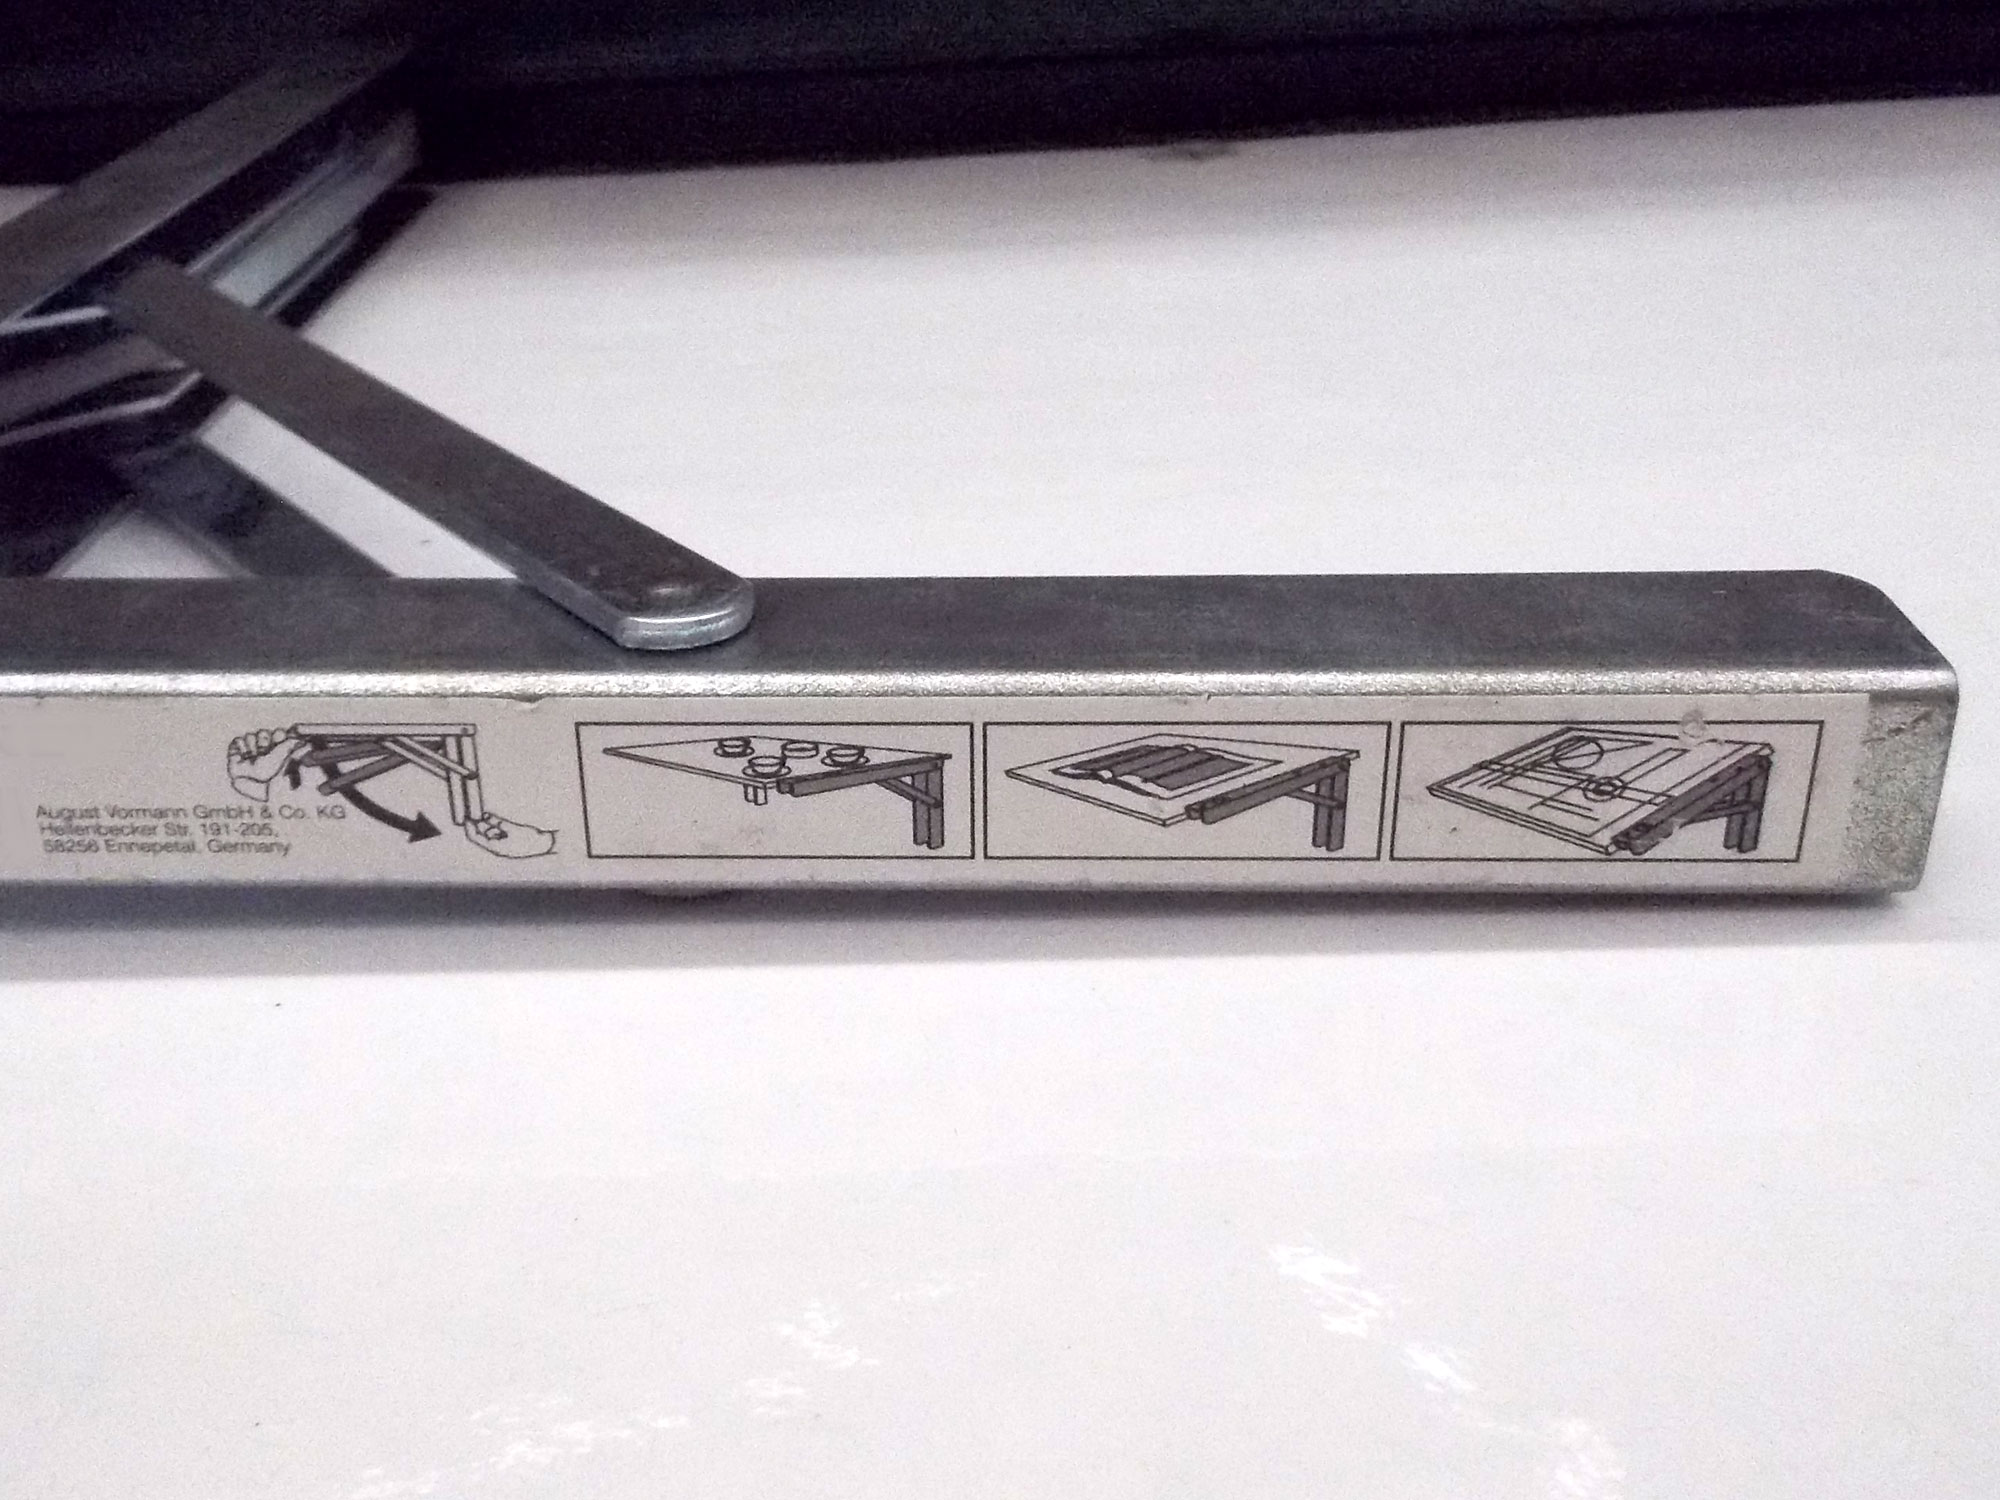
- The reverse surface on the brackets has a label showing their various possible uses. These brackets are available in the following sizes (shelf support x vertical mounting arm length): 200x120mm, 250x120mm, 300x170mm, 350x170mm, 400x170mm, 450x170mm, and 500x170mm.
- These laminated wood brackets are more decorative and would not be out of place in a sitting room, study or kitchen.

- Three examples of the brackets used with the double slotted bands such as those used in the simple project at the beginning of this feature, plus two 495mm slotted bands at the top.
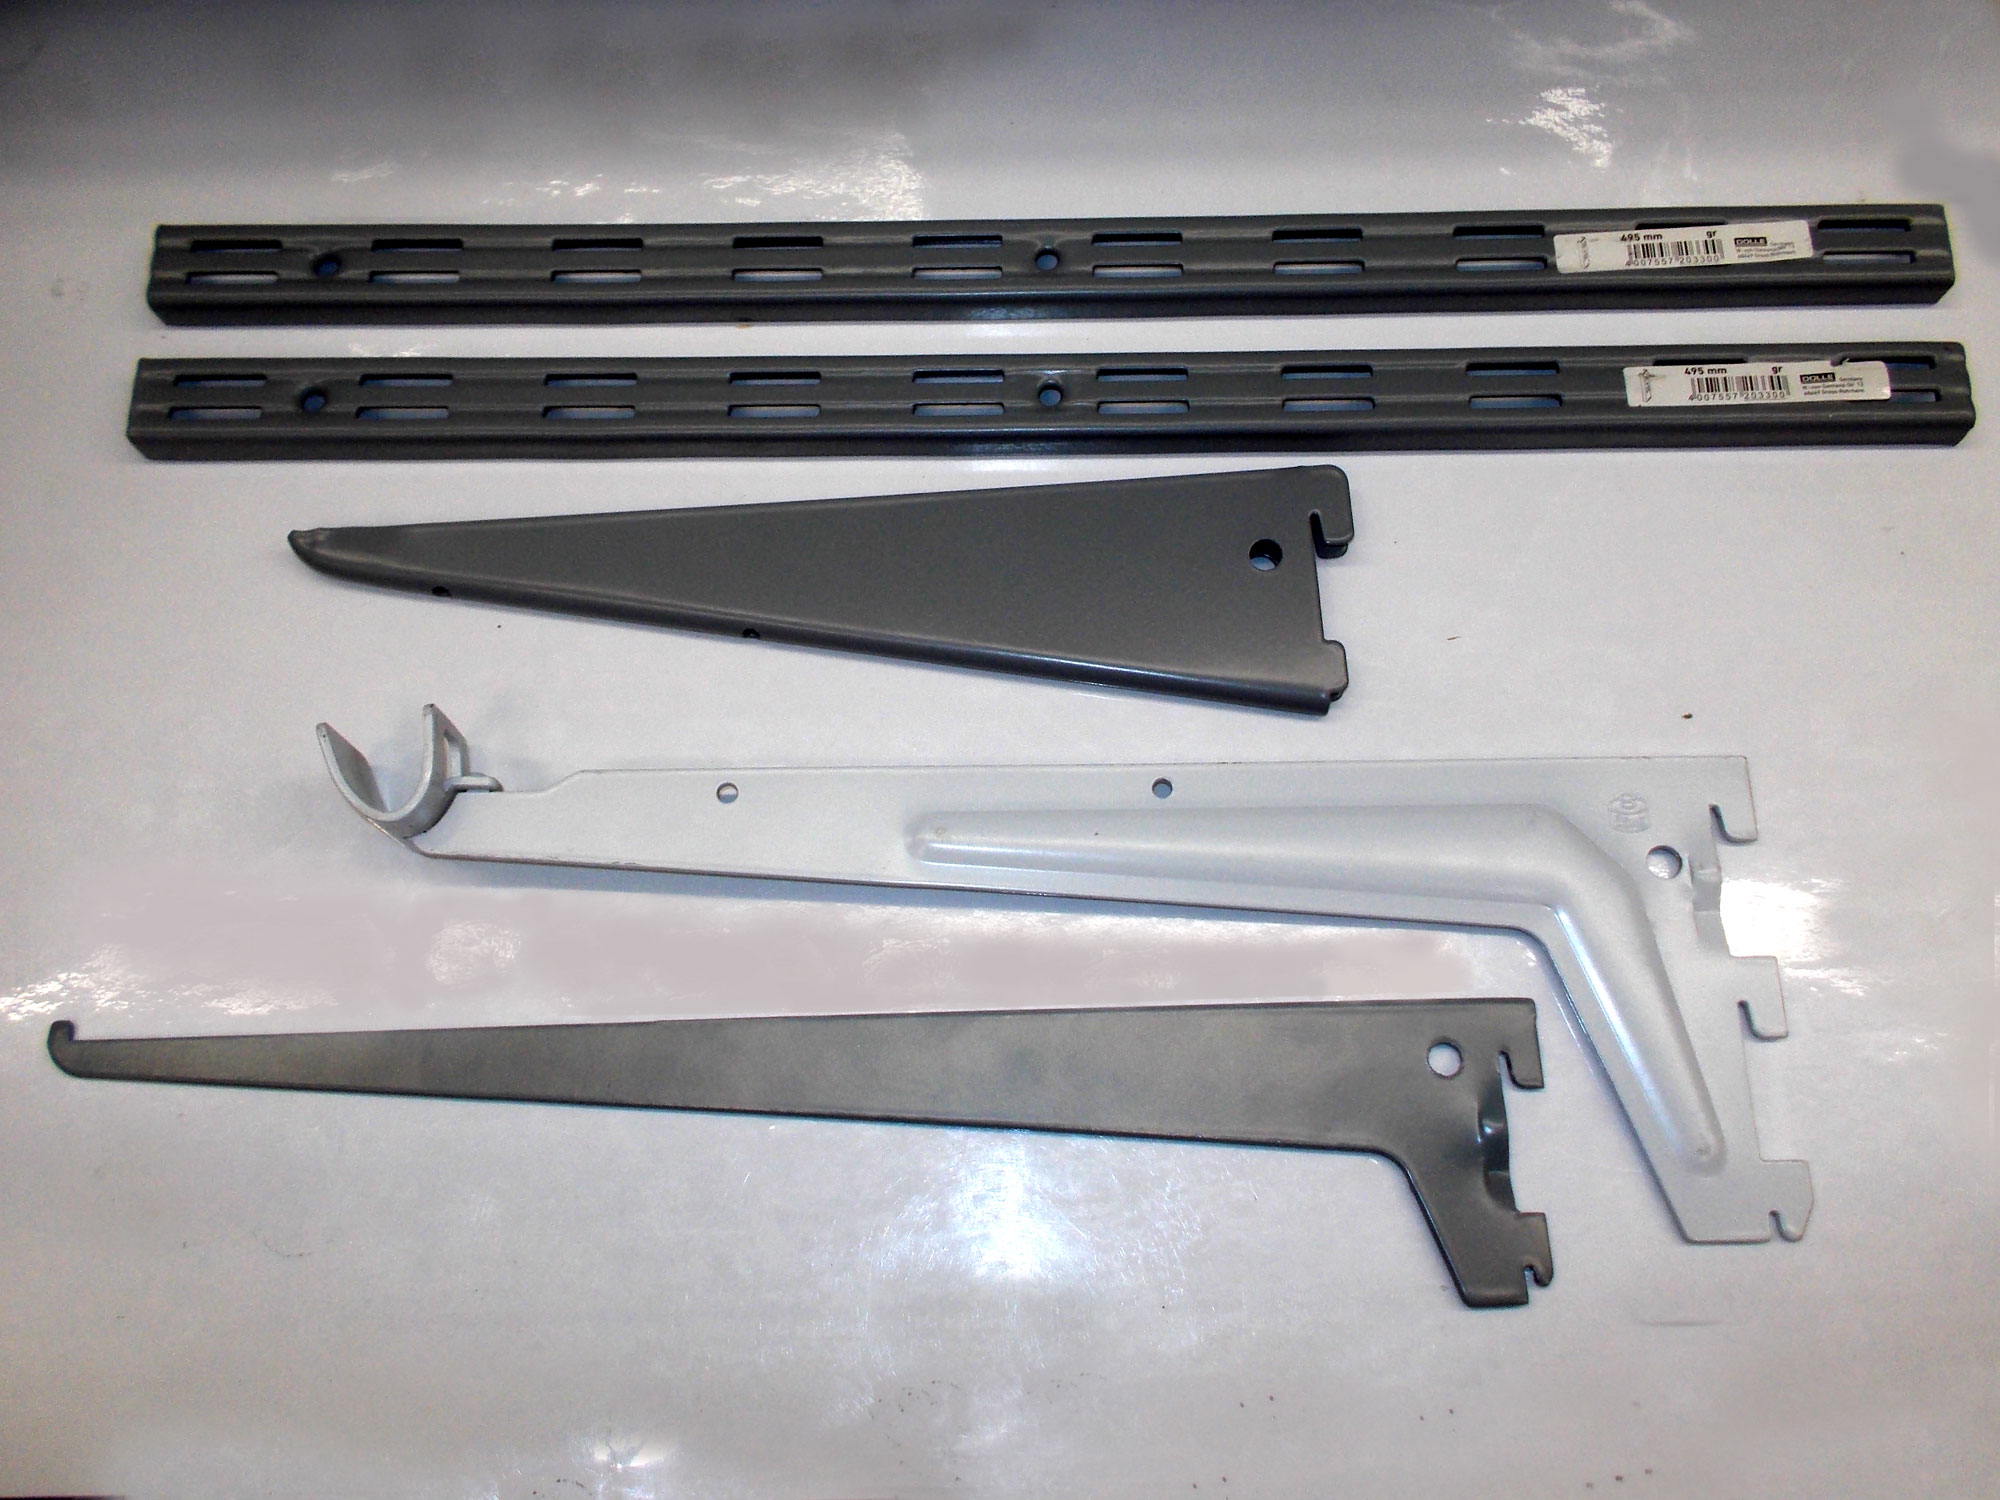
- This is a double-slotted bracket – the same as the one just above – for a more decorative and stronger result; even the single leaf brackets can take a considerable load, however.
- This bracket (the centre one in the image above) can be used not only as a shelf bracket in its own right, but also as a mount for a hanging rail for clothing or other items.
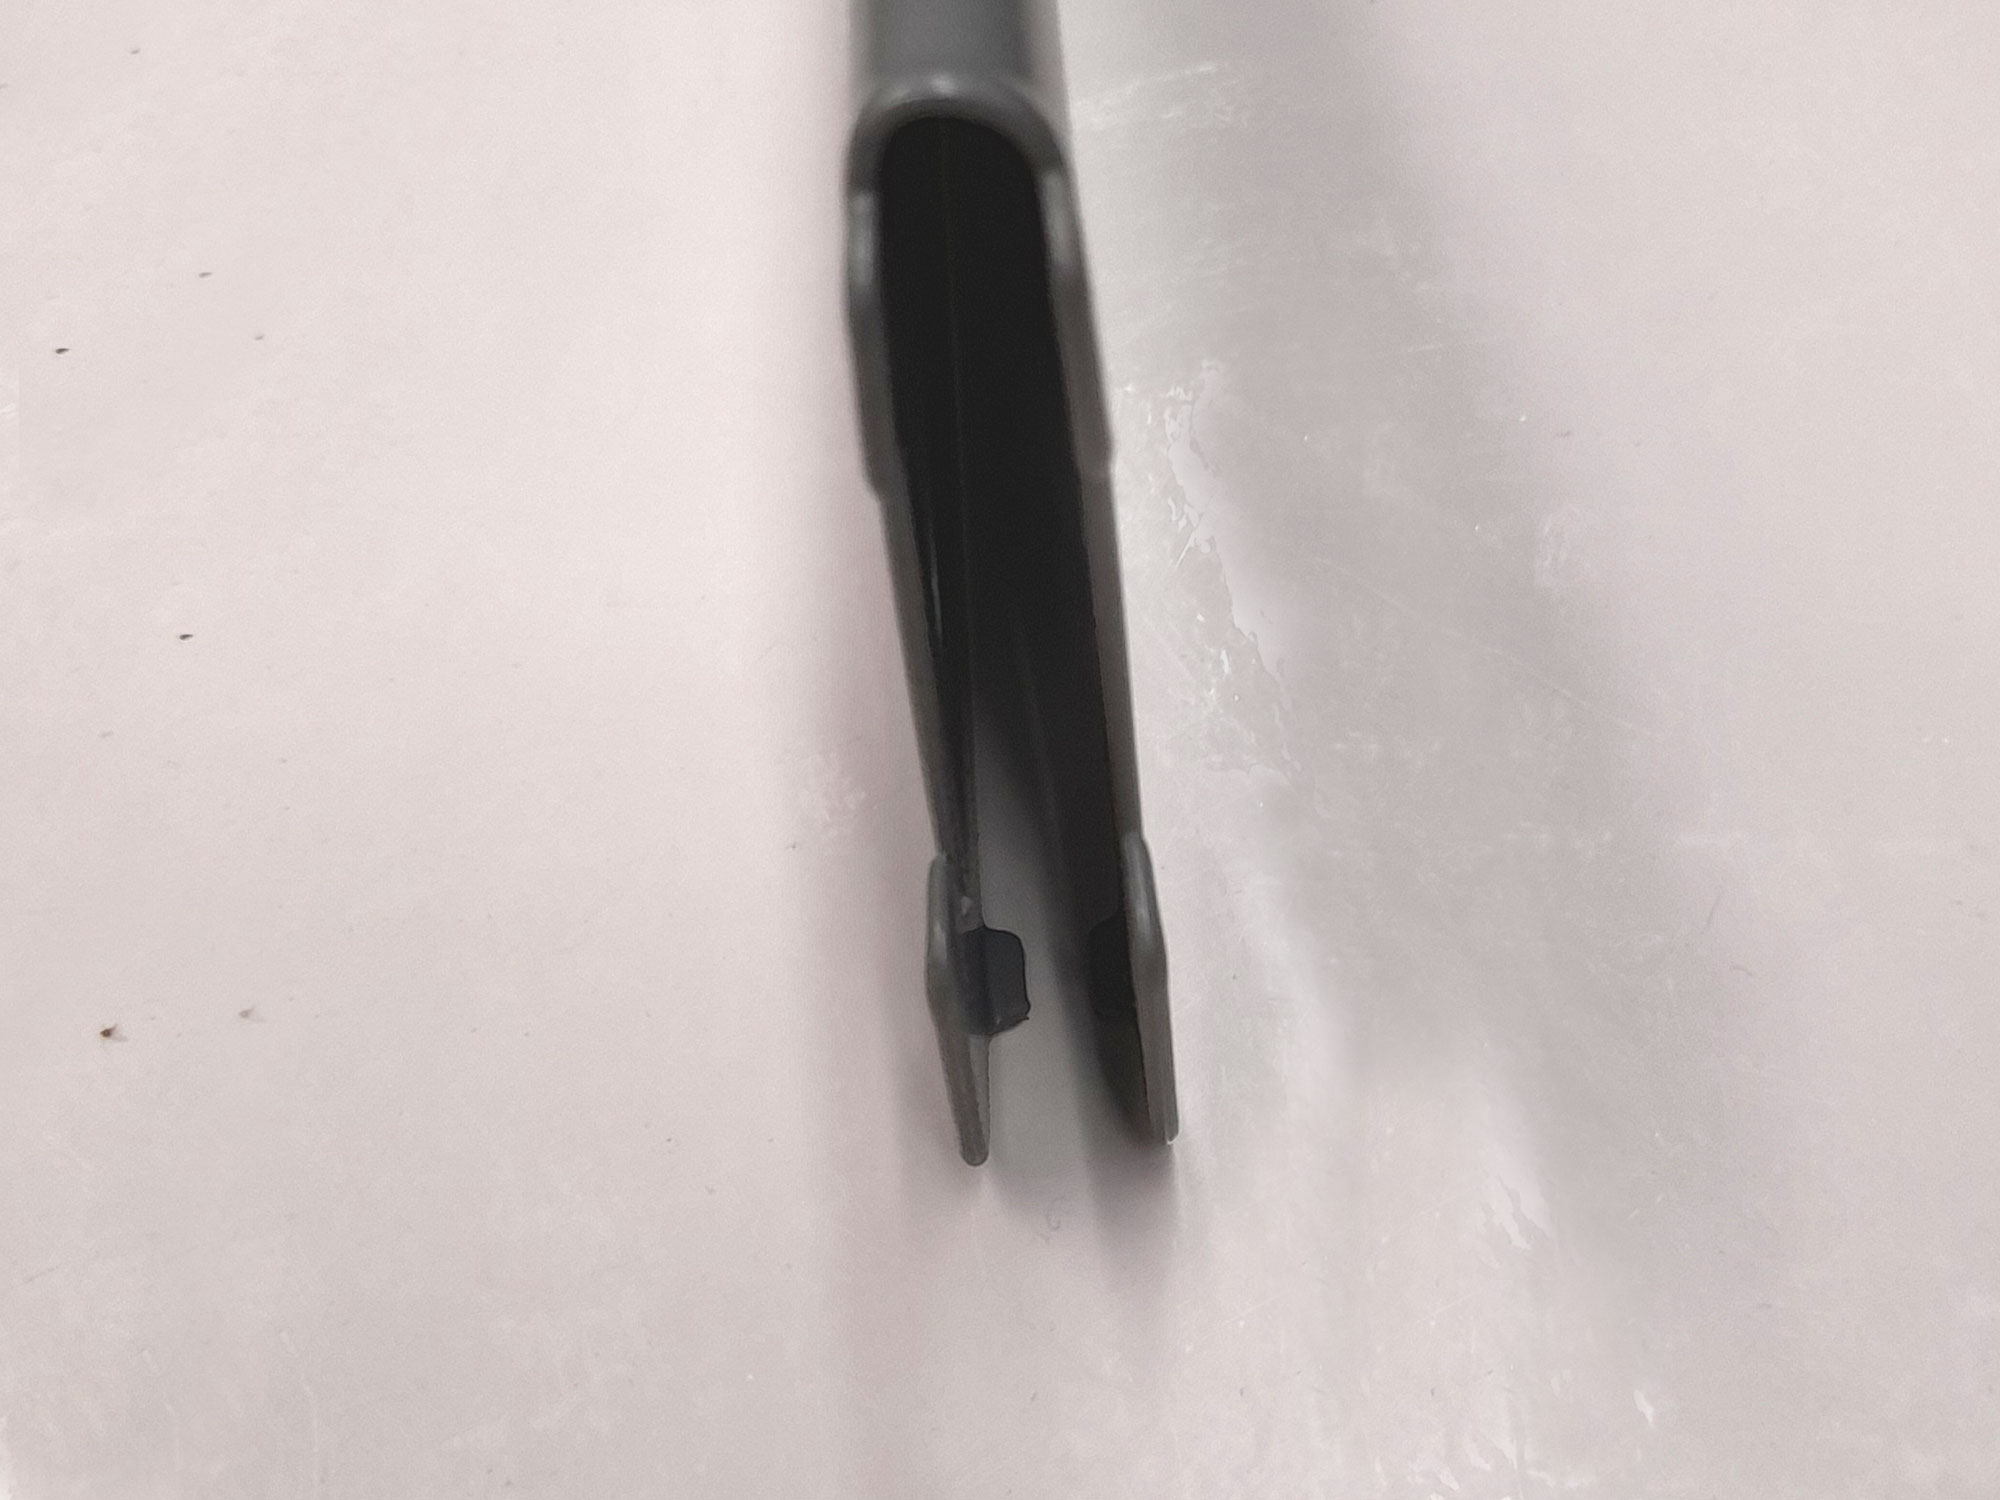
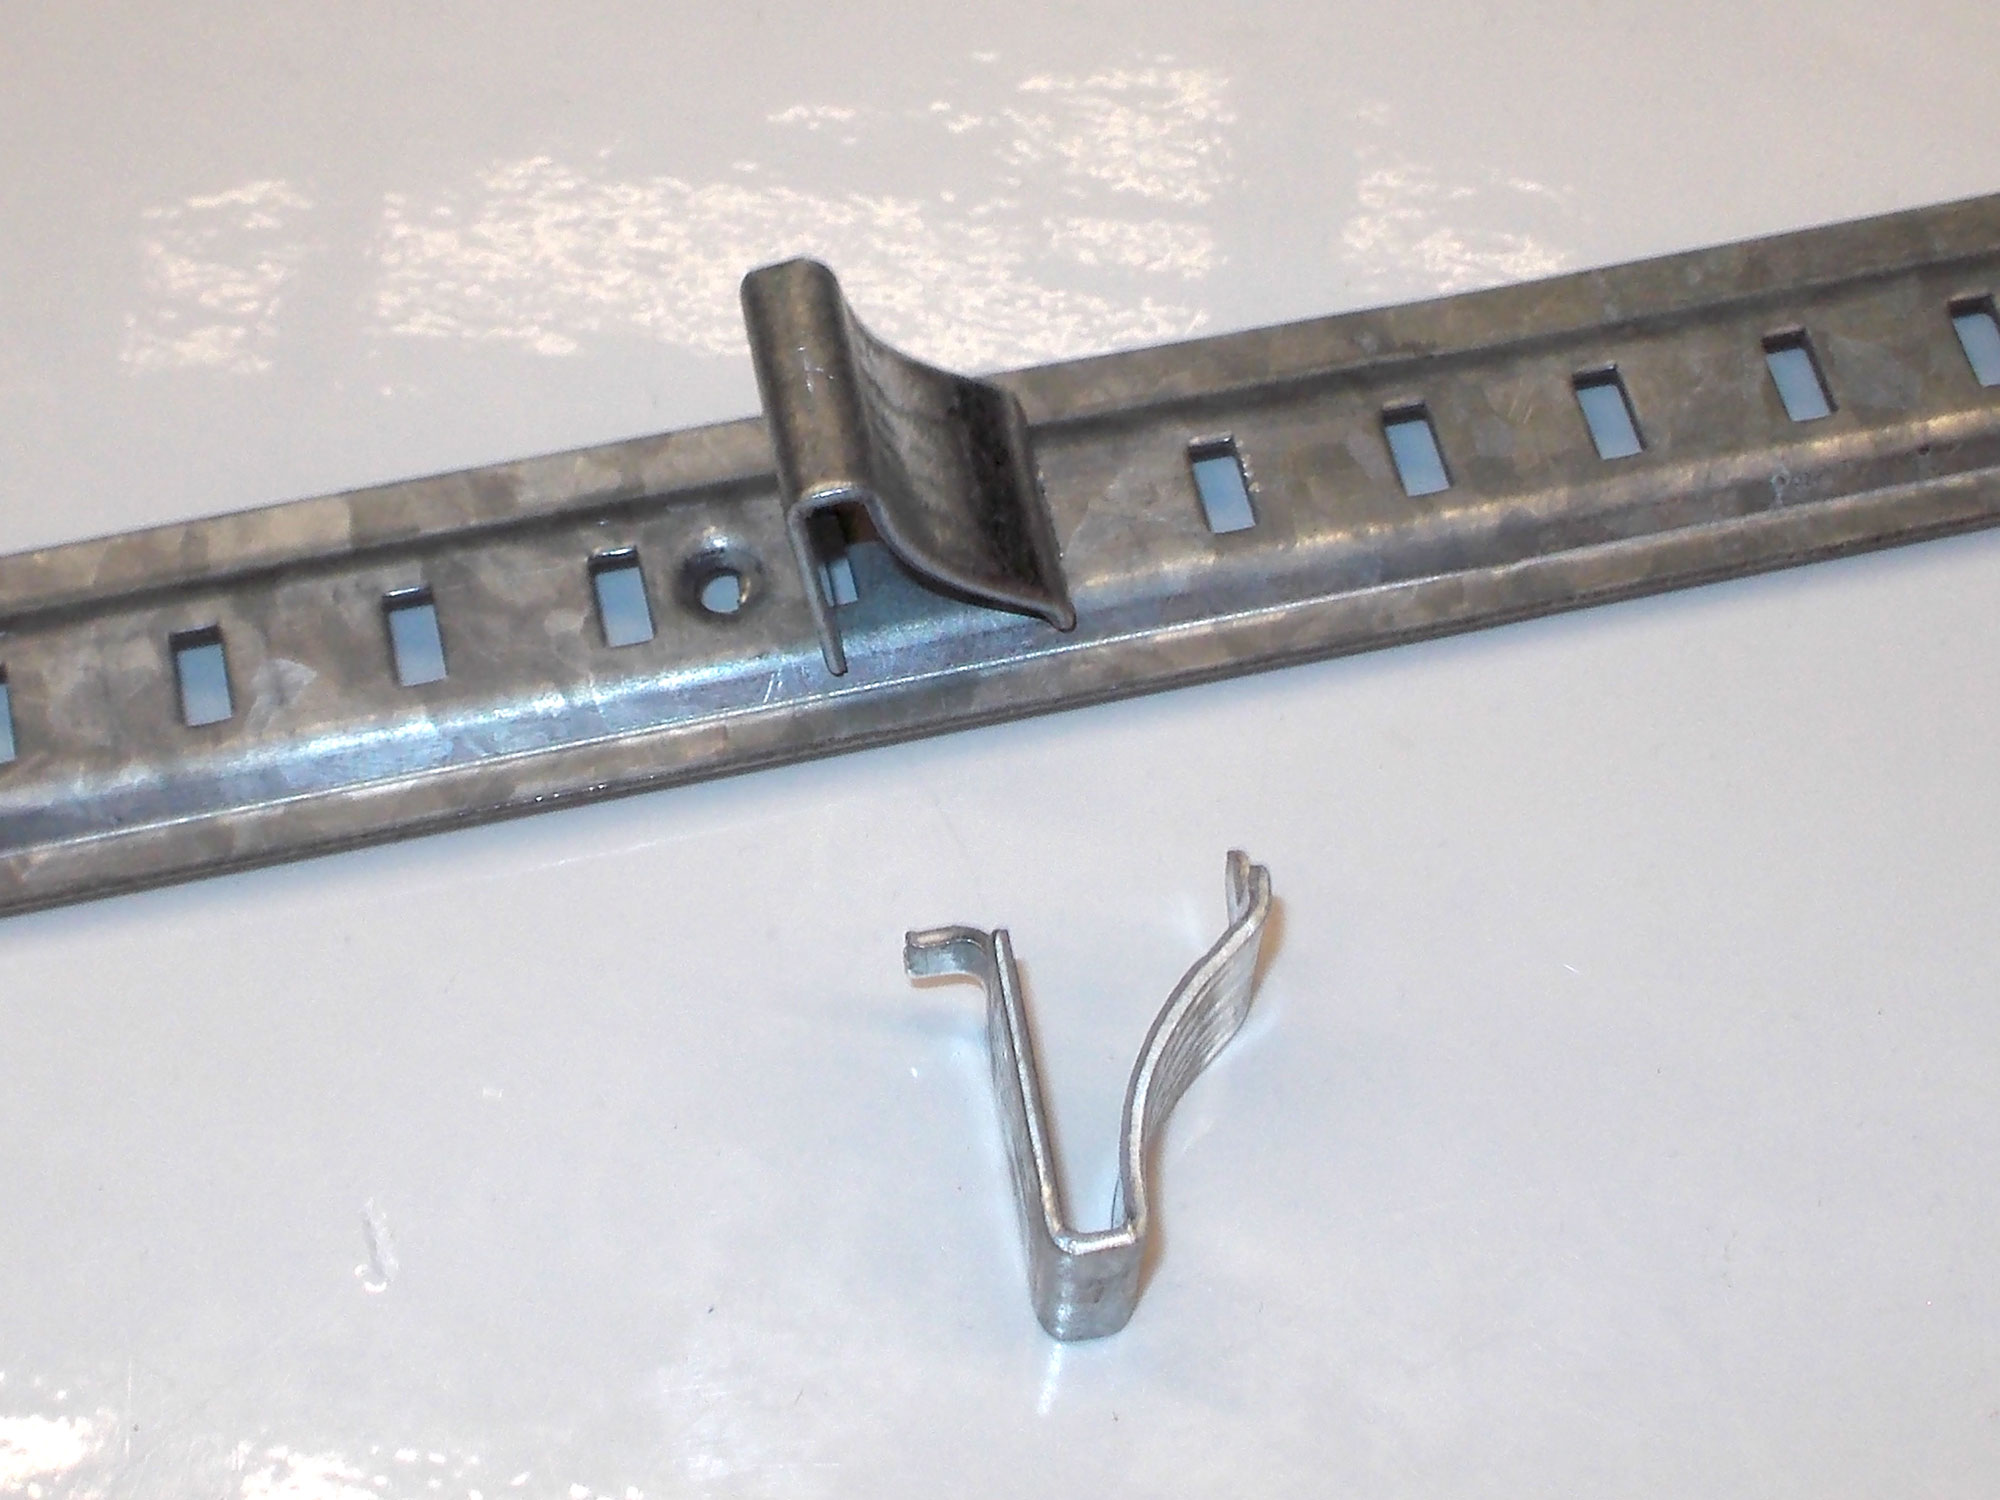
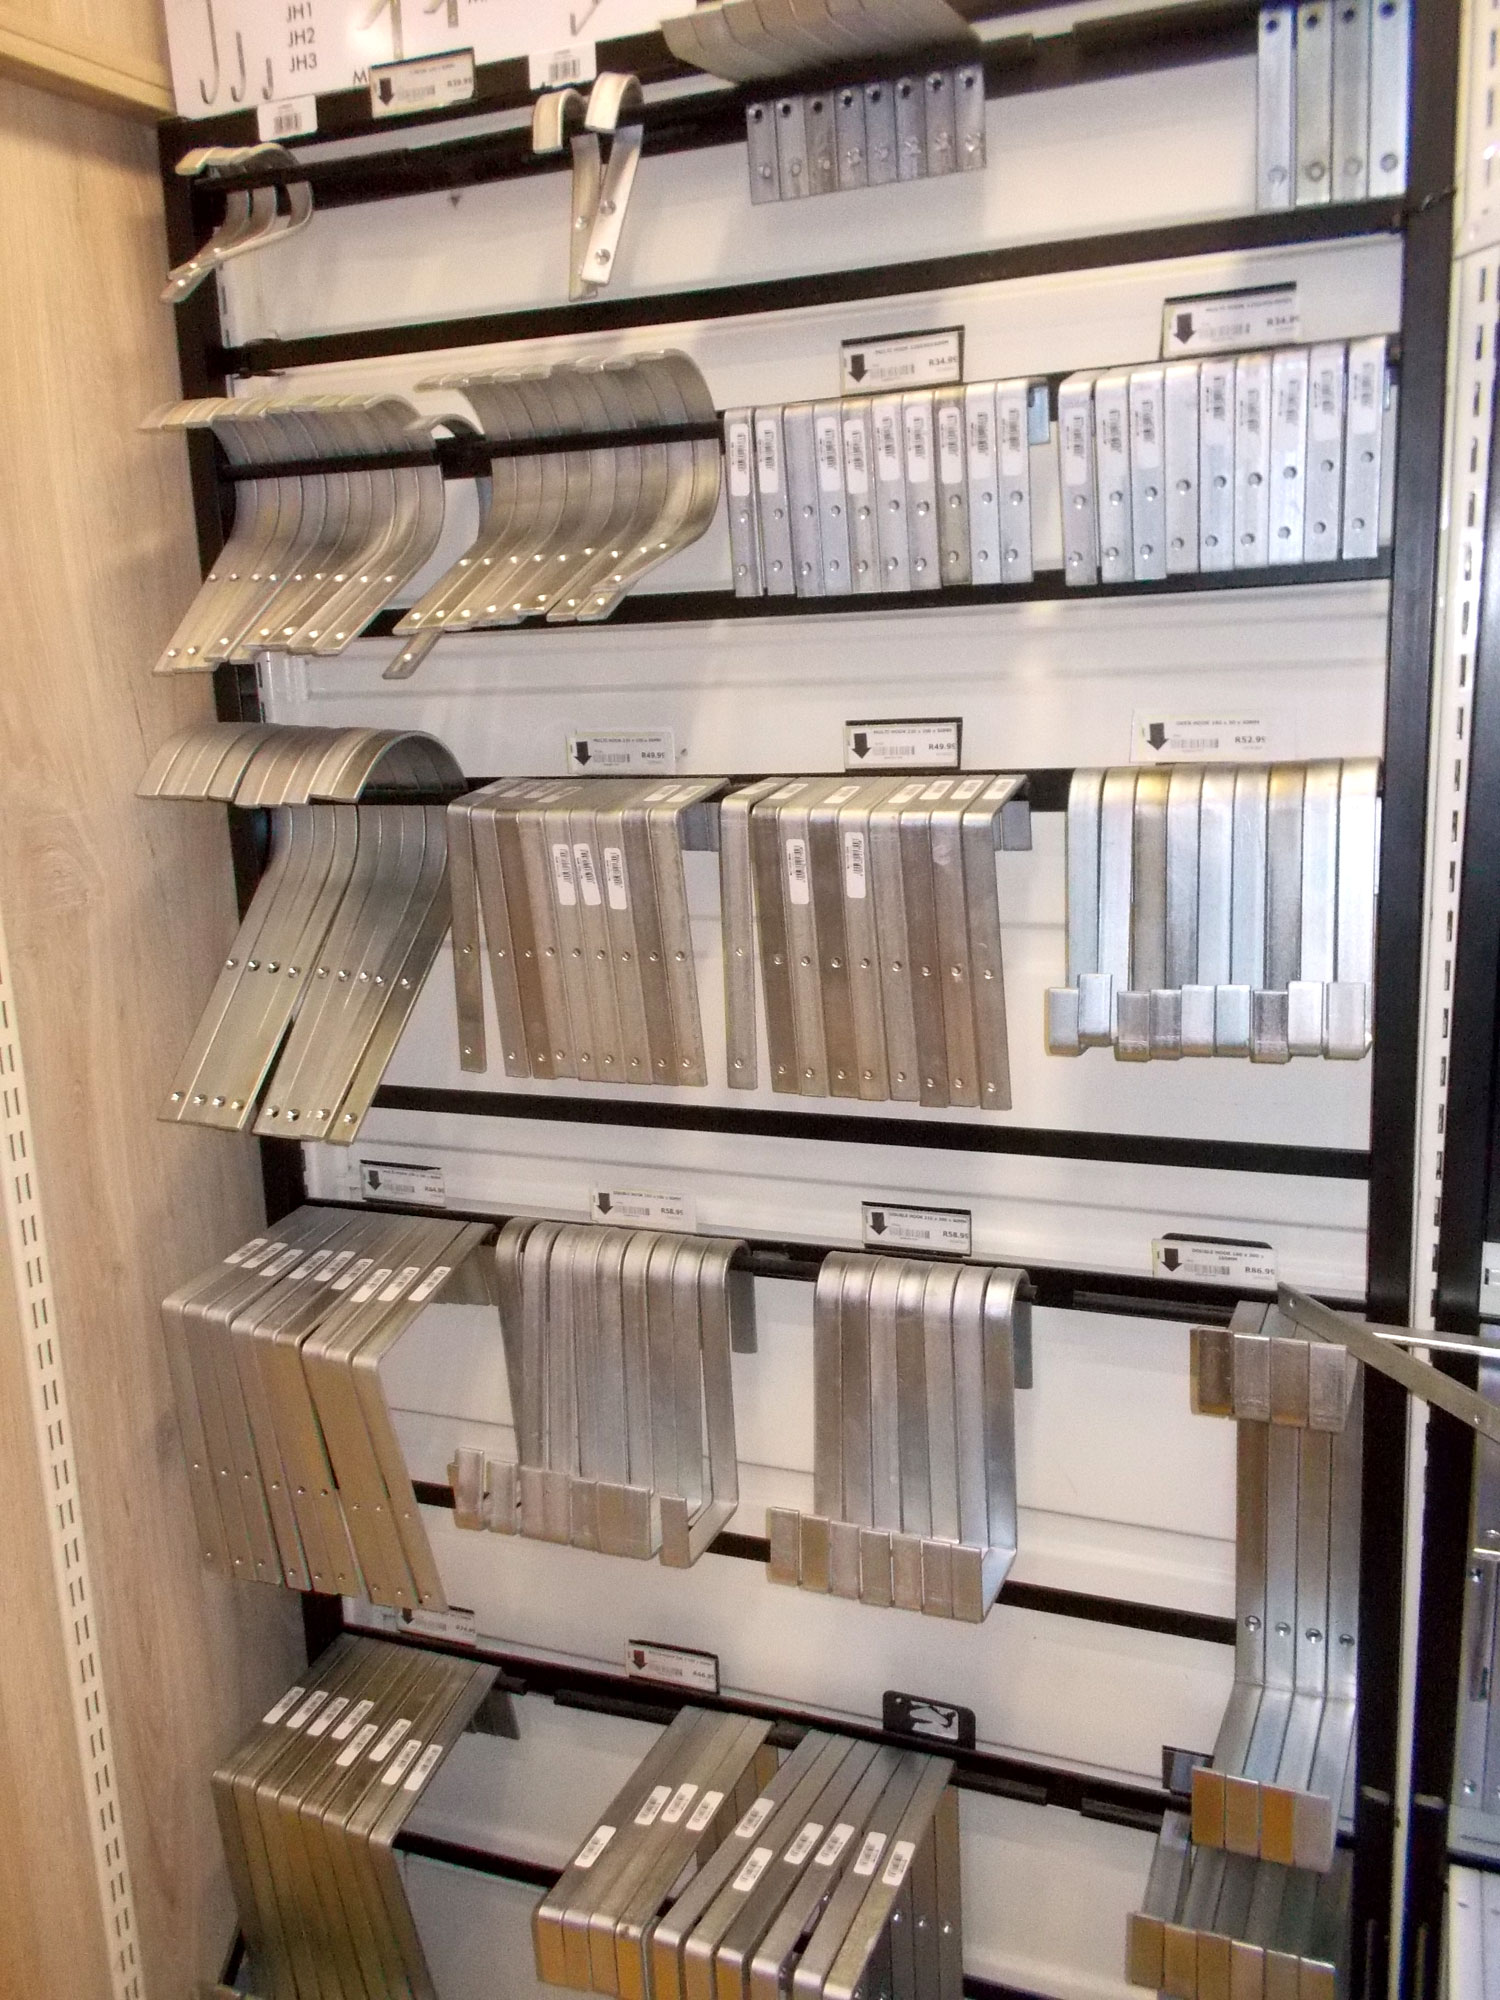
- Shelf brackets with a difference from the others shown here… these are designed for use in cabinets. The mounting bands are attached (two bands per side) to the inner sides of the cabinet and the springy shelf supports are clipped into position in their slots. This type of shelf mounting system allows quite a bit of latitude as to shelf spacing as the slots are positioned in increments of 10mm or so.
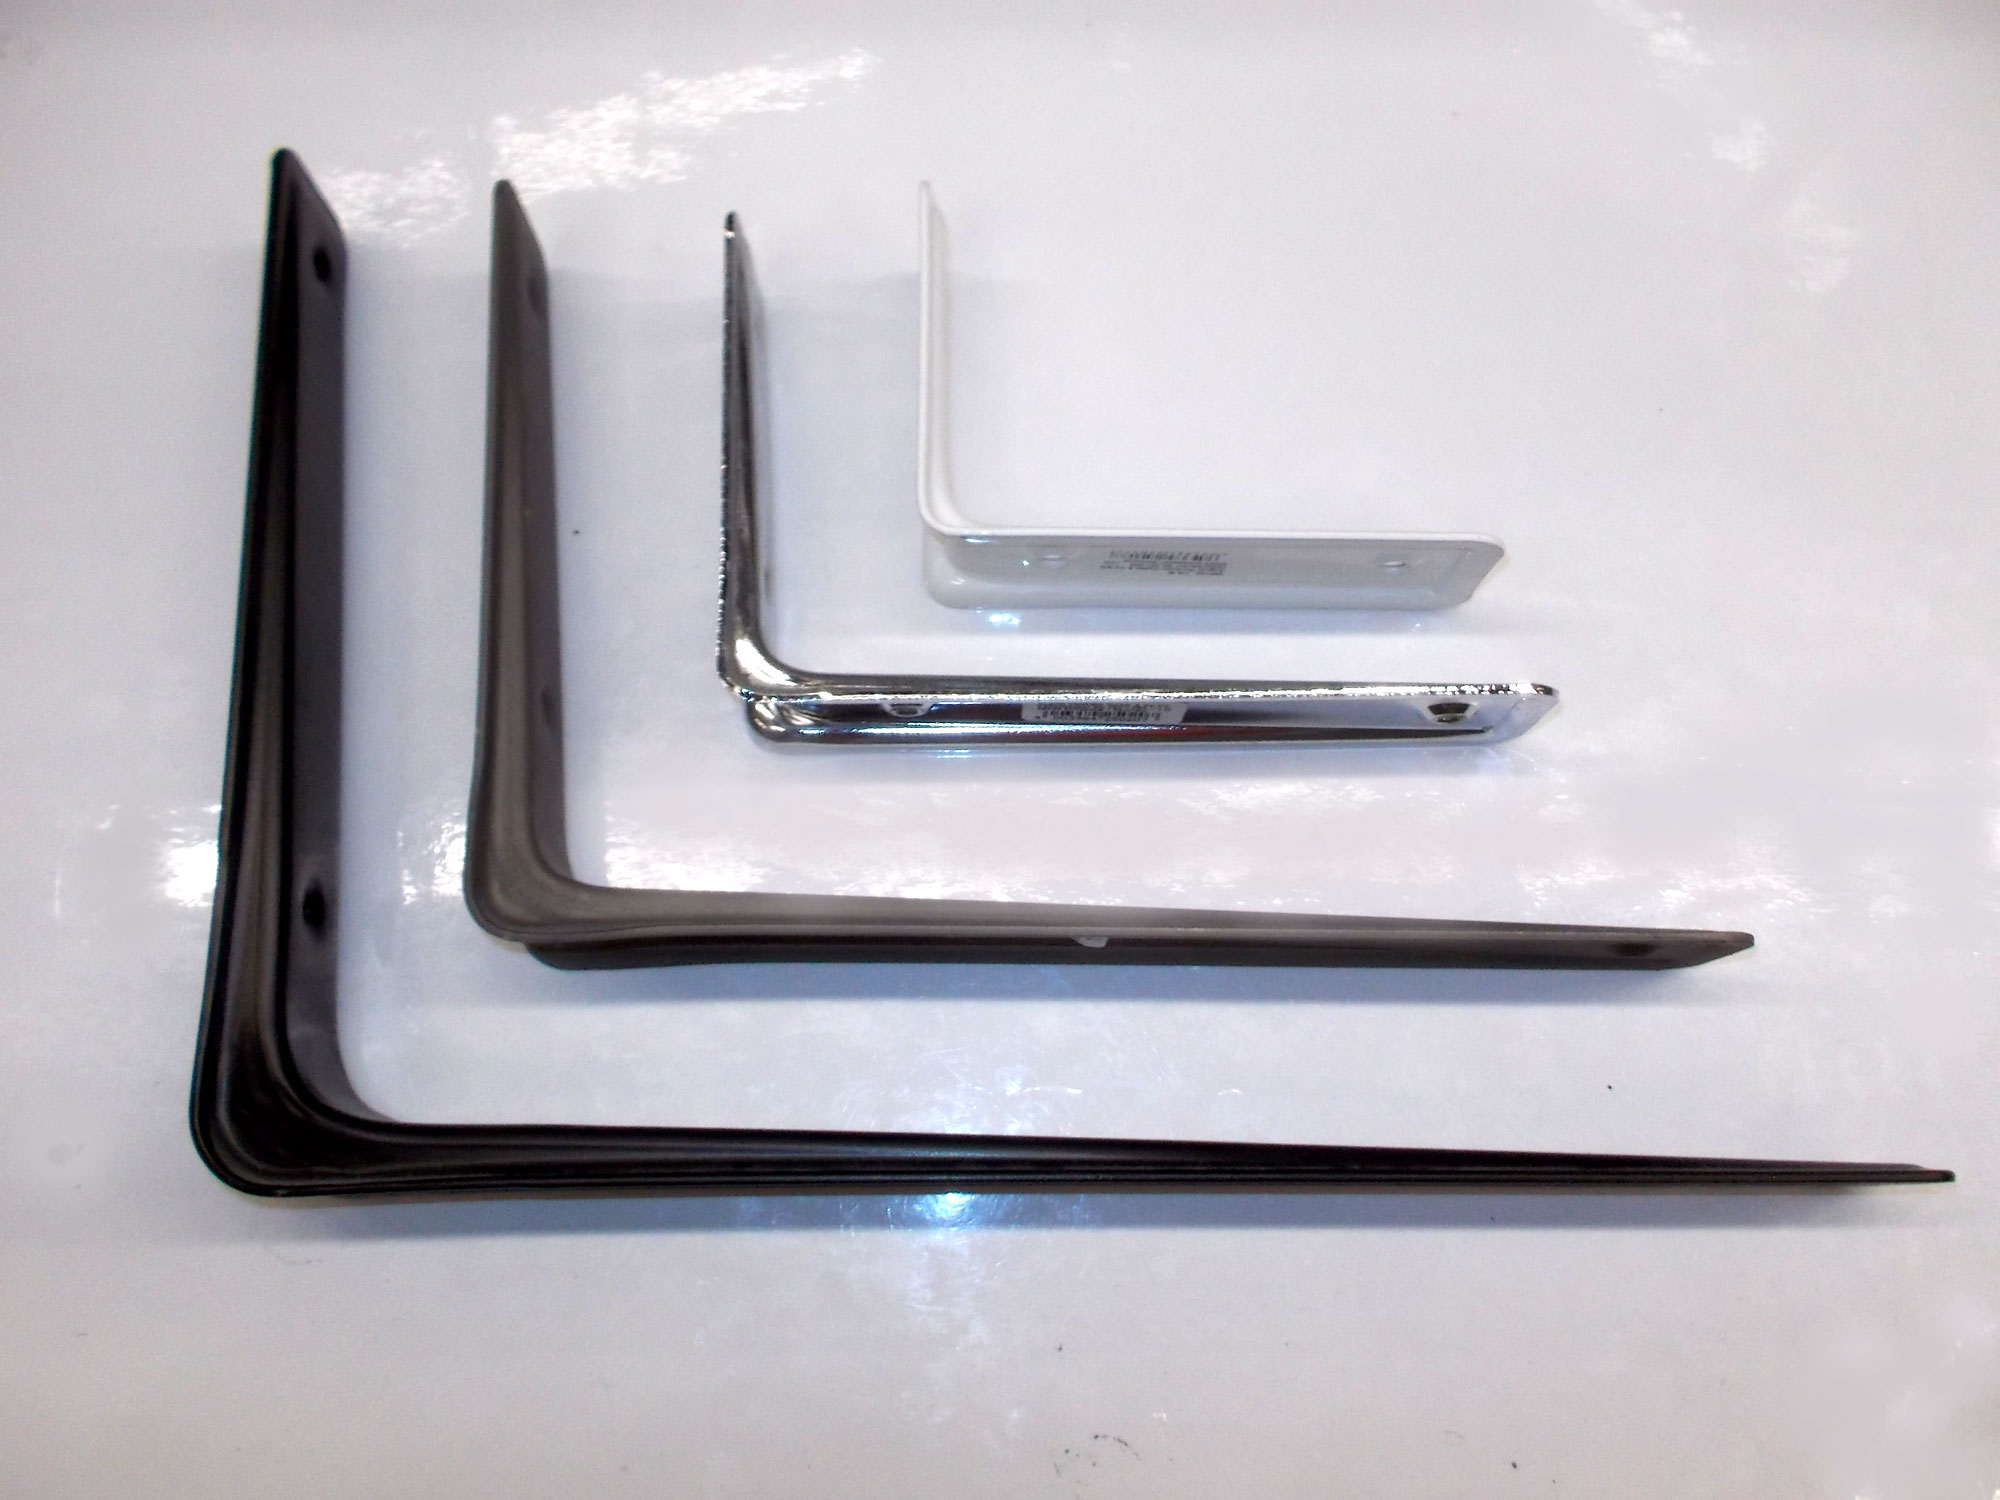
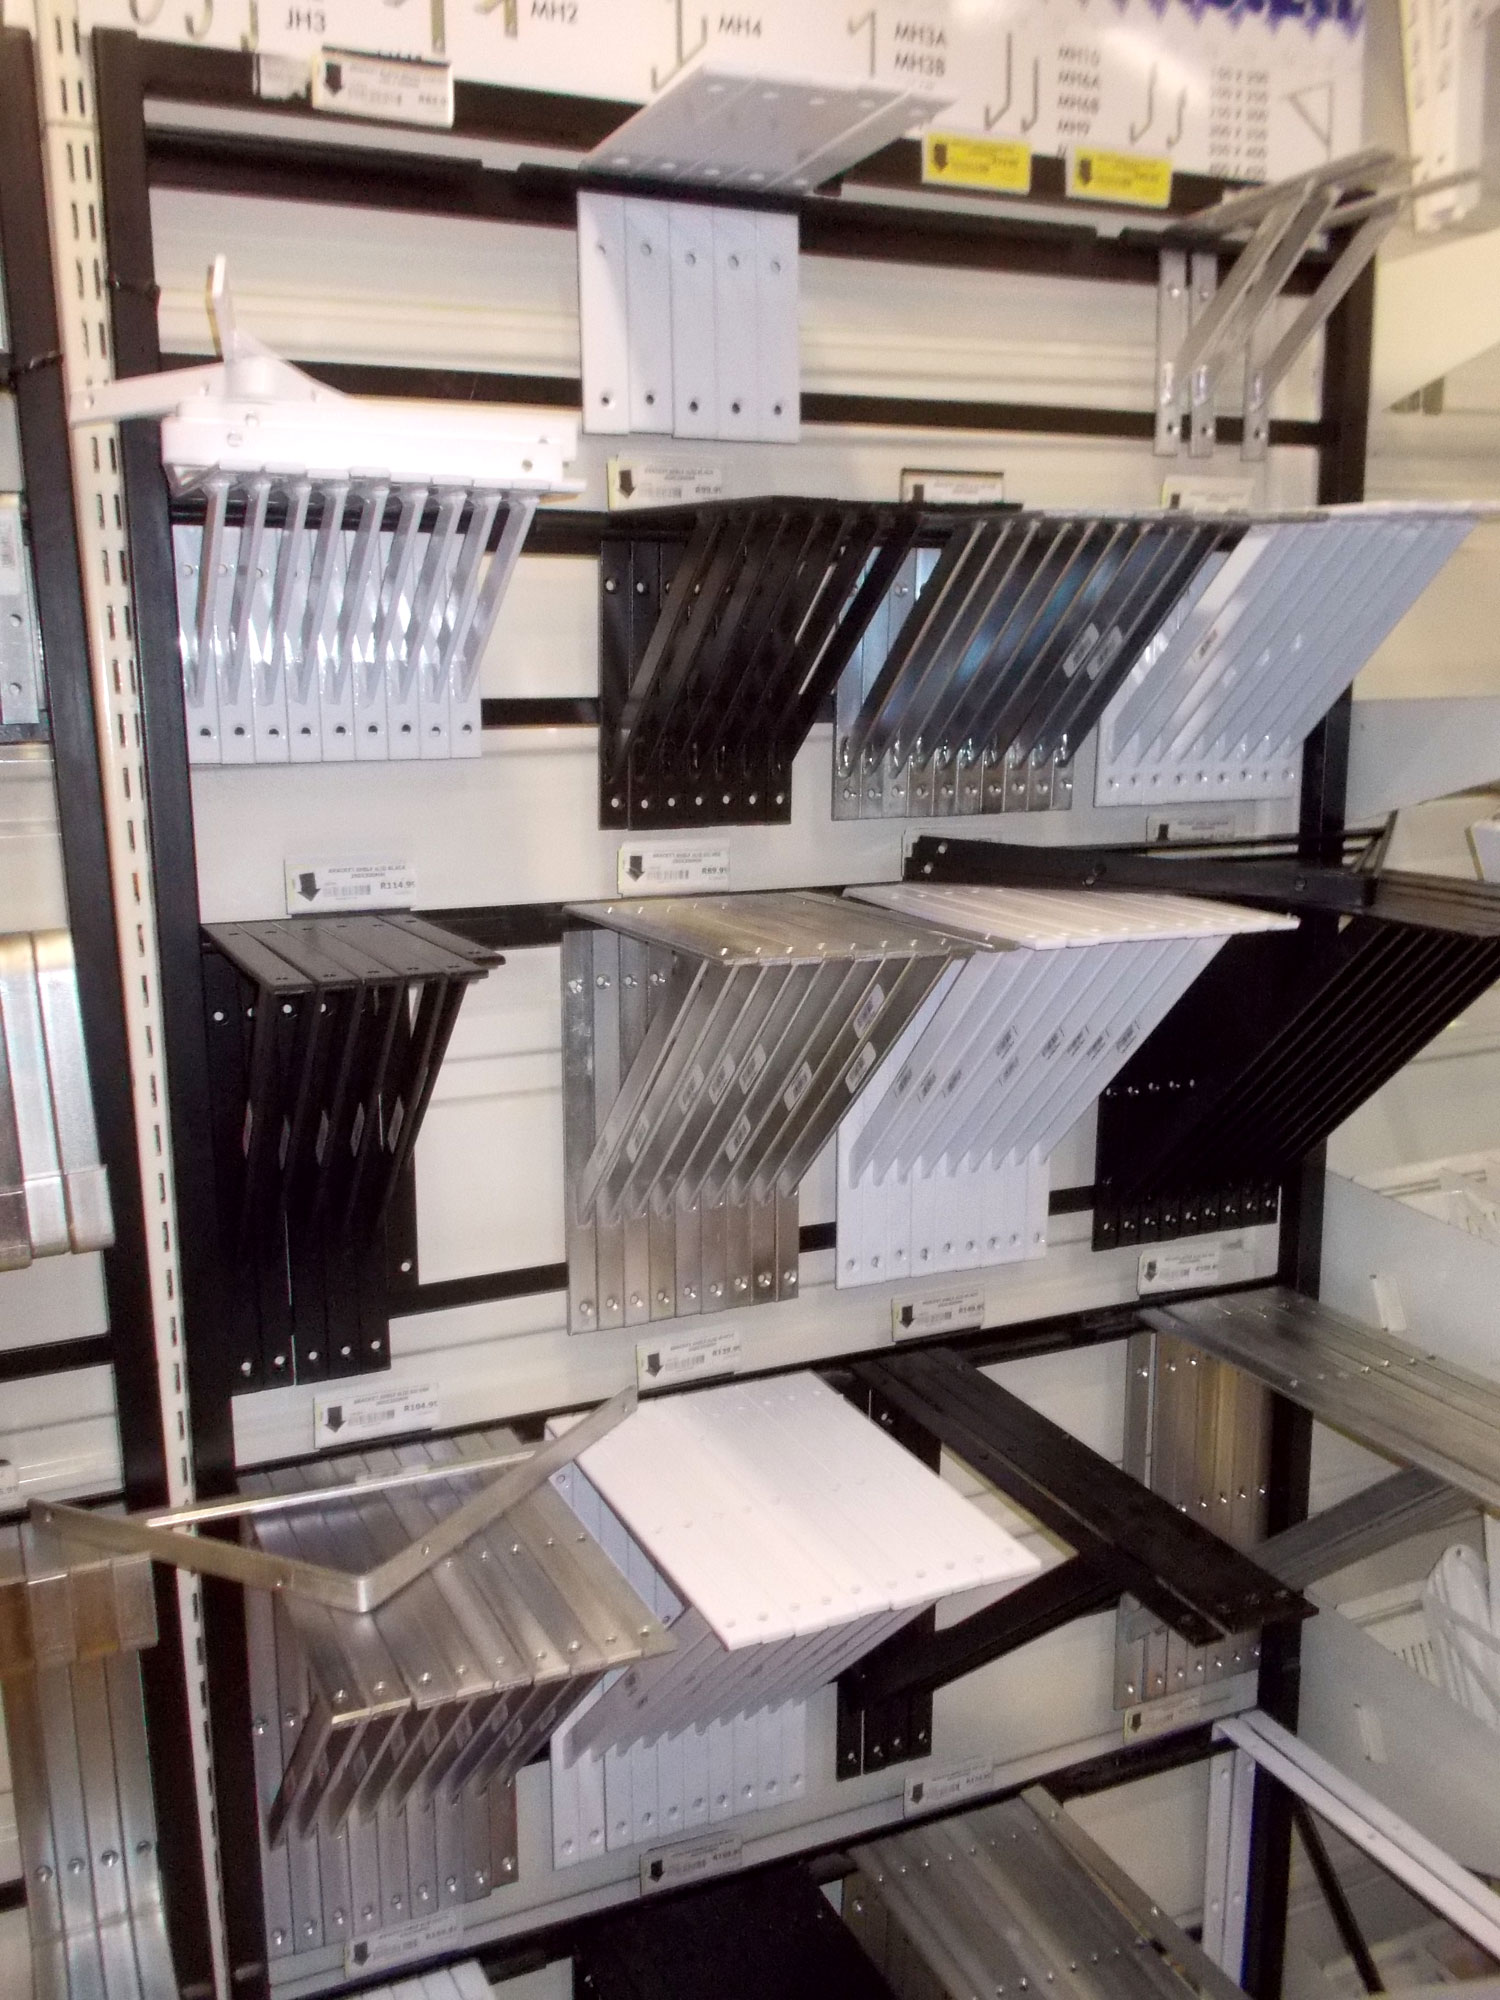
- Another variation on the simple shelf bracket, showing an assortment of sizes and finishes… black, white and silver chrome.
- Braced shelf brackets such as these are very good for heavy loads thanks to the bracing, though the small one second from top left is more suited to hanging plant baskets and the like on a patio.
- A stand showing the selection of braced shelf brackets.
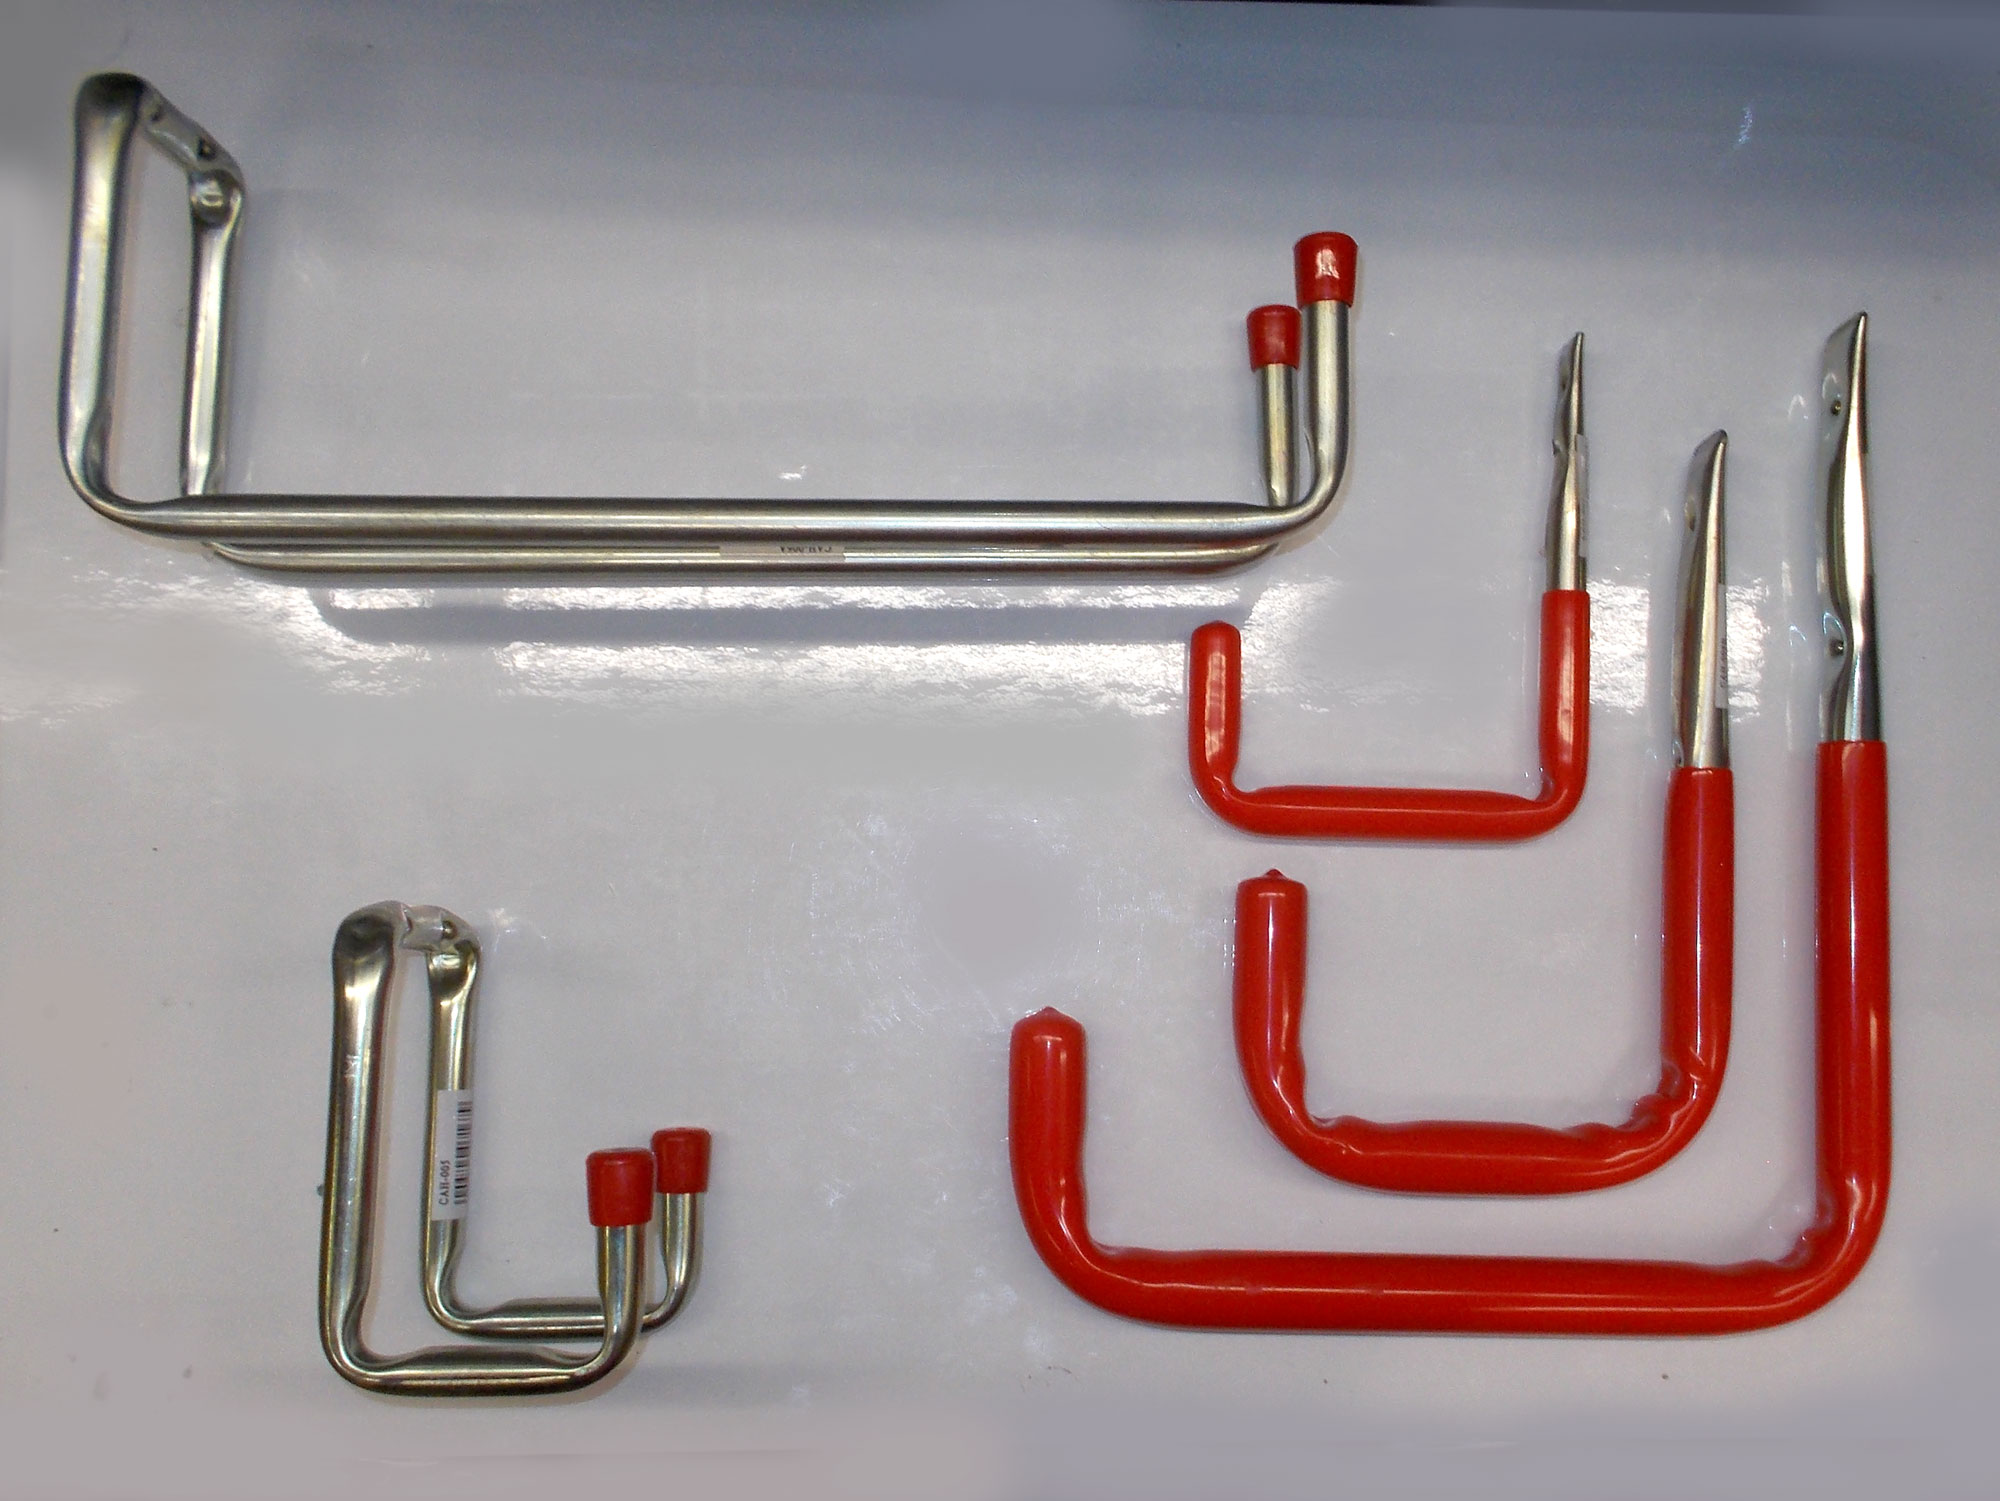
- These brackets are largely constructed from tubing which has been bent to shape and also coated with a protective cushioning finish, making them ideal in the garage for hanging up bicycles and other sports equipment along with garden tools and so on. Some are designed to swing out of the way and rest up against the wall when not in use.
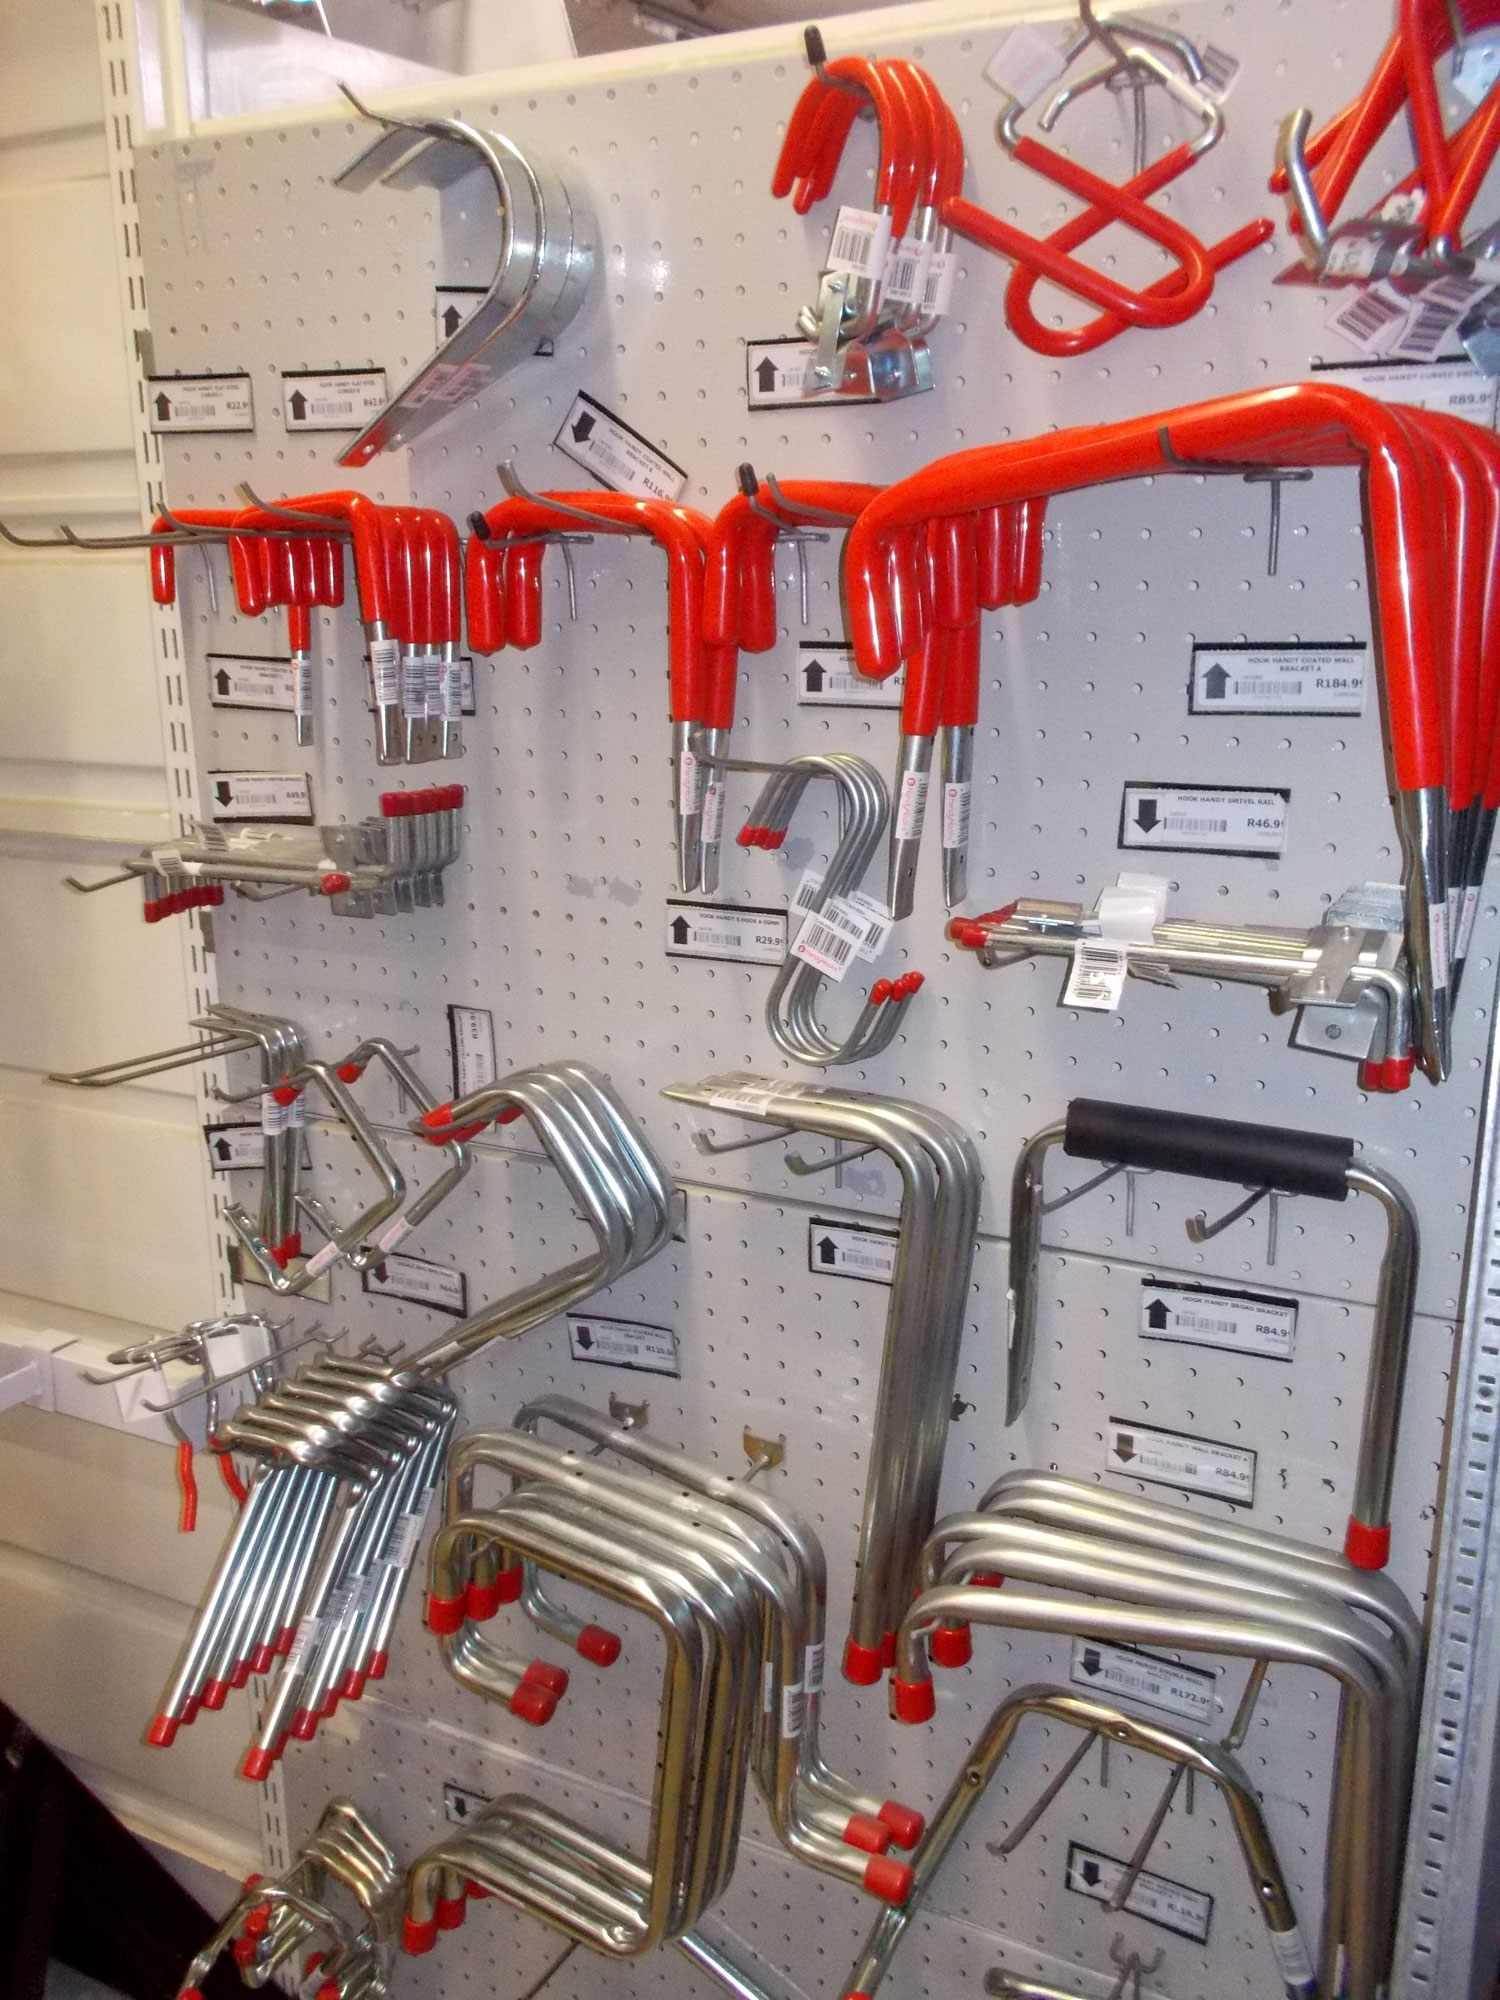
- Brackets are not only for shelves… they are also used for supporting piping and other similar items, often on a permanent basis, and often simply as hooks for rope, extension cords and the like. Again, they are available in a wide range of sizes and configurations.
- A closer look at some of the selection. Note the two top right can be used as shelf supports and at the same time also as hooks or pipe supports.
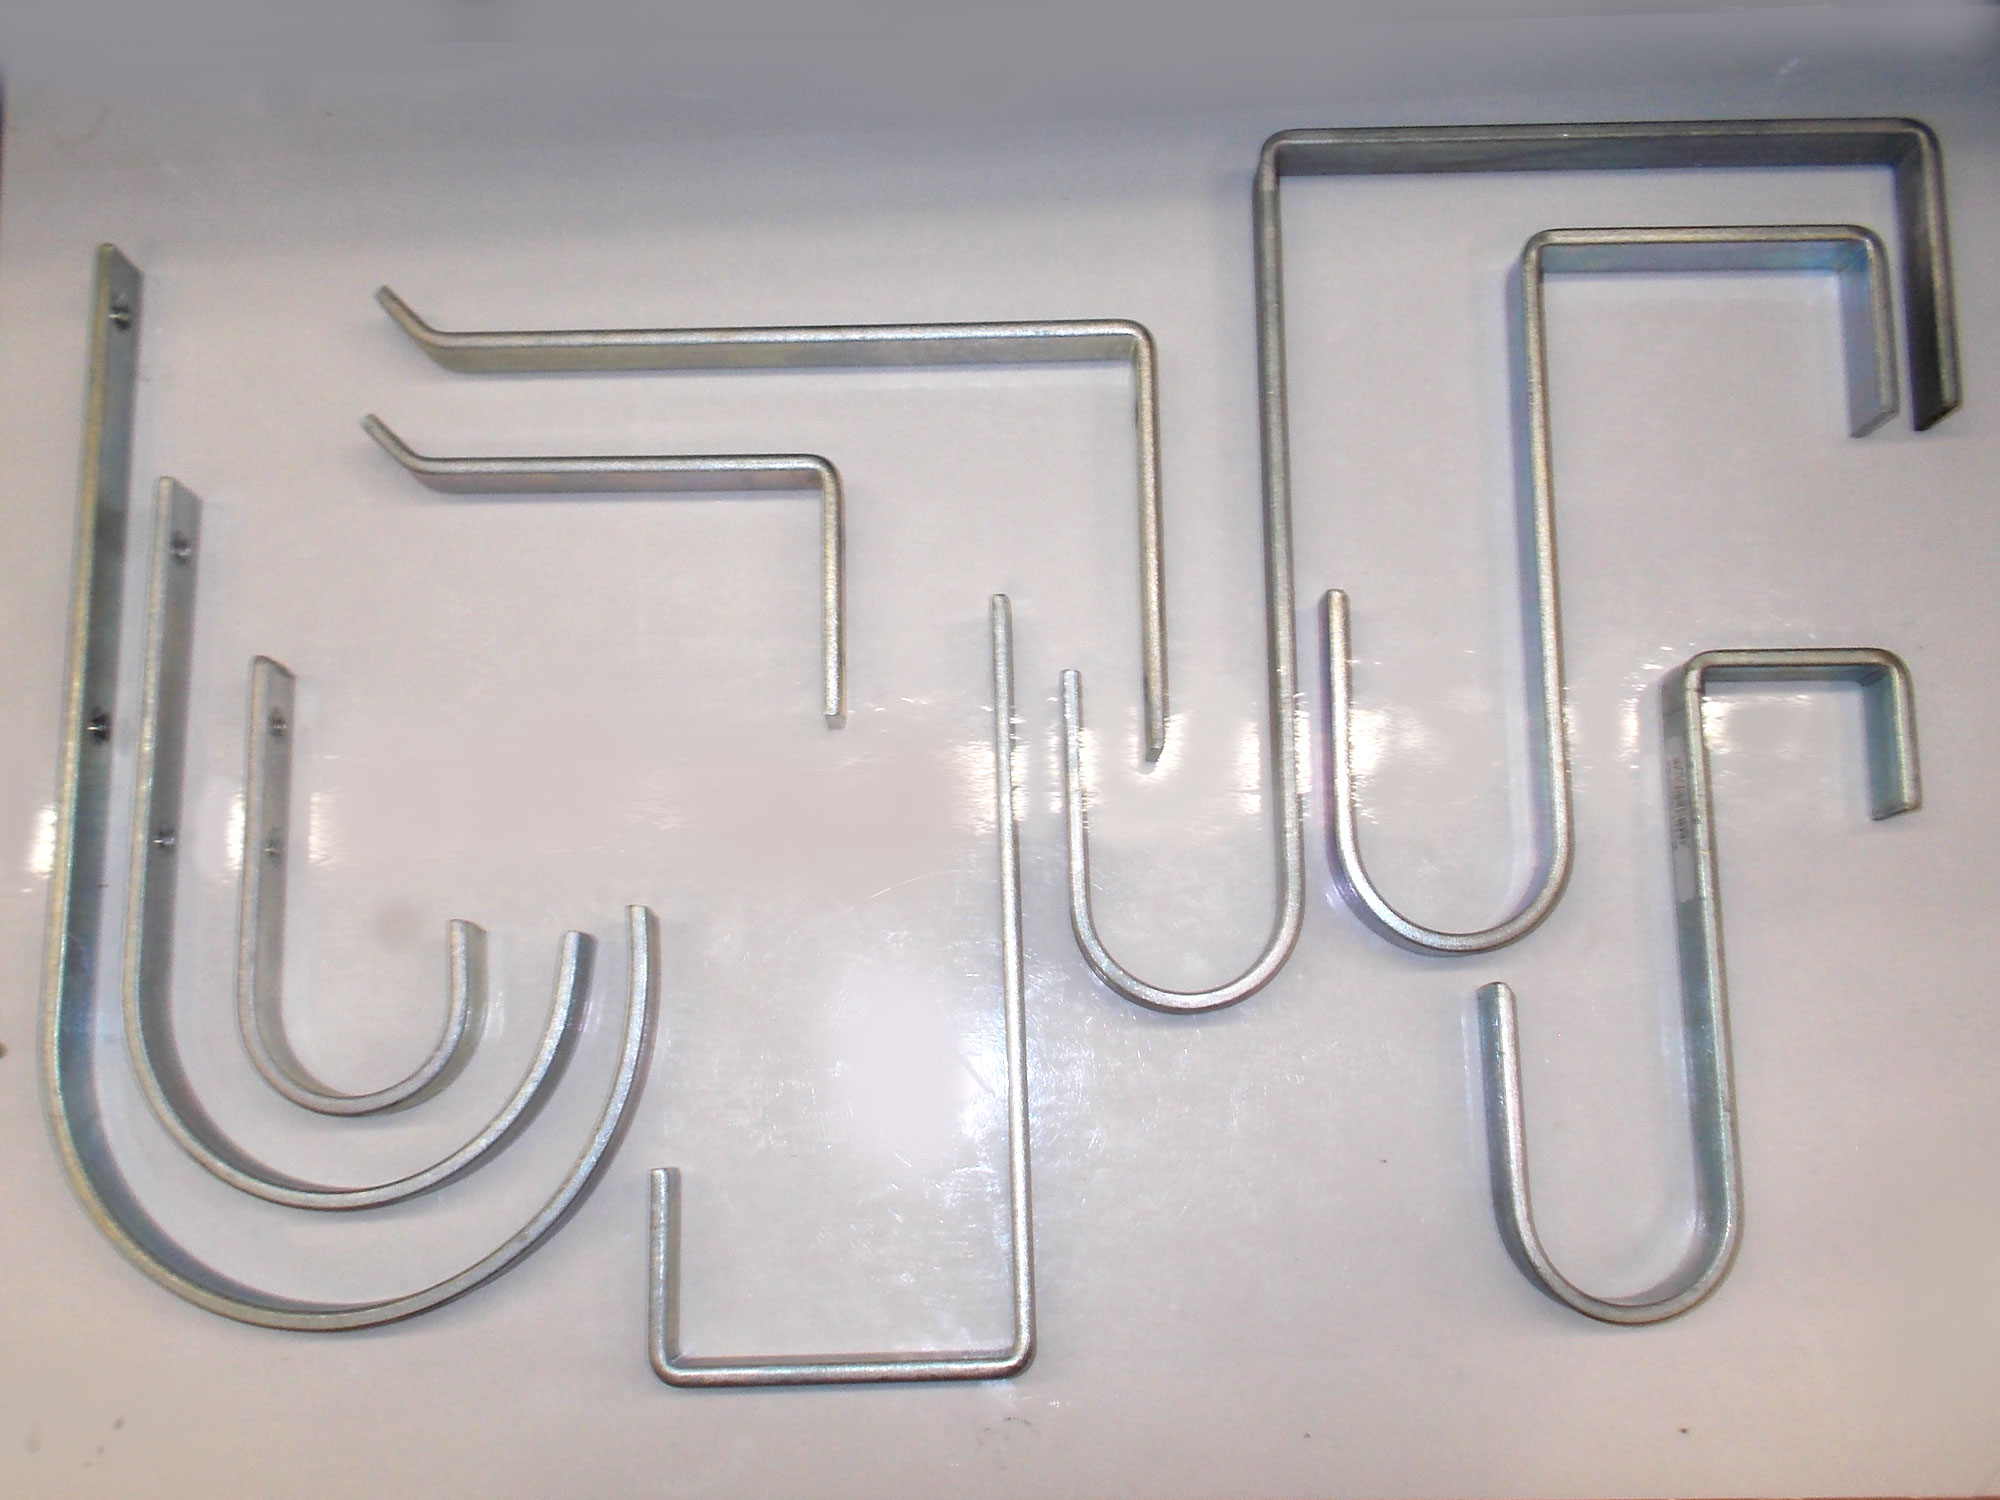
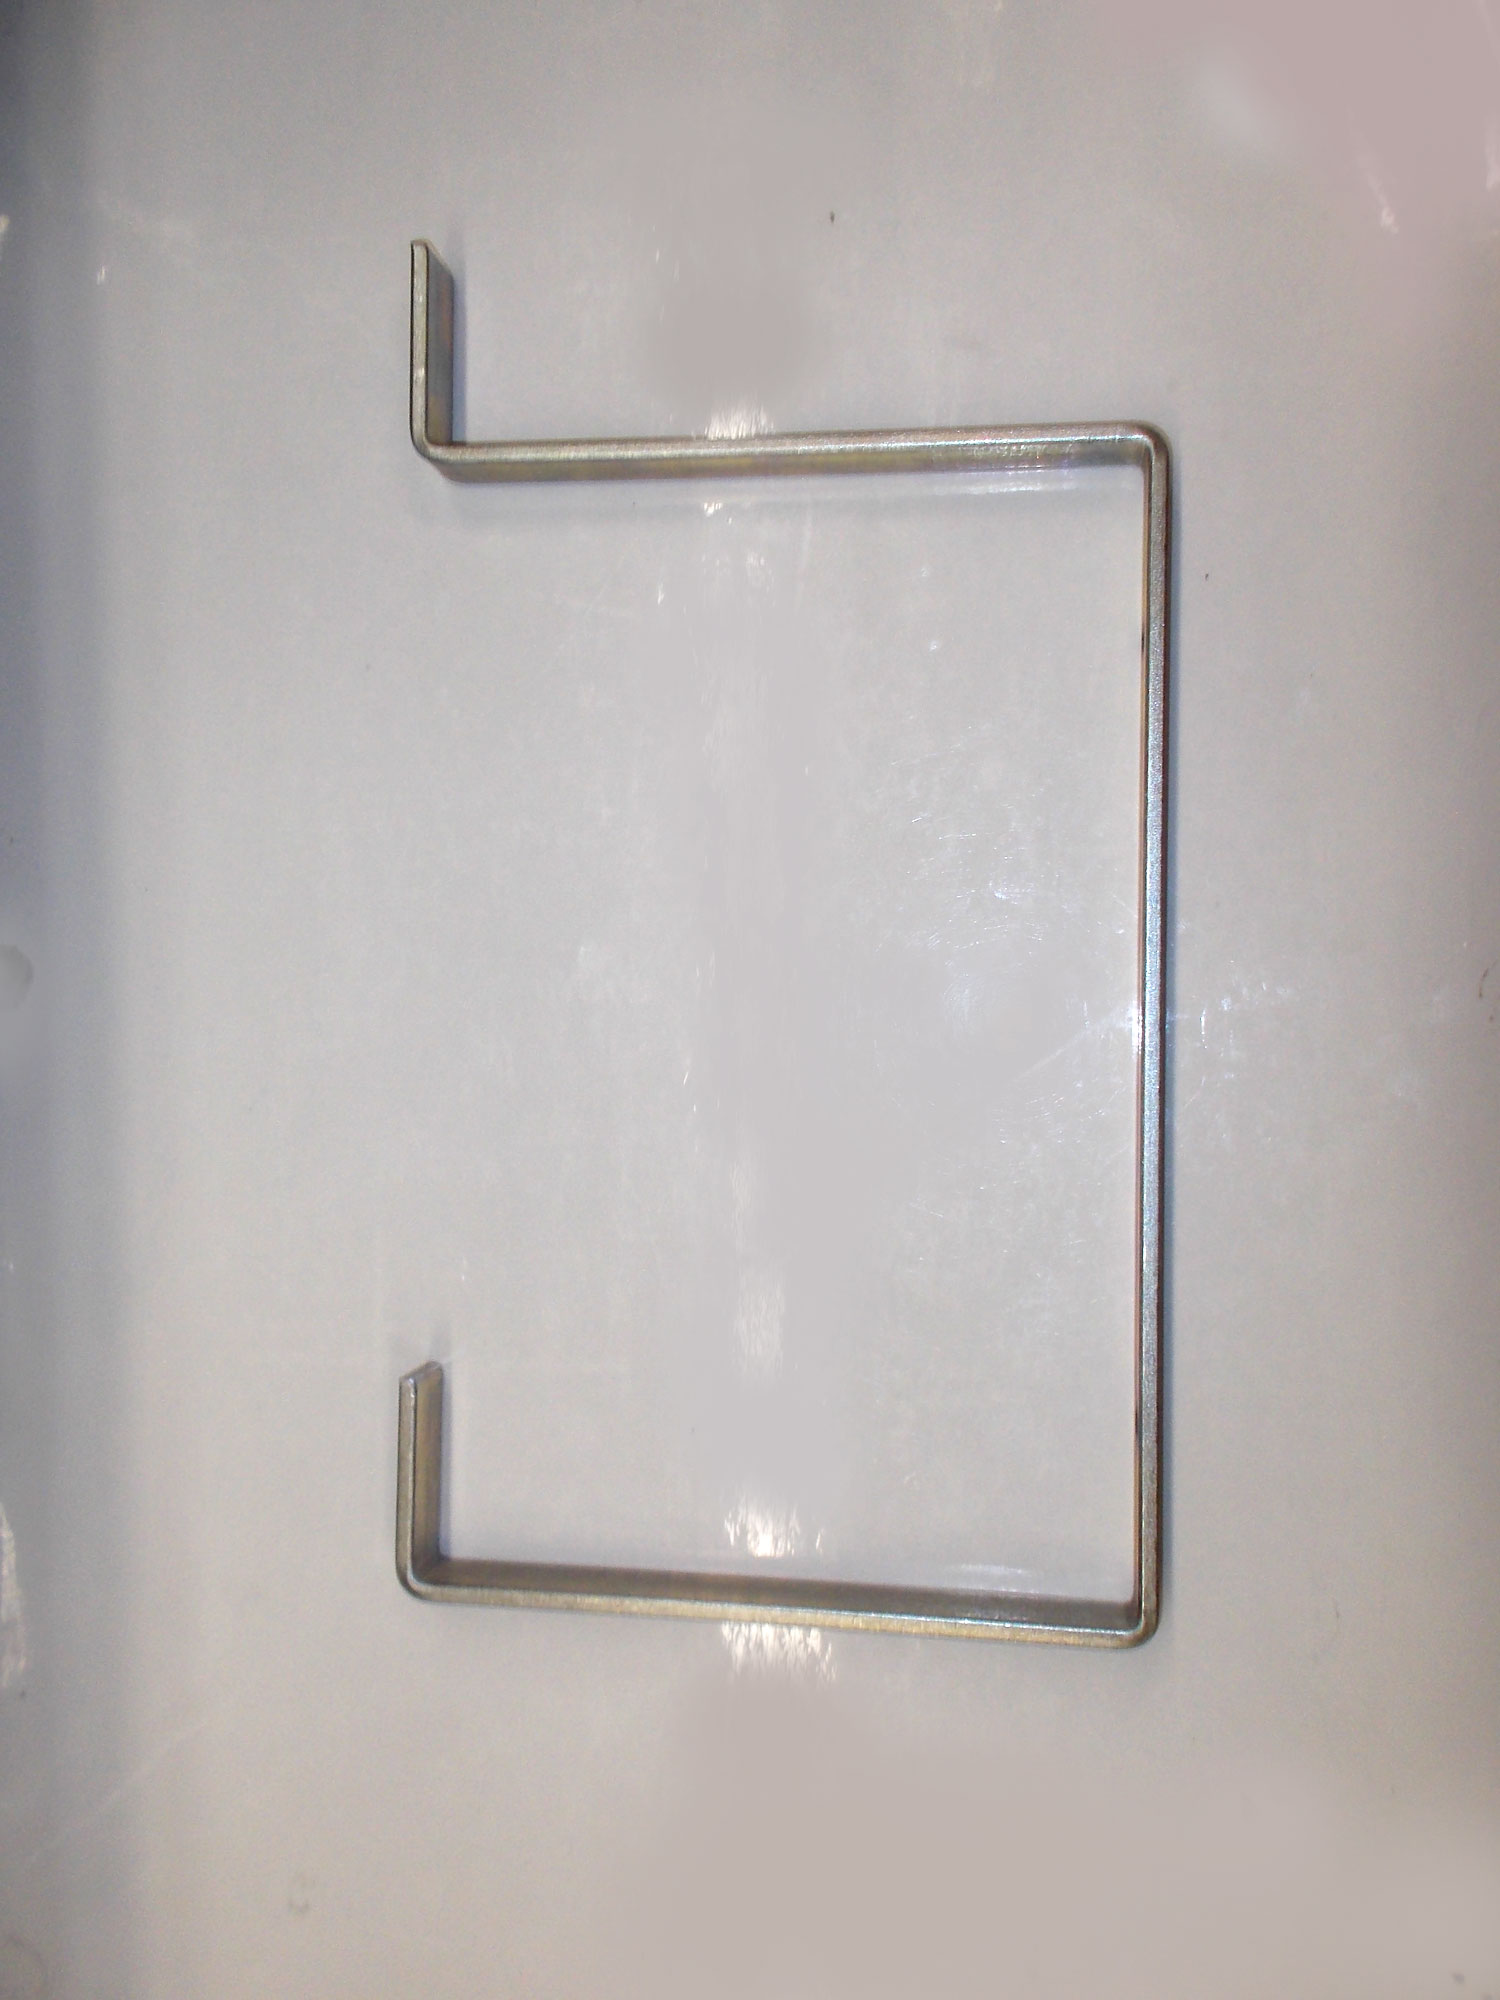
- A double shelf support bracket… the right-hand vertical arm is fastened to the wall.
- Some more examples of tubular brackets.
- This is an illustration of a floating shelf bracket, sometimes sold as a self-assembly unit – the pre-drilled and router shelf being supplied along with the base and possibly even as well, securing screws and wall plugs.. It comprises a sturdy bar with two bars welded to a flat base which is fixed to the wall. A recess is routed in the edge of the shelf and a hole drill into the shelf for each bar. The shelf is then simply slipped on to the bars and sits flush against the wall’s surface without any sign of what is keeping it there – hence the name ‘floating shelf’.
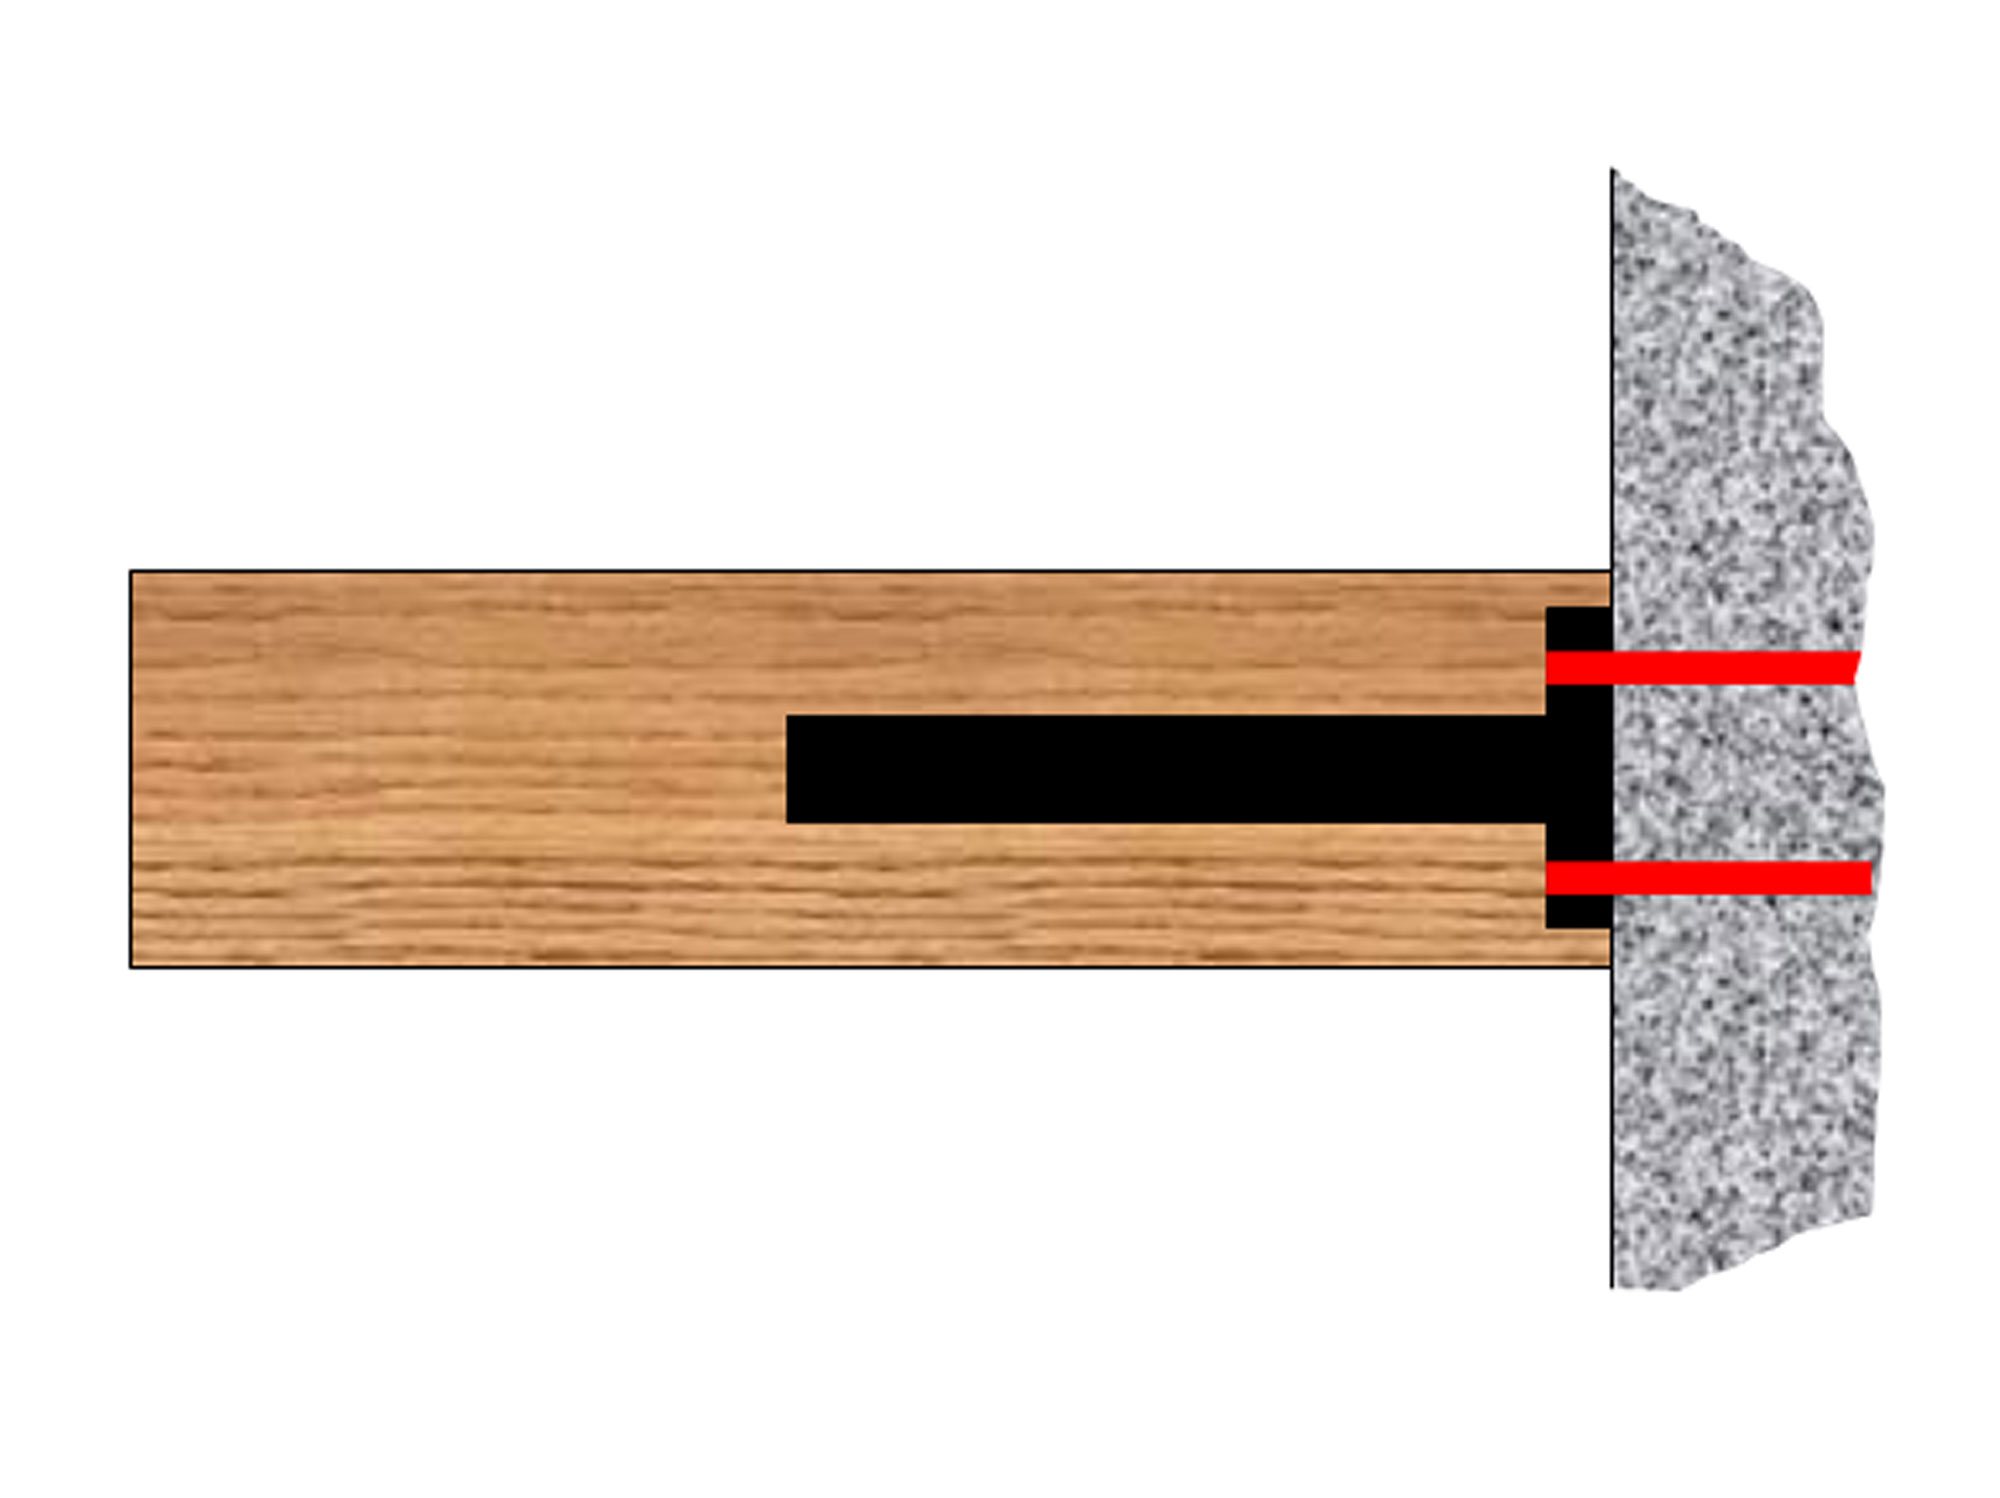
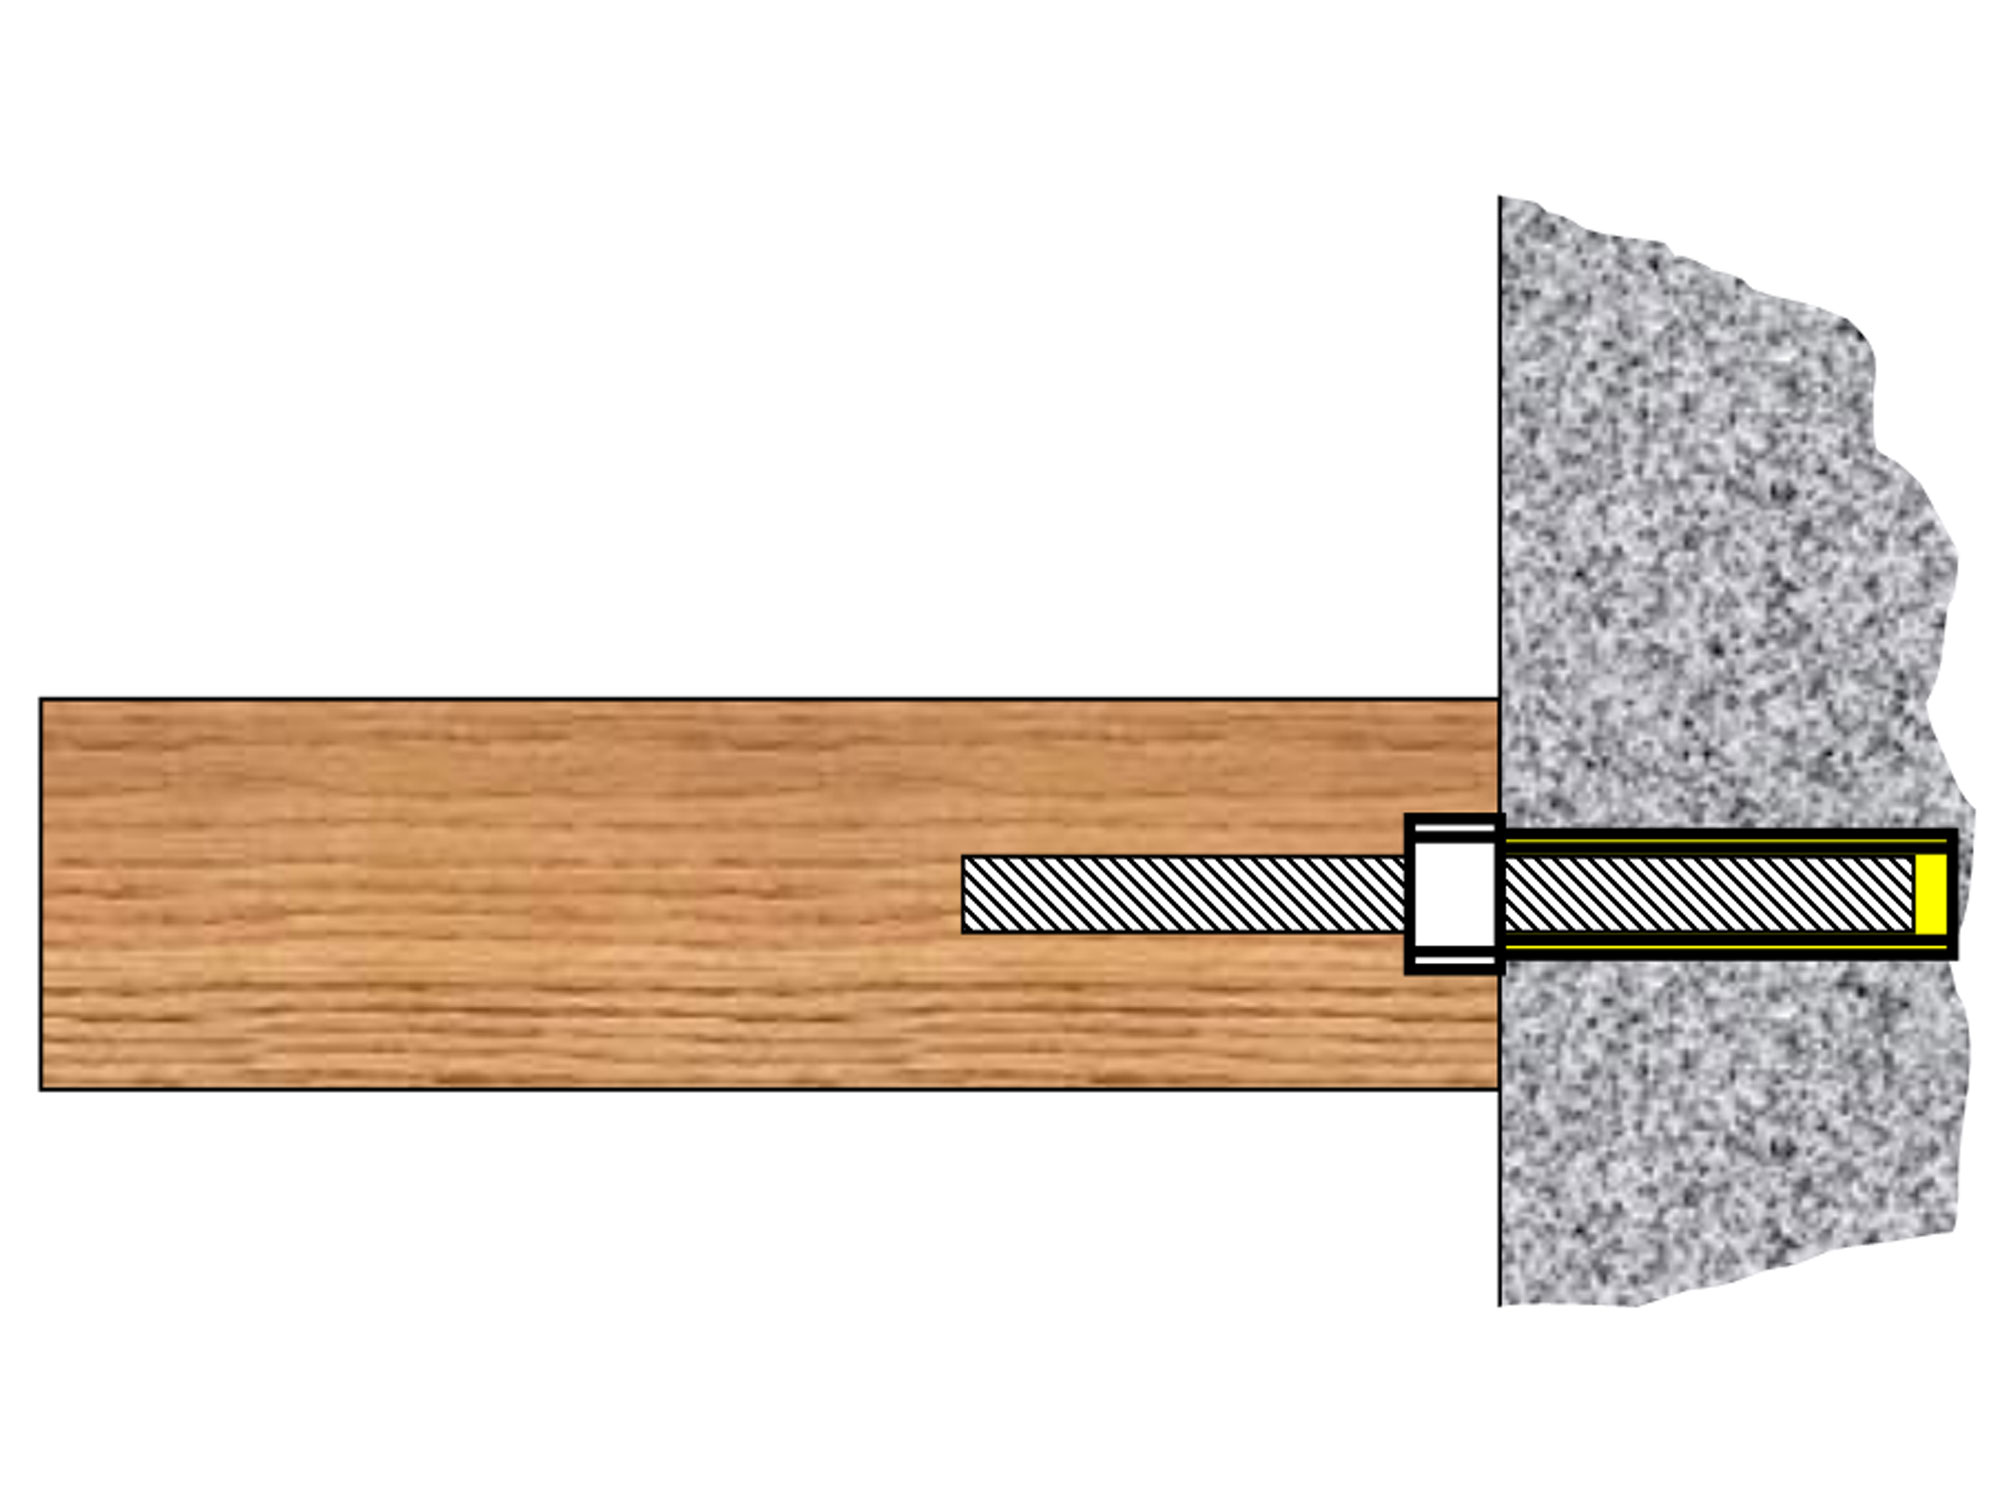
- This is also a floating shelf, but in this case one that you can make for yourself at minimal cost using a threaded rod and rawlbolt when attached to a masonry wall. If you are attaching it to a drywall, then you would need to drill a hole for each threaded rod slightly smaller than the diameter of the rod itself and using a wrench or vice-grips on the end of the rod, turn it into the hole. Again, these holes would need to be in the middle of a wall stud, but also bear in mind even then its load-carrying capacity might not be as great as its peer mounted in the masonry wall… the diameter of the threaded rod of course being a determining factor in either case.
Project guide
Skill level: 2
Estimated time: 1-2 hours at the most, including cutting the shelves to the required lengths. (Your local Mica may offer a cutting service. Ask them!)
Cost: Depends on the number of shelves, and hence shelf brackets and length of uprights you will be requiring and the type you select
Assistant: No
Tools required:
Drill/driver with impact function, masonry bit of the correct size; screwdriver bits to fit the securing screws.
Panel:
These materials are available at Selected Mica Stores. To find your closest Mica and whether or not they stock the items required, please go to www.mica.co.za, find your store and call them. If your local Mica does not stock exactly what you need they will be able to order it for you or suggest an alternative product or a reputable source.